Knowing how to cook a beer can chicken should be a tool in every backyard BBQ’er’s toolset. This method gets slept on a lot of the time, but it’s one of the easiest and most predictable ways to cook a whole chicken without overcooking it and leaving it dry. My in-laws are the ones who got me into making chicken this way originally, and my kids — who are definitely picky eaters — actually love chicken this way, so it’s become one of the staples we like to make at the house.
One of the best parts about beer can chicken is how flexible it is. You can cook it on a gas grill, a charcoal grill, a smoker, or even a pellet grill and still get good results. In this post, I’ll walk through how to do it on a gas grill, since that’s what most people have, and I’ll also touch on how to adjust for what you’re cooking.
It’s a straightforward recipe, whether you’re cooking for a couple of people or feeding a group. I’ll walk you through the full process step by step.
Jump to:
- Can You Smoke Beer Can Chicken on a Gas Grill?
- Why Beer Can Chicken Works (Especially on a Gas Grill)
- How to Adapt This Recipe for Different Cookers
- Ingredients for Smoked Beer Can Chicken
- How to Make Smoked Beer Can Chicken on a Gas Grill
- How to Get Crispy Skin on Smoked Beer Can Chicken
- Homemade BBQ Sauce Ideas to Try with this Smoked Beer Can Chicken
- Equipment
- Storage & Reheating
- Recipe
Can You Smoke Beer Can Chicken on a Gas Grill?
Let’s get this out of the way first — you can absolutely smoke a beer can chicken on a gas grill effectively.
The key is making sure you have the right tools to set yourself up for success. A gas grill won’t naturally produce smoke like a pellet grill or drum smoker, but with the right setup, you can still build a noticeable smoky flavor, most notably by using either wood chunks (if you have a compatible grill like the one I use for this cook), wood chips in a smoke box, or even pellets in a smoke tube. I’ll break down each option in the post, but the main thing to understand going in is this: you don’t need a smoker to make this work. You just need to cook the chicken over indirect heat and introduce a steady, controlled smoke source. That’s really all there is to it.
Why Beer Can Chicken Works (Especially on a Gas Grill)
This method works because it handles a few key things at once: even cooking, preventing the meat from drying out, and crisping up the skin. Cooking the chicken upright lets heat move around the whole bird instead of just hitting one side. The liquid in the can adds a little steam inside, which helps keep things from drying out—especially in the breast.
On a gas grill, the setup matters more. You’re working with a more direct heat source, so running a two-zone setup—heat on one side, chicken on the other with low to no heat—basically turns your grill into an indirect cooker. That keeps you away from flare-ups and gives the chicken time to cook through without burning the outside. At the same time, gas grills tend to run a bit hotter than smokers, which actually works in your favor here—you’ll get crispier skin this way without having to doctor up the chicken like you would if you smoked it at lower temperature ranges.
When you put everything together, you end up with a chicken that cooks evenly, stays juicy, and finishes with a solid bite-through skin. Add a little wood for smoke, and now you’ve got some extra flavor layered in without making it complicated. It’s a simple setup, but it’s consistent—and that’s really what you want.
How to Adapt This Recipe for Different Cookers
Gas Grill
Using a gas grill is exactly how I make this recipe, but there are a few ways to add smoke flavor. As I mentioned in the last section, the first key is creating a two-zone setup so the chicken cooks over indirect heat.
The second step is adding a smoke source. Now, transparently, I do this with CharBroil’s Pro Series Gas Grill, which I love and highly recommend because it has 3-in-1 capabilities: inserts for either a traditional gas grill or a charcoal grill, or a griddle. How I used it for this cook was to add the charcoal tray to the grill, place the wood chunks on top, and light the coals to heat the grill while the wood chunks smoldered for a nice smoky flavor. I’ll attach a link here in case you want to check it out.
Now, I know everyone doesn’t have that setup, so there are a few cheap, easy alternatives you can buy to achieve the same flavor. A smoke box is the simplest option. It’s basically a small metal box (or even a foil packet) filled with wood chips that sits over a lit burner and smolders as you cook. The other option is a smoke tube, which runs on pellets instead of chips and does the same thing. Between the two, I lean toward wood chips or chunks. In my experience, they give you a deeper, more natural smoke flavor compared to pellets—but either one will get the job done.
Pellet Grill
On a pellet grill, the process is more straightforward. Set the temperature between 350-375°F and place the beer can chicken directly on the grates. The grill automatically manages heat and smoke, resulting in a steady cook and consistent smoky flavor without needing to rotate or adjust much during the process. The one thing I’ll say, though, just reiterating the point from my comment about the smoke tube, is that you simply will not get as deep a smoky flavor as you would with a wood- or charcoal-based grill. That could be a pro or con depending on who you are cooking for, so just keep it in mind.
Smokers & Kamado-Style Grills
With a smoker or kamado-style grill, you’ll want to run a little hotter than you typically would think—right around 325–350°F. Think of this as more of the hot & fast style of smoking. Use lump charcoal as your base and add a couple of wood chunks for smoke.
Airflow is what makes or breaks this setup. These types of cookers can build heavy smoke quickly if you choke them down too much, so keep an eye on your vents and adjust as needed to maintain a steady, clean burn. Also, make sure to go easy on the wood —two or three chunks are plenty. The charcoal is already adding flavor, so you don’t need to overload it.
Ingredients for Smoked Beer Can Chicken
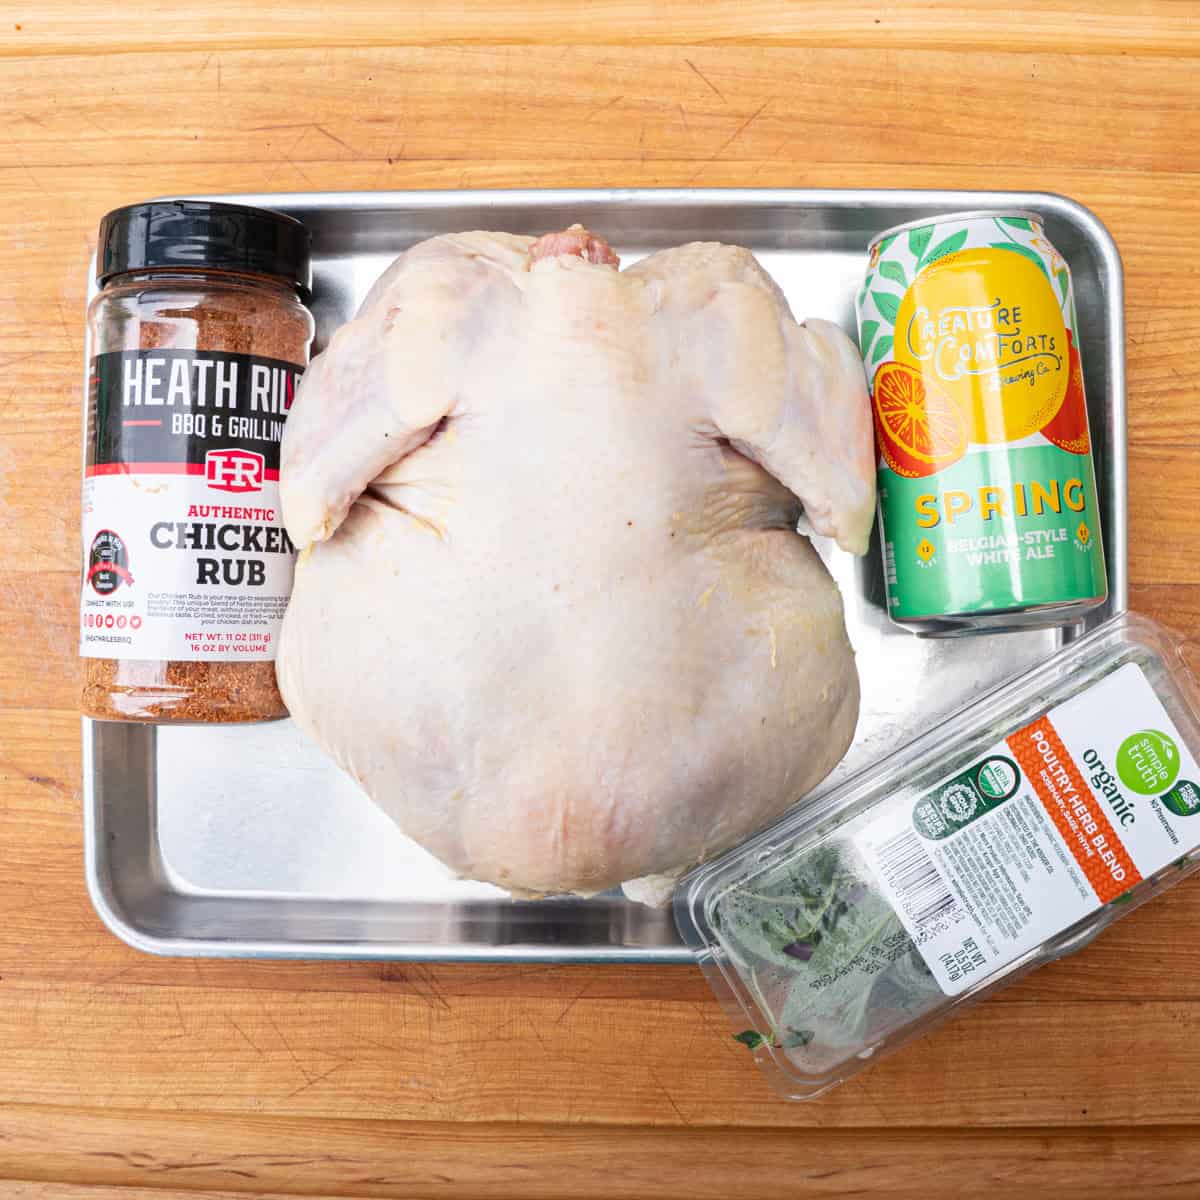
- Whole chicken (3–5 lbs.)
- Oil or cooking spray -- I use Pam spray for ease.
- Your favorite BBQ or chicken rub — you’ve got a lot of flexibility here. I tend to go with something like Heath Riles Chicken rub or How to BBQ Right’s Competition BBQ Rub, but you can also keep it simple with equal parts salt and pepper. Chef Paul Prudhomme's poultry magic seasoning is a great option, too.
- 1 can of beer — You can use anything from Miller Lite to a hazy IPA for this. I went with one of Creature Comfort’s Spring Belgian-Style White Ale for this cook.
- Fresh herbs (thyme, sage, rosemary) — You can buy these separately, but if your grocery store sells a fresh poultry mix like this, I find it more cost-efficient.
- BBQ sauce (optional) — Truthfully, you don’t need a sauce here, and skipping it will usually give you slightly better skin. But for this version, I went with a more mainstream BBQ approach and brushed on a store-bought sauce. If you go that route, just use something that fits your taste. I used Melvin’s Red BBQ Sauce because I already had it on hand. It’s got a little sweetness with some vinegar on the back end, which works well with the smoke without overpowering the chicken.
How to Make Smoked Beer Can Chicken on a Gas Grill
Step 1: Set up the grill
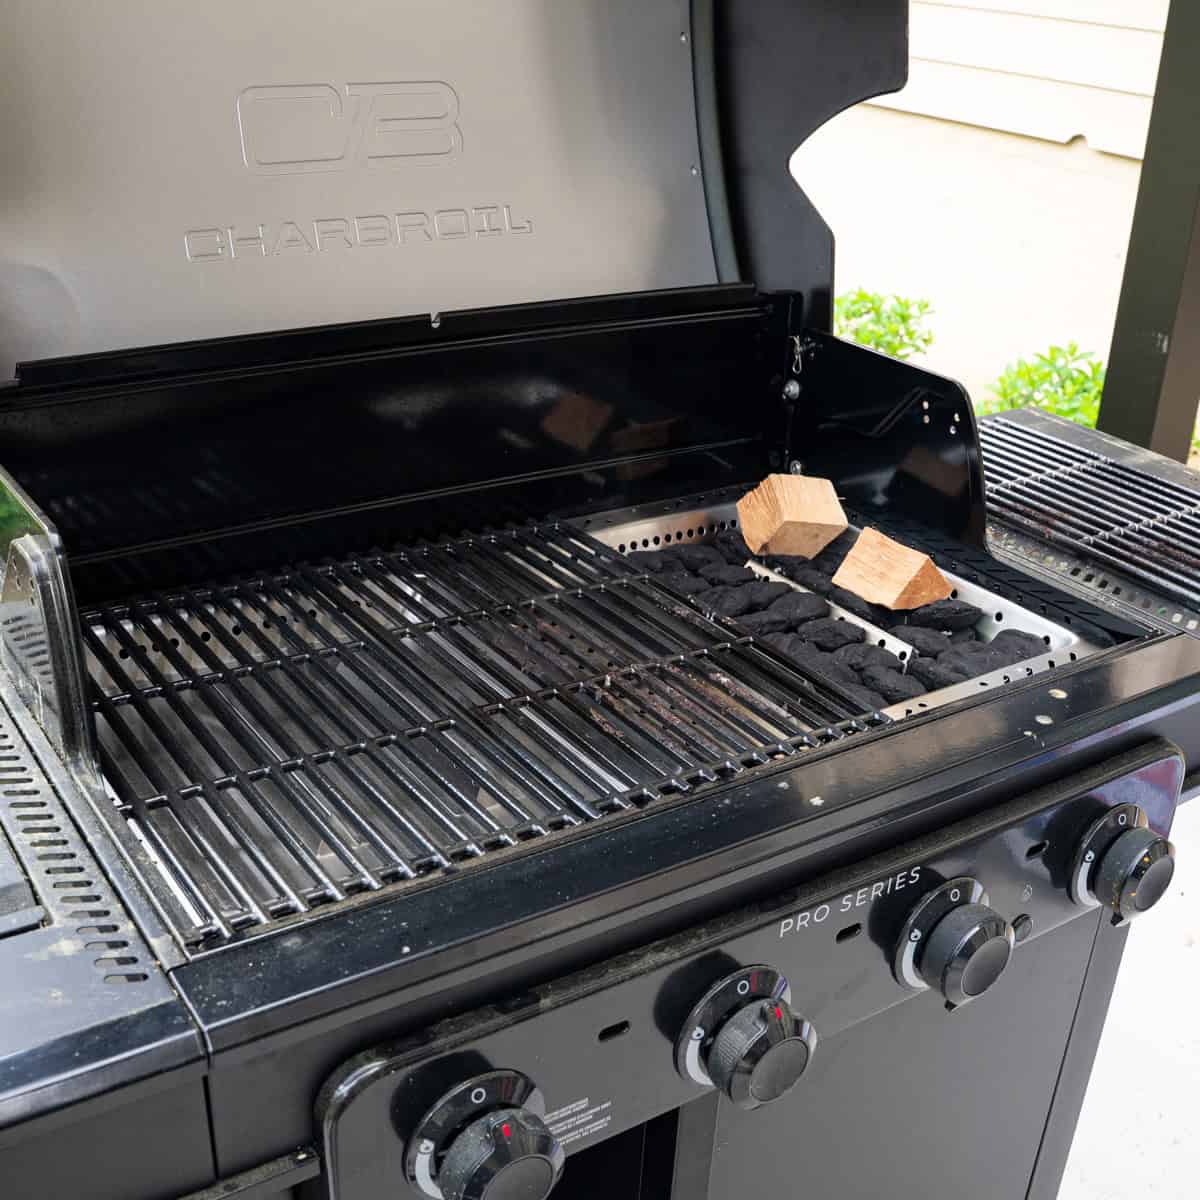
Turn one side of your gas grill to medium-low heat and leave the other side off. You’re aiming for a grill temp around 350–400°F. Every grill is different, so you may need to adjust your gas grill to low heat if it runs hot. Just make sure you keep that in mind. At this stage, you can also add your wood source on the direct-heat side to begin smoldering.
Best Wood for Smoked Beer Can Chicken
Truthfully, the type of wood you use is all about what flavor profile you prefer. Personally, I always lean towards hickory or pecan because they have a more pronounced smoky flavor, but I know many prefer fruitier woods like apple and cherry for milder flavors, since they don’t overpower the meat.
Step 2: Prep the chicken
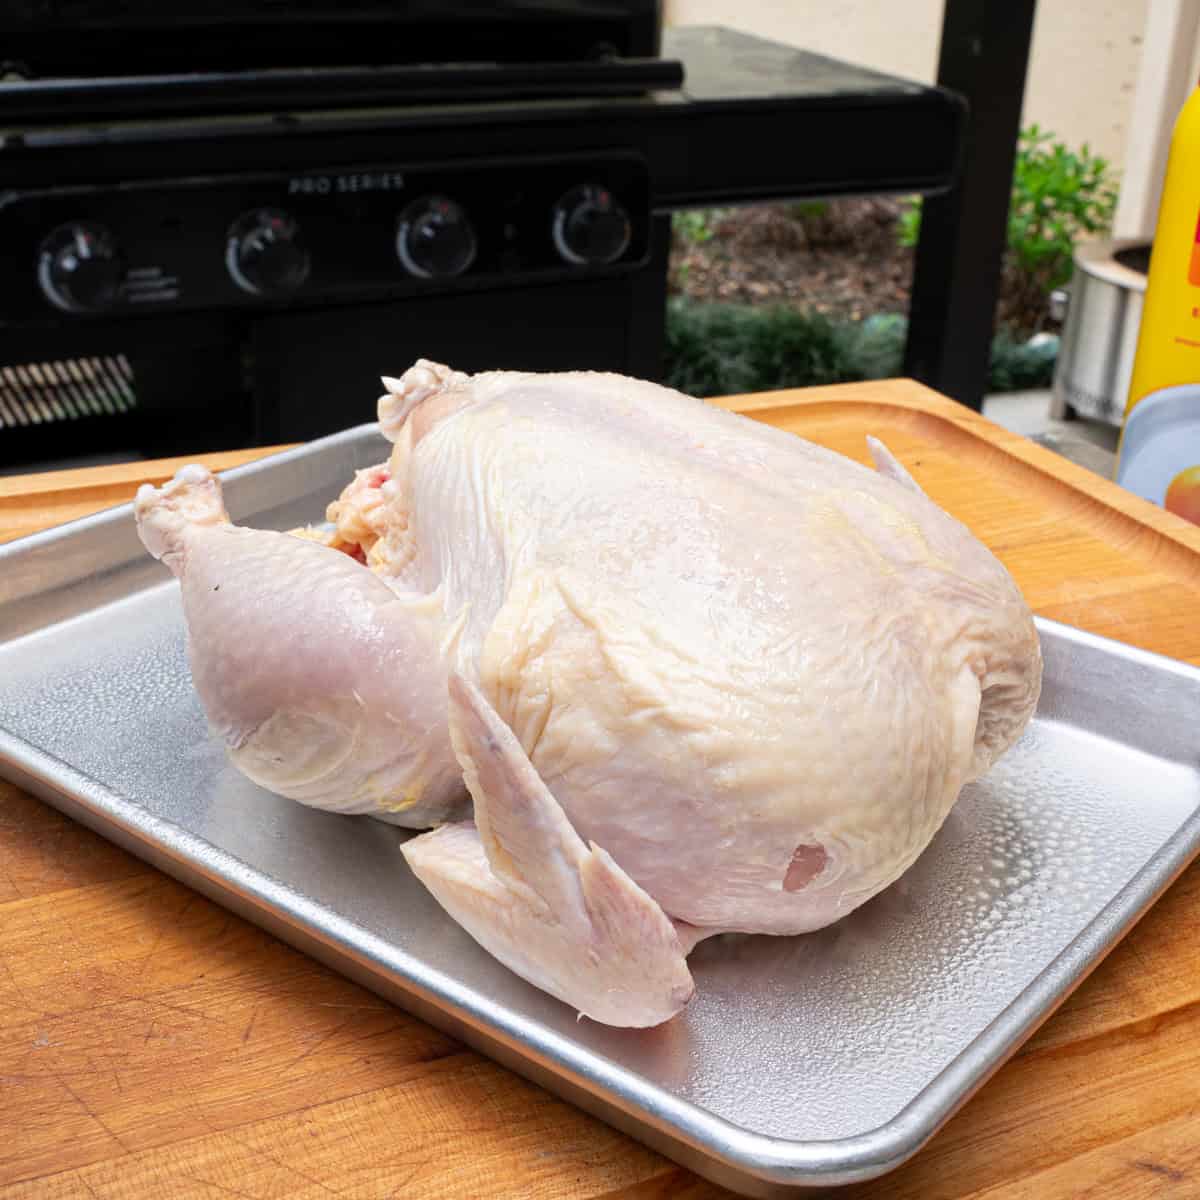
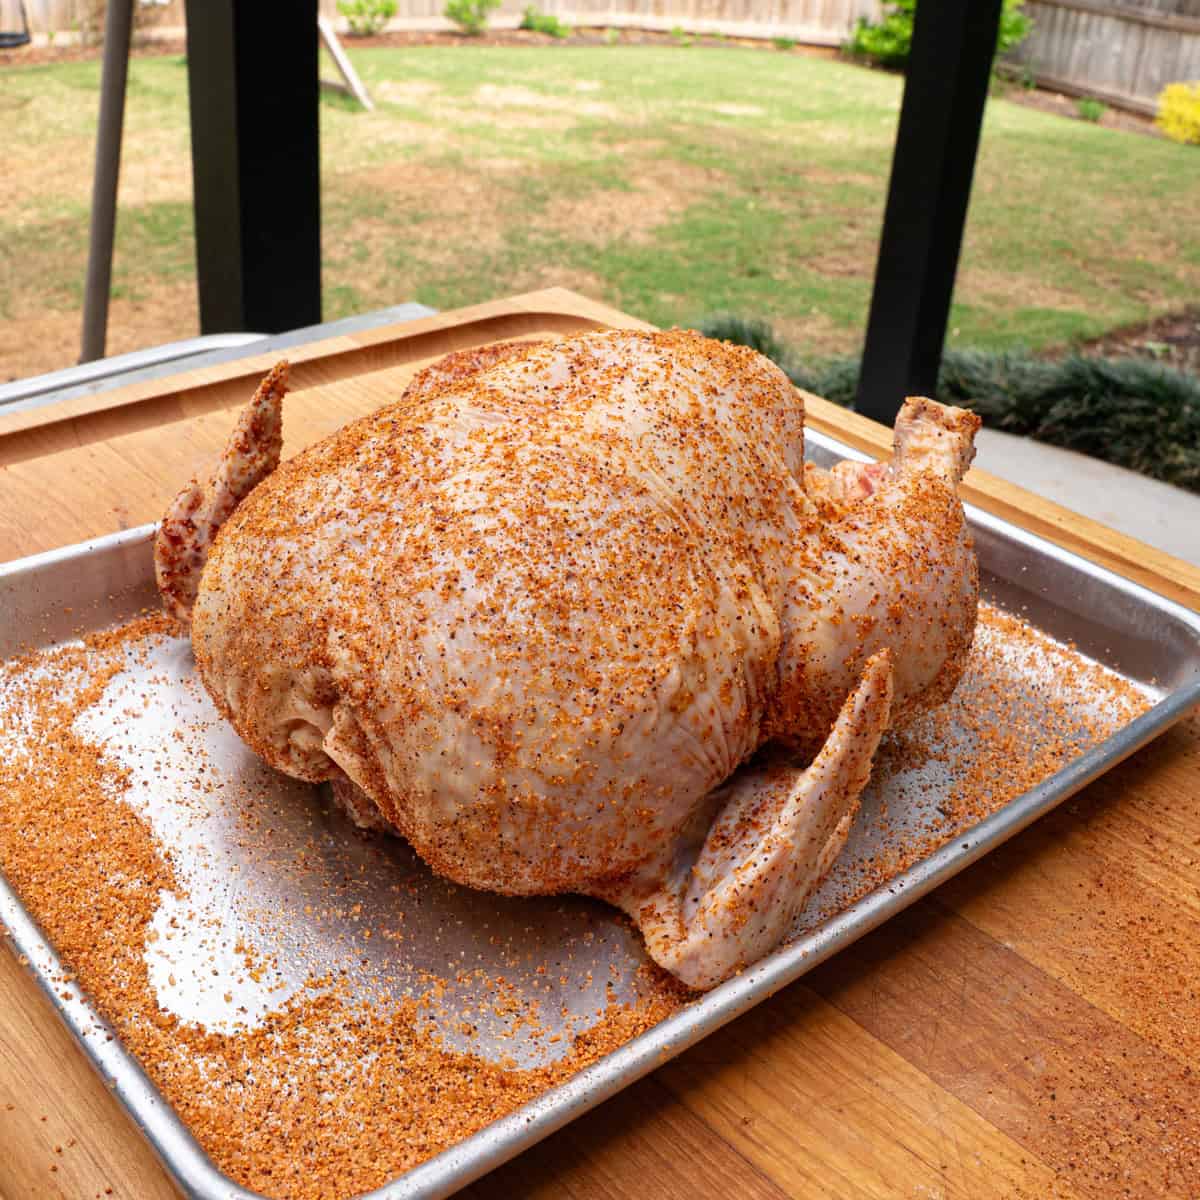
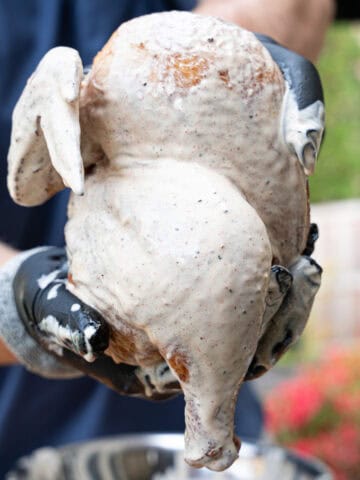
One of the great things about smoking a beer can chicken is that there is hardly any prep work. Simply take out the pre-packaged innards from the bird, Pat the chicken dry, coat it lightly with oil or spray, and season it thoroughly on all sides.
Step 3: Prepare the beer can
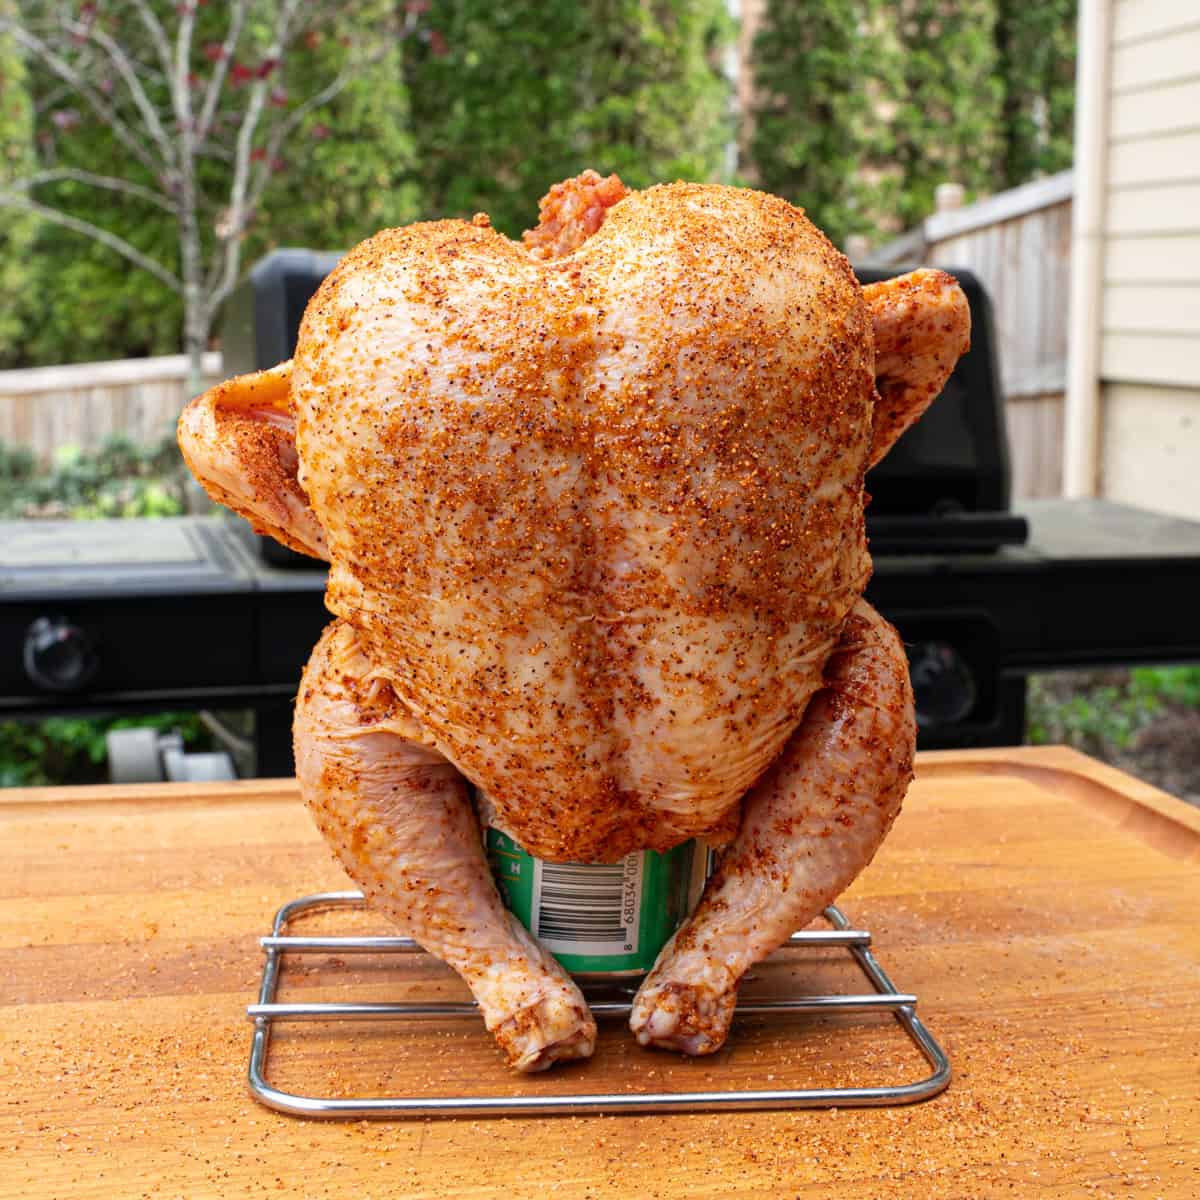
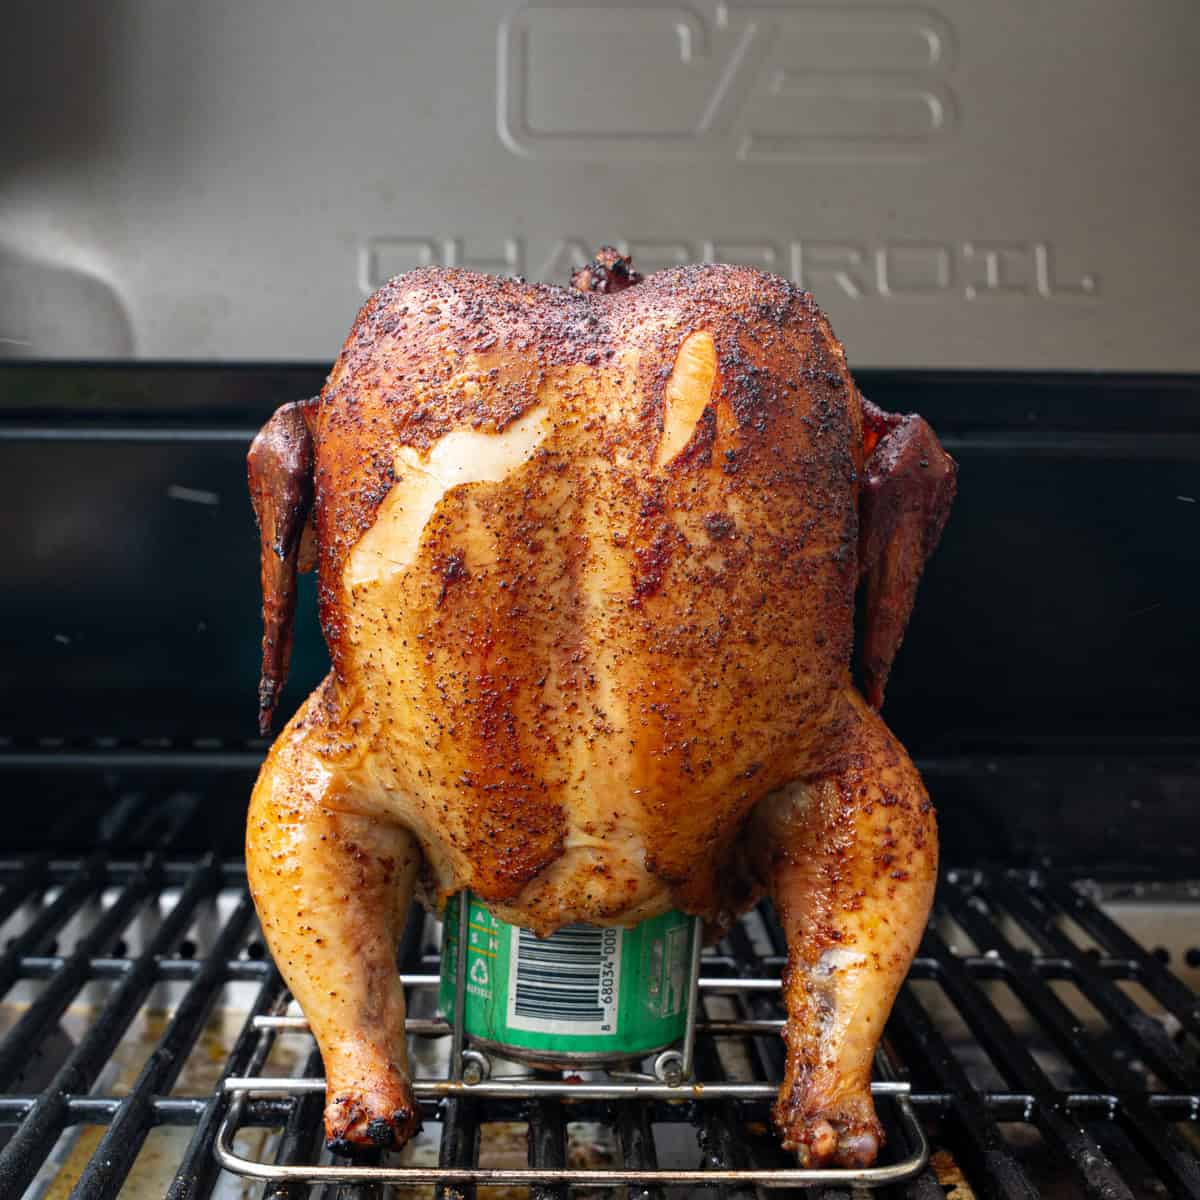
Open the beer, pour out about half, and add your herbs directly into the can. If you’d like to make it easier, you can use a can opener to remove the top of the beer can, but that’s an optional step that, transparently, I did not feel the need to do for this cook.
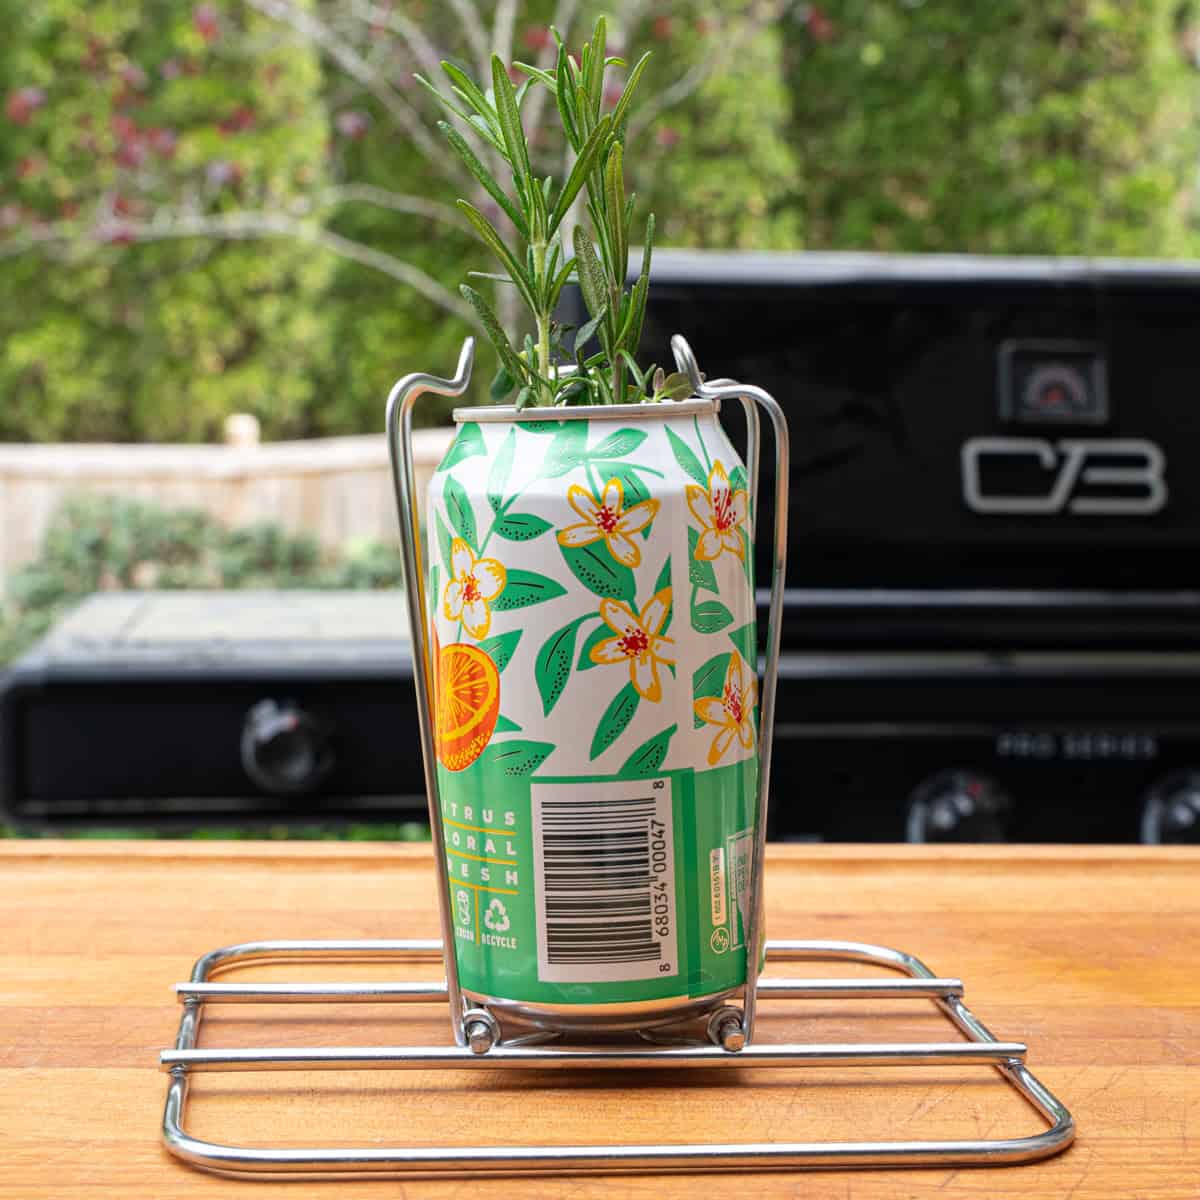
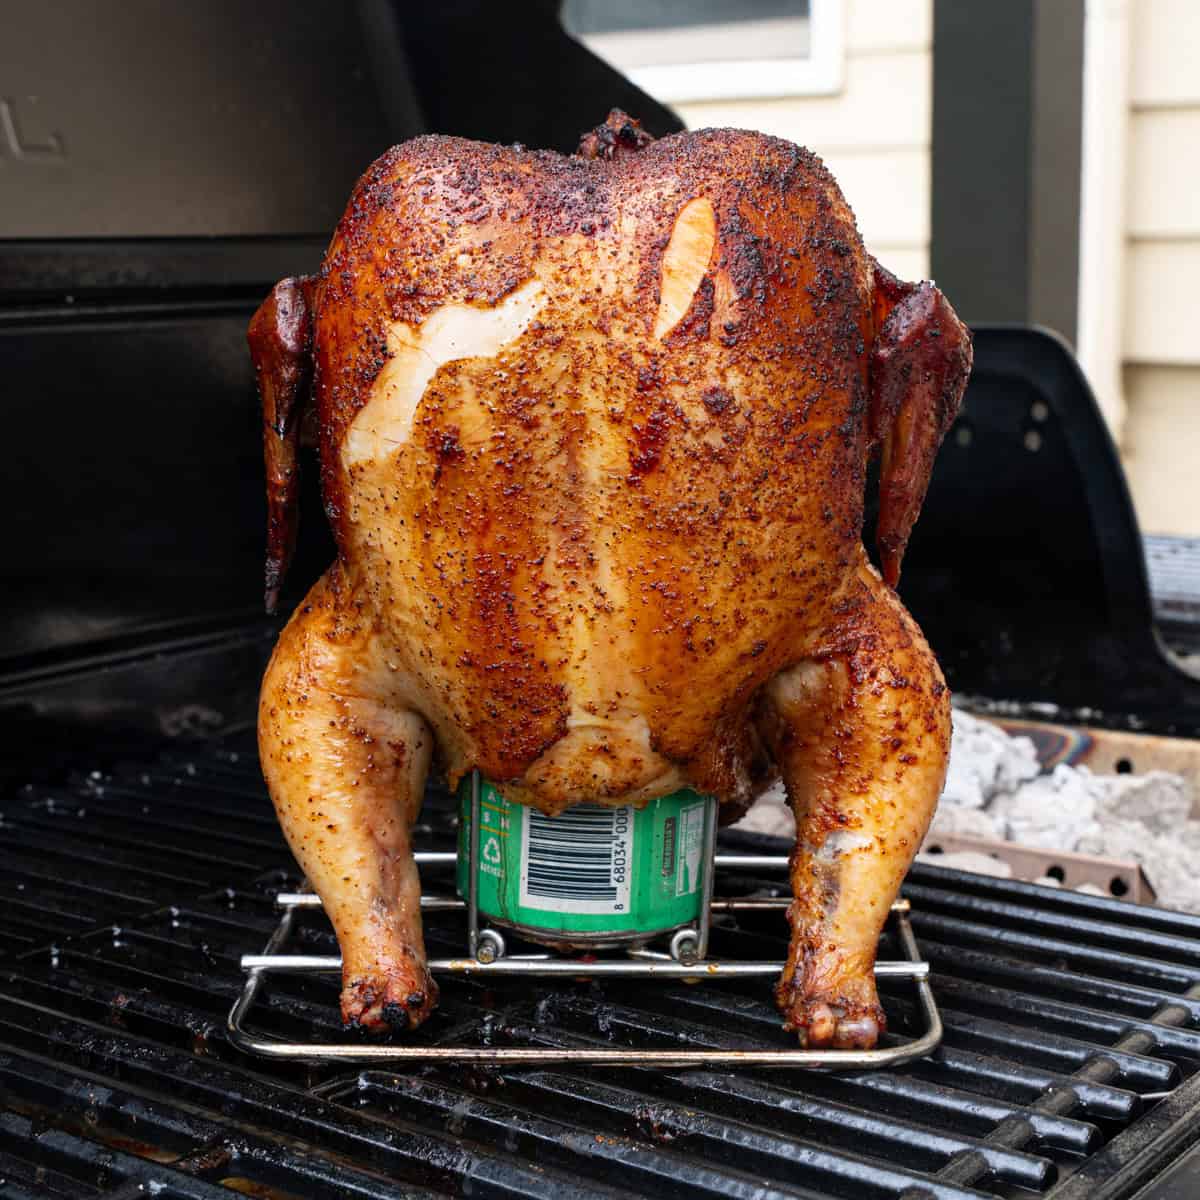
After that, place the chicken upright over it so it sits stably. I used this beer can chicken holder from CharBroil to help stabilize the chicken, but there are lots of great options out there you can look into. I just like that one because it’s foldable, and it’s only $5. You can also go without using one, but I do find it helpful to prevent the chicken from accidentally falling over on the grill.
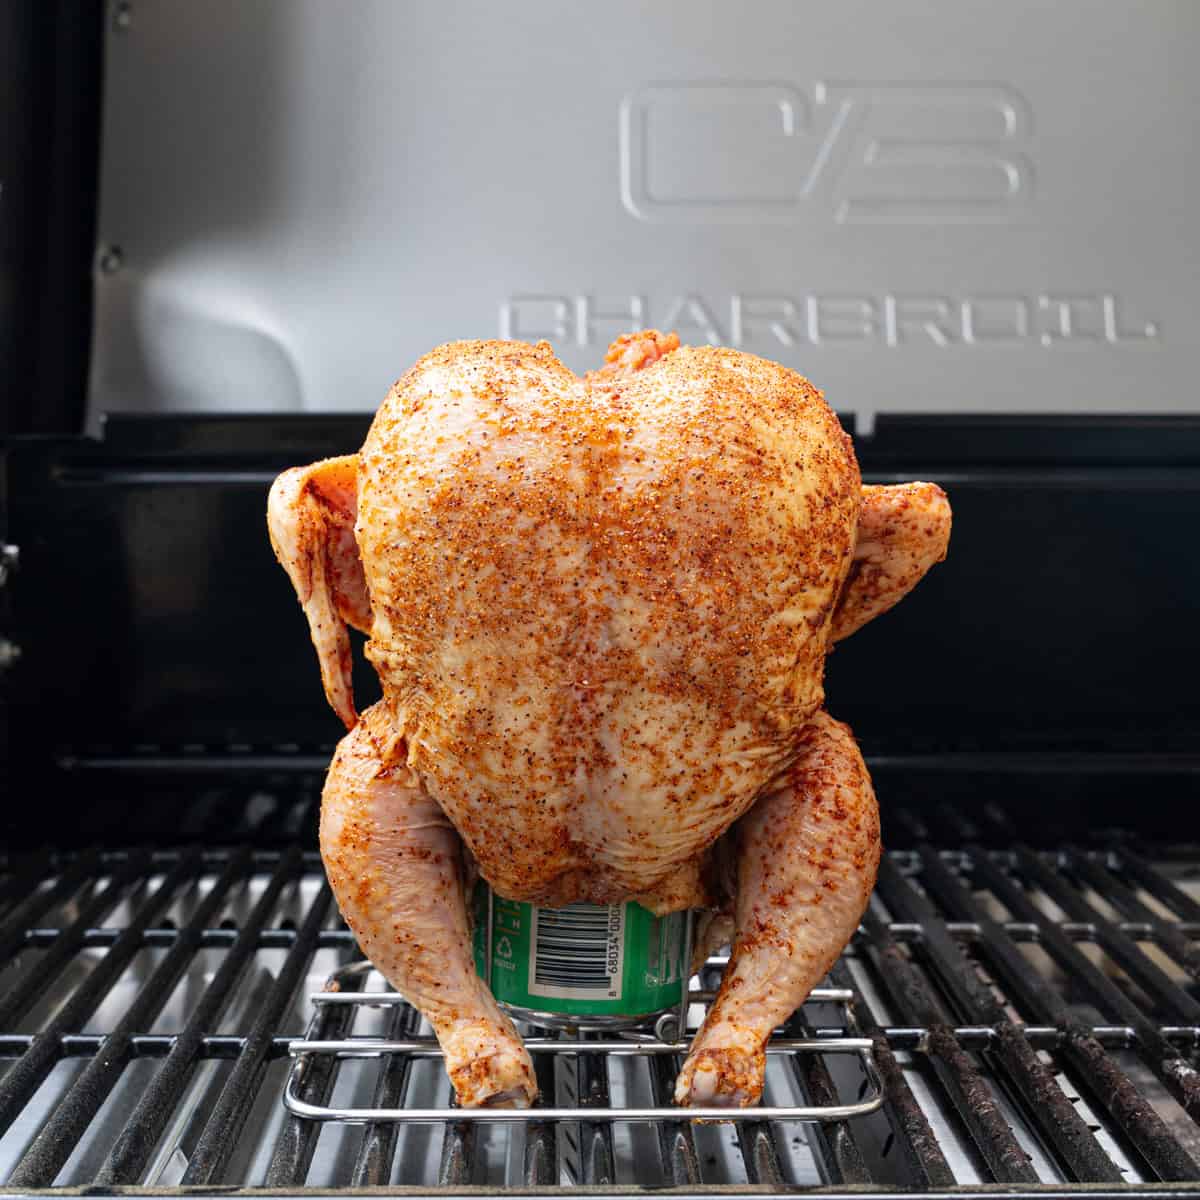
Step 4: Start cooking (indirect heat)
Place the chicken on the cooler side of the grill—never directly over the heat. That will cause a whole bird to overcook on the outside and undercook on the inside if you’re not careful. Then simply close the lid and let it cook. One thing I do recommend on a gas grill: rotate the chicken a few times while it cooks. Heat isn’t always perfectly even across the grates, so turning the bird every 20-30 minutes helps everything cook more evenly from all sides.
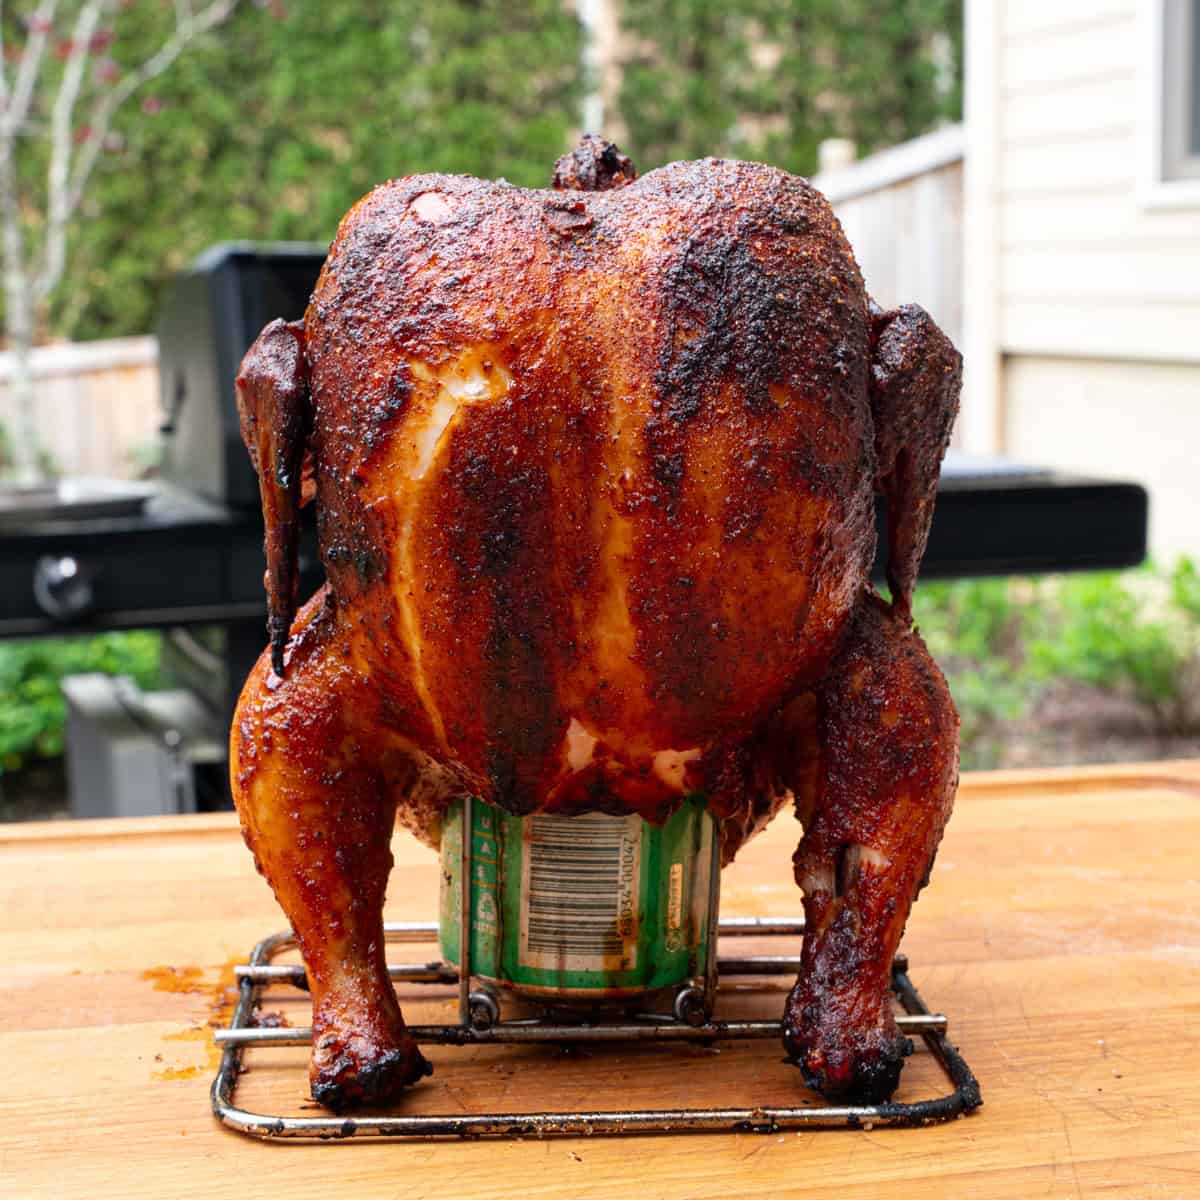
The total cook time will typically range from 1.5 to 2 hours, depending on the size of the chicken. To test for doneness, monitor the internal temperature: once the chicken reaches approximately 150°F, you can brush on the BBQ sauce if desired.
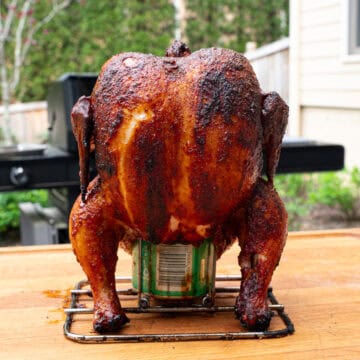
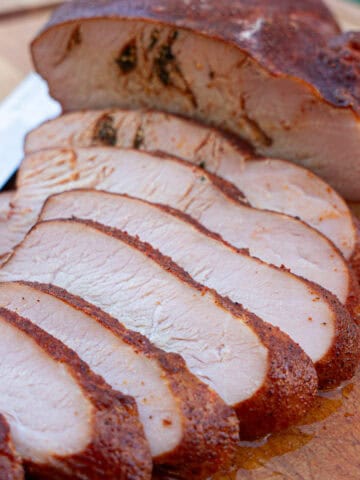
Remove the chicken from the grill when it reaches an internal temperature of 160–162°F, then allow it to rest until it reaches a final internal temperature of 165°F before slicing to guarantee both safety and optimal juiciness.
How to Get Crispy Skin on Smoked Beer Can Chicken
Achieving crispy skin depends on several manageable variables. That said, making beer-can chicken on a gas grill really reduces those variables and makes the process easier. The main points to consider are to a) use oil as a binder and b) make sure your grill is in that 350–400°F. The grill will do the rest of the work for you. If it’s getting close to finishing cooking and you do want the skin a little crispier, simply move the chicken closer to direct heat, but most of the time, proper temperature control throughout the cook gets you there.
Homemade BBQ Sauce Ideas to Try with this Smoked Beer Can Chicken
If you want to take this recipe a step further and use a homemade BBQ sauce, here are a few of my favorites:
- Hot Garlic Sauce
- Cherry Molasses BBQ Sauce
- Alabama White Sauce
- Hot Honey BBQ Sauce
- Mustard-Based BBQ Sauce
Equipment
- Gas grill
- Charcoal tray insert, smoke box/tube, or foil packet
- Meat thermometer
- Beer can holder (optional)
- Carving Knife
- Cutting Board
Storage & Reheating
Beer can chicken makes for great leftovers. Simply store any remaining chicken in an airtight container in the refrigerator for up to 4 days, or vacuum-seal (or use a freezer-safe bag) to freeze for an extended period.
Reheat on low heat in the oven or air fryer (I like to keep it around 350 degrees) until warmed through.
Recipe
Smoked Beer Can Chicken on a Gas Grill
Equipment
- Gas grill
- Charcoal tray insert smoke box/tube, or foil packet
- Meat Thermometer
- Beer can holder optional
- Carving Knife
- cutting board
Ingredients
- 1 3-5 lbs. whole chicken
- Pam spray or other oil substitute as needed
- Favorite BBQ or chicken rub to taste
- 1 C BBQ sauce
- ½ beer
- Fresh Herbs I used a storebought poultry mix of thyme, sage, and rosemary
Instructions
- Set the grill to two-zone cooking by putting the burners on one side of the grill to medium-low heat and the other side completely off. Meanwhile, take out your chicken and spray it liberally with Pam spray or your oil of choice then season well on all sides.
- Next, pop open a beer can and pour out half of the liquid. Stuff the herbs into the can and place the chicken on top of it so that the open cavity on the bottom side of the chicken (nearest the legs) slides directly over the beer can (I used a beer can chicken holder for this, which I’ll link here. It makes it easier but is not necessary if you don’t have one).
- Once the grill registers side 350-400 degrees, add the prepared beer can chicken to the indirect heat side of the grill and allow it to cook (the chicken will never be over direct heat). Look at the chicken every 20 minutes or so and rotate the chicken as needed if one side starts to brown more than another (I find I need to do this a few times throughout the cooking process for even browning across the entire chicken).
- Once the chicken registers ~150 degrees, brush on the BBQ sauce (if desired) so that it can tack on. Once the Chicken registers ~160-162 degrees, remove it from the grill. I do this so that carryover cooking will take it to 165 degrees from there without drying out the breast meat.
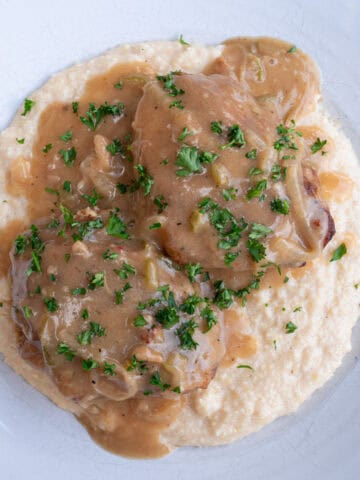
- Allow the chicken to rest for ~10-15 minutes, then carve and serve. Enjoy!

Leave a Reply