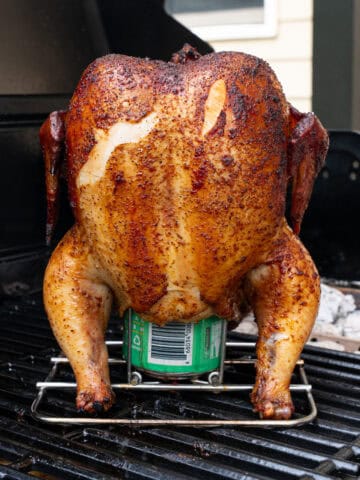
Smoking a whole chicken is notoriously tricky, especially for beginners, because it's easy to end up with dry breast meat and a rubbery skin. The secret to fixing both problems is simple, though — spatchcock the chicken before it hits the grill.
It’s a nearly foolproof technique, especially on a pellet grill, because it allows heat and smoke to circulate around the entire chicken for an even cook with little fuss, all while producing incredibly juicy meat and deep smoky flavor.
In this guide, I will provide a step-by-step overview of smoking spatchcock chicken on a pellet grill, detailing the preparation process, specifying optimal cooking temperatures and timing, and I’ll give a few of my favorite tips and tricks to enhance the final result. By the time you’re done reading, you’ll have all the confidence in the world of making a chicken this way in your own backyard, and I wouldn’t be surprised if you enjoy the ease and convenience of this method so much that it becomes a house favorite.
Jump to:
- Why Smoke a Spatchcock Chicken on a Pellet Grill?
- Pellet Grill Cooking Timeline
- How to Avoid Rubbery Skin on Pellet Grill Chicken
- Ingredients
- Equipment You'll Need
- Step-by-Step Instructions to Smoke a Spatchcock Chicken on a Pellet Grill
- BBQ Sauce Ideas for Smoked Spatchcock Chicken
- Storage and Reheating
- Recipe
Why Smoke a Spatchcock Chicken on a Pellet Grill?
Cooking a spatchcocked chicken on a pellet smoker has several advantages over roasting or grilling a whole bird, a more traditional method.
More Even Cooking
First, flattening the chicken allows it to cook more evenly. Normally, chicken breasts are the part of the chicken that tends to cause the most trouble for people when they are making the whole bird, because they will dry out if overcooked, but typically the legs and thighs can go longer, plus the whole chicken tends to crisp up better when the chicken stays on the grill longer. It’s a fine line that becomes significantly harder to navigate when cooking a whole chicken the more traditional way.
With a spatchcock chicken, everything cooks at nearly the same rate because you drastically expand the chicken's surface area. That also gives the skin a better chance of becoming crispy rather than rubbery, which is one of the biggest challenges when smoking poultry, no matter what grill or smoker you are using.
Subtle Smoke Flavor
Also, cooking on a pellet grill allows you to infuse the meat with a hint of smoke flavor, unlike a gas grill, where it’s more difficult (without using accessories), or a traditional smoker, which has a much more pronounced flavor. This can be a benefit or a con, depending on who you talk to and who they are cooking for.
The Convenience Factor
What’s not debatable, though, is that smoking a spatchcocked chicken on a pellet grill is significantly more convenient, easy, and accessible for the vast majority of people (especially if you aren’t someone who is cooking every week at home) than using a traditional smoker or gearing up a gas grill. Plus, it’s much faster to use, since you typically just flip a switch and set your temperature, rather than sitting next to a firebox and managing your temperature like you may have to with more traditional smokers.
The take-home message, though, in my opinion, is that using a pellet smoker to smoke a spatchcocked chicken is the most user-friendly way of cooking a chicken for the average person and tends to give great results no matter your skill level.
Pellet Grill Cooking Timeline
If it’s your first time cooking a smoked spatchcock chicken, it helps to understand how the cook progresses. Here’s a general timeline when cooking a whole spatchcock chicken at 350-375°F on a pellet grill.
0 minutes
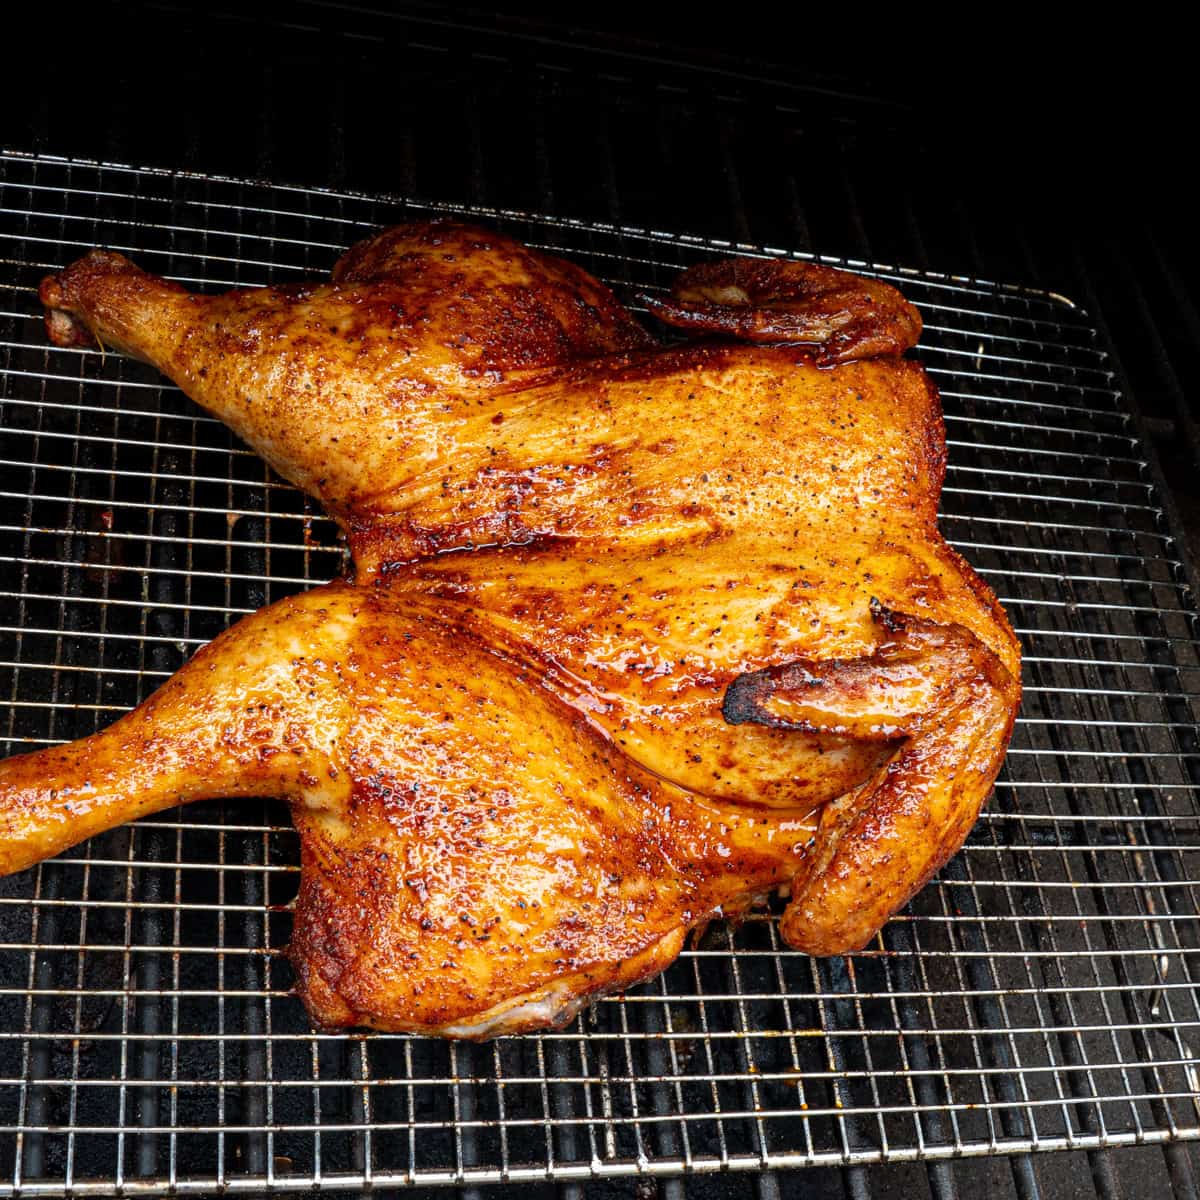
Place the seasoned spatchcock chicken on the pellet grill.
10–15 minutes
The seasoning begins to set and form a light crust.
15 minutes
Brush the chicken lightly with oil or melted butter.
45 minutes
Start checking the internal temperature of the chicken breast.
50 minutes
Apply BBQ glaze if using.
50–60 minutes
Remove the chicken.
How to Avoid Rubbery Skin on Pellet Grill Chicken
One of the biggest frustrations when cooking smoked chicken on a pellet grill is ending up with rubbery skin. To me, this is always one of the most challenging aspects for beginners to nail when cooking a chicken. And to be totally honest, it’s easier to achieve with a traditional smoker or charcoal-based grill than with a pellet grill. See pellet grills create a moist cooking environment, which is great for consistency but not ideal for crisping chicken skin. Combine that with the fact that most people tend to smoke chicken at very low temperatures for the entire cook, which, in theory, sounds like the right thing to do, but in reality, is not ideal for poultry. That being said, it’s not impossible — you just need to know how to do it, and I’ll give you a few tips that’ll help.
It's All About the Heat
Smoking a spatchcock chicken, as I do in this recipe, really thrives on the “hot & fast” smoke approach. Think the 350-375 degree temperature range, which is way higher than you’d smoke other meats (You could even raise it to 400 degrees if you want to cook faster). That’s because poultry does not have the intramuscular fat or connective tissue that beef or pork have, and thus they simply don’t need as long to cook. Plus, the higher heat allows the fat under the skin to render properly, helping create crispy skin rather than soft or rubbery skin.
Remember, you’re still getting a slight hint of wood flavor solely by the fuel source you’re choosing when cooking on a pellet grill, so try to keep that in mind and not box yourself into the school of thought that smoking has to occur one specific way.
Extra Tips for Crisping the Skin on Smoked Spatchcock Chicken
A couple of additional tricks you can try if you have the time that will help even more include:
- Pat the chicken dry before seasoning.
- Salt the chicken (i.e., dry-brine) and place it on a wire rack in the refrigerator to air-dry for a few hours before cooking.
- Use oil as a binder. Also, don’t be afraid to oil the chicken during cooking.
- Finish the chicken at a higher heat once it's almost done if you think it needs a little help at the end.
These small adjustments make a huge difference when cooking spatchcock chicken on a pellet grill. The one thing I will caution you on, though, is that if you are planning to apply BBQ sauce to your spatchcock chicken, as I do in this recipe, you tend to sacrifice some of that skin texture. It’s simply hard to avoid on a pellet grill unless you crank up the heat at the tail end of the cook. If that’s really going to bother you, I’d recommend saving the sauce on the side to dip the chicken in when serving.
Ingredients
- Whole chicken (spatchcocked)
- Olive oil or melted butter
- BBQ dry rub or chicken seasoning — You can use anything you like here, from salt and pepper to a more traditional BBQ rub. I tend to go with something on the saltier side, or whatever I have on hand in the pantry at the time.
- BBQ Sauce — You can keep it easy and go with a store-bought variety, or make your own. I’ll include some of my favorite options at the end of the post if you’d like some ideas.
Equipment You'll Need
- Pellet grill or pellet smoker — A Traeger, Pit Boss, or any other pellet grill works great. People get caught up in the brand names with these, but honestly, I’ve cooked on four different varieties and have had similar experiences with all of them.
- Instant-read Meat thermometer
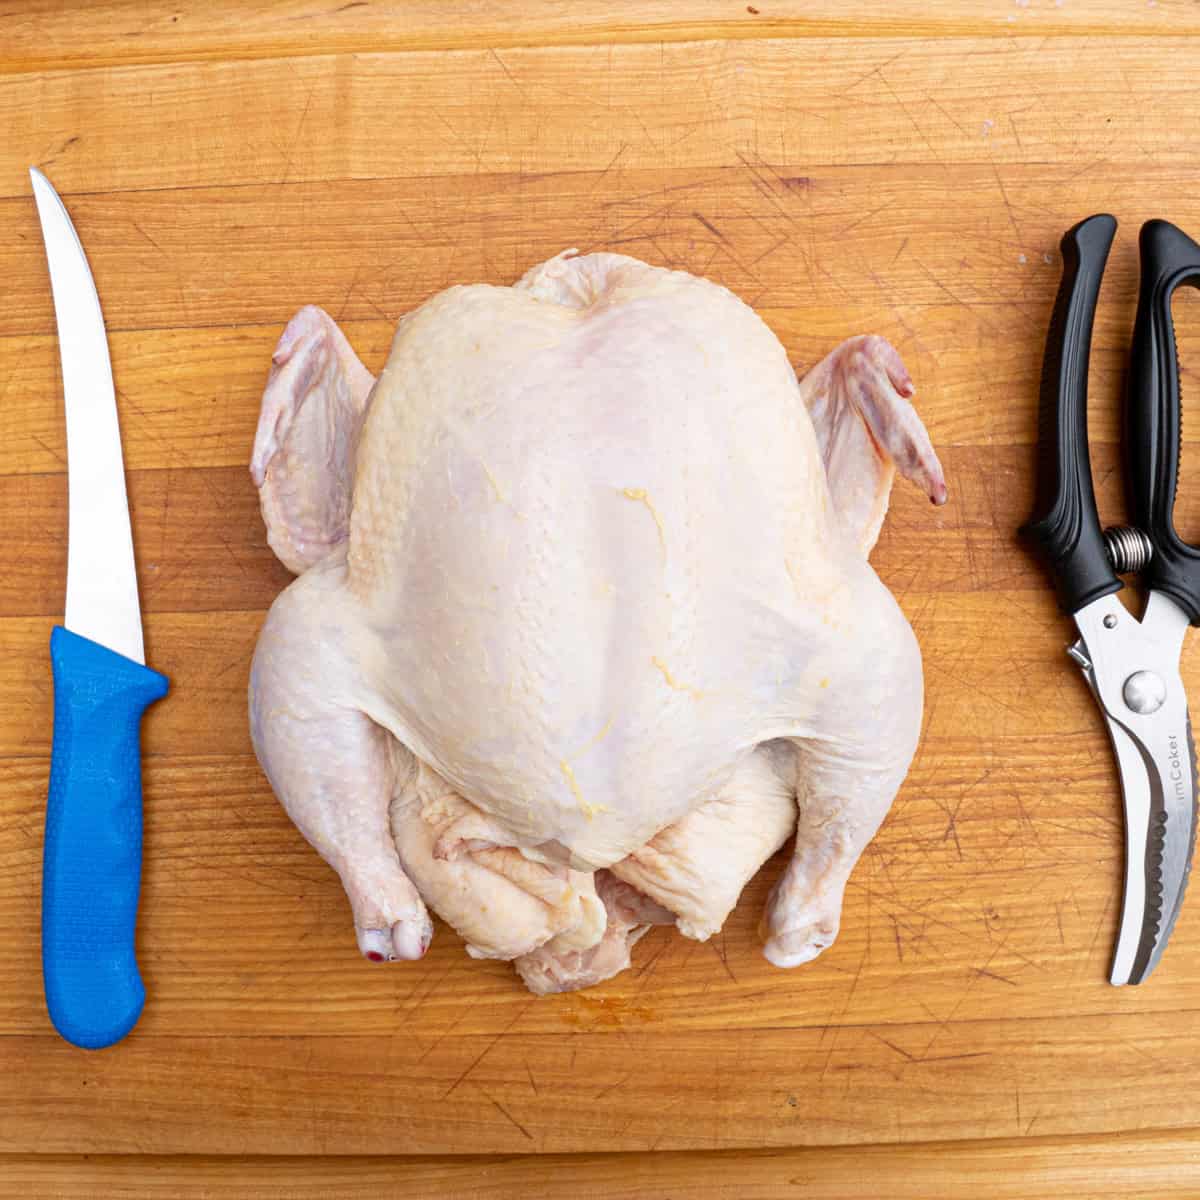
- Kitchen shears
- Cutting board
- Wire Rack
- Sheet pan
- Wood pellets
Which wood pellets work best?
Honestly, I think this is one of the most overrated aspects of pellet smokers. Different flavors and brands of pellets will have subtle differences, but nothing especially notable in my opinion, especially compared to cooking with real wood splits like you would an offset or even a kamado-style grill. My biggest advice is to get what is either most affordable or most accessible. I primarily get my wood pellets from Bear Mountain BBQ, and I’ve enjoyed them, but I’ve also had great products from competitors. I tend to get their hickory blend, but it’s more of a mental thing than anything else because those are the wood splits and chunks I use on my larger cookers.
Step-by-Step Instructions to Smoke a Spatchcock Chicken on a Pellet Grill
Step 1: Preheat the Pellet Grill & Prepare the Spatchcock Chicken
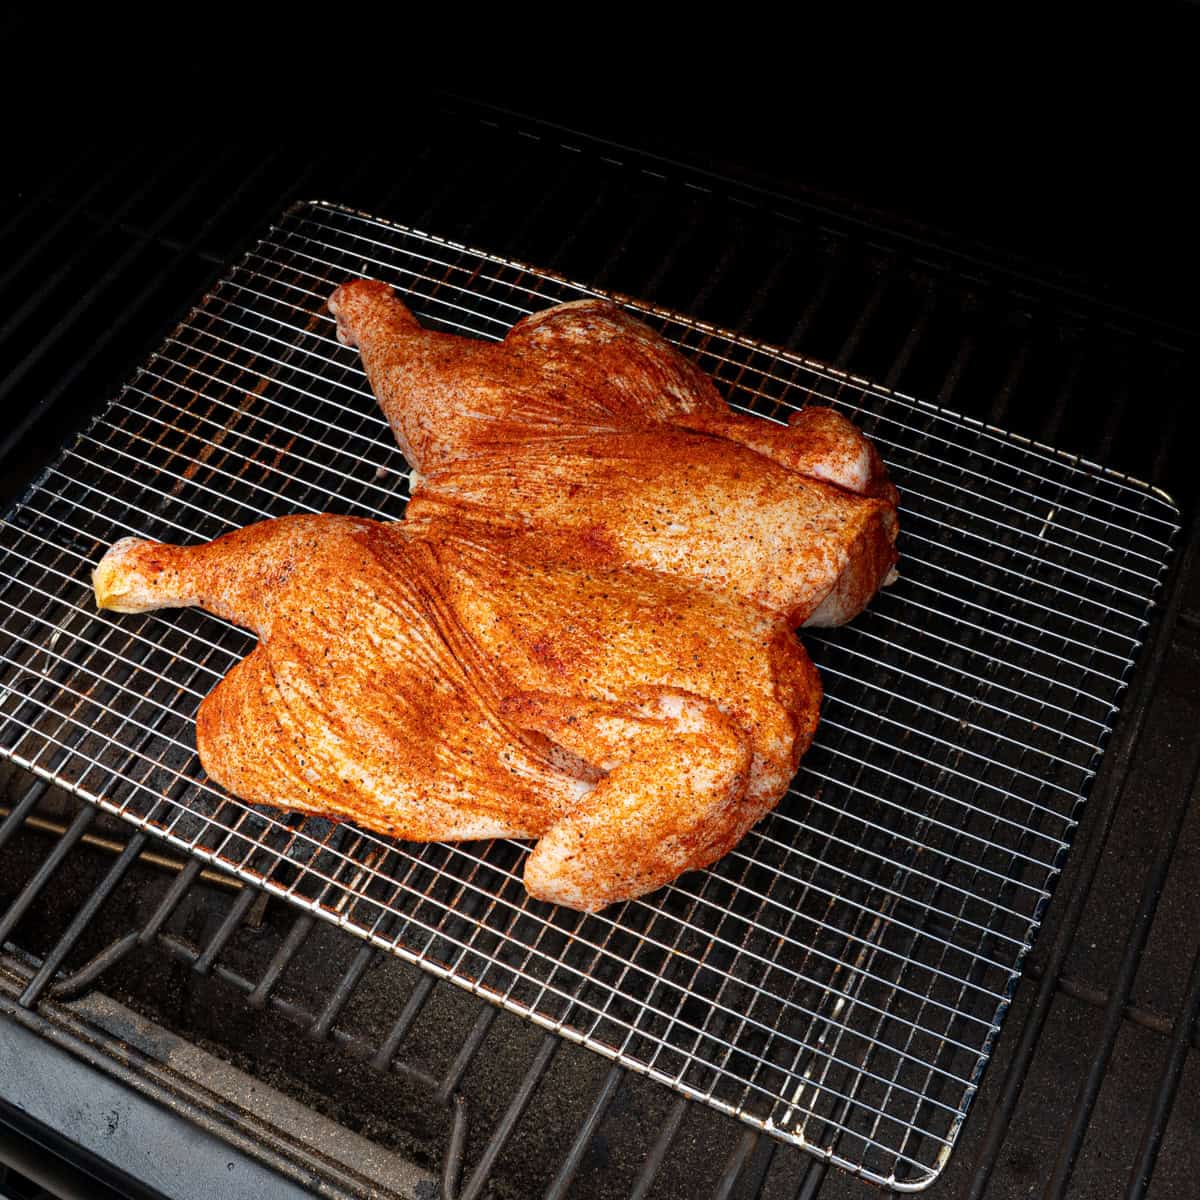
Start by warming up your pellet grill to ~350-375°F. Meanwhile, if your chicken isn’t already prepared, you’ll need to spatchcock it by removing the backbone and flattening the bird (I have a whole blog post walking you through the process if you’re interested in a step-by-step breakdown).
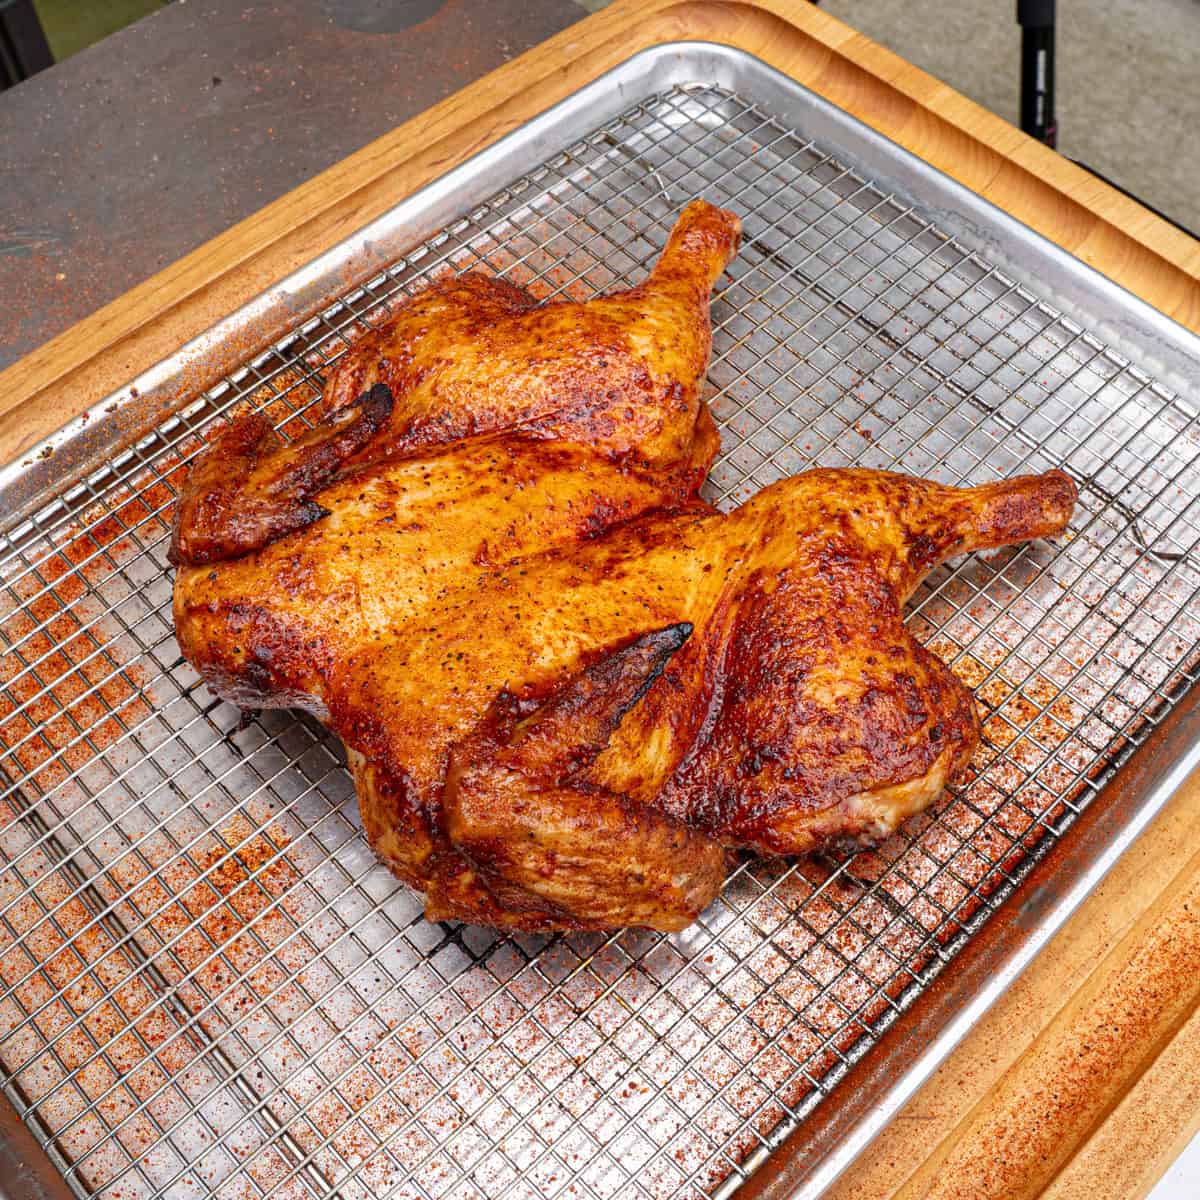
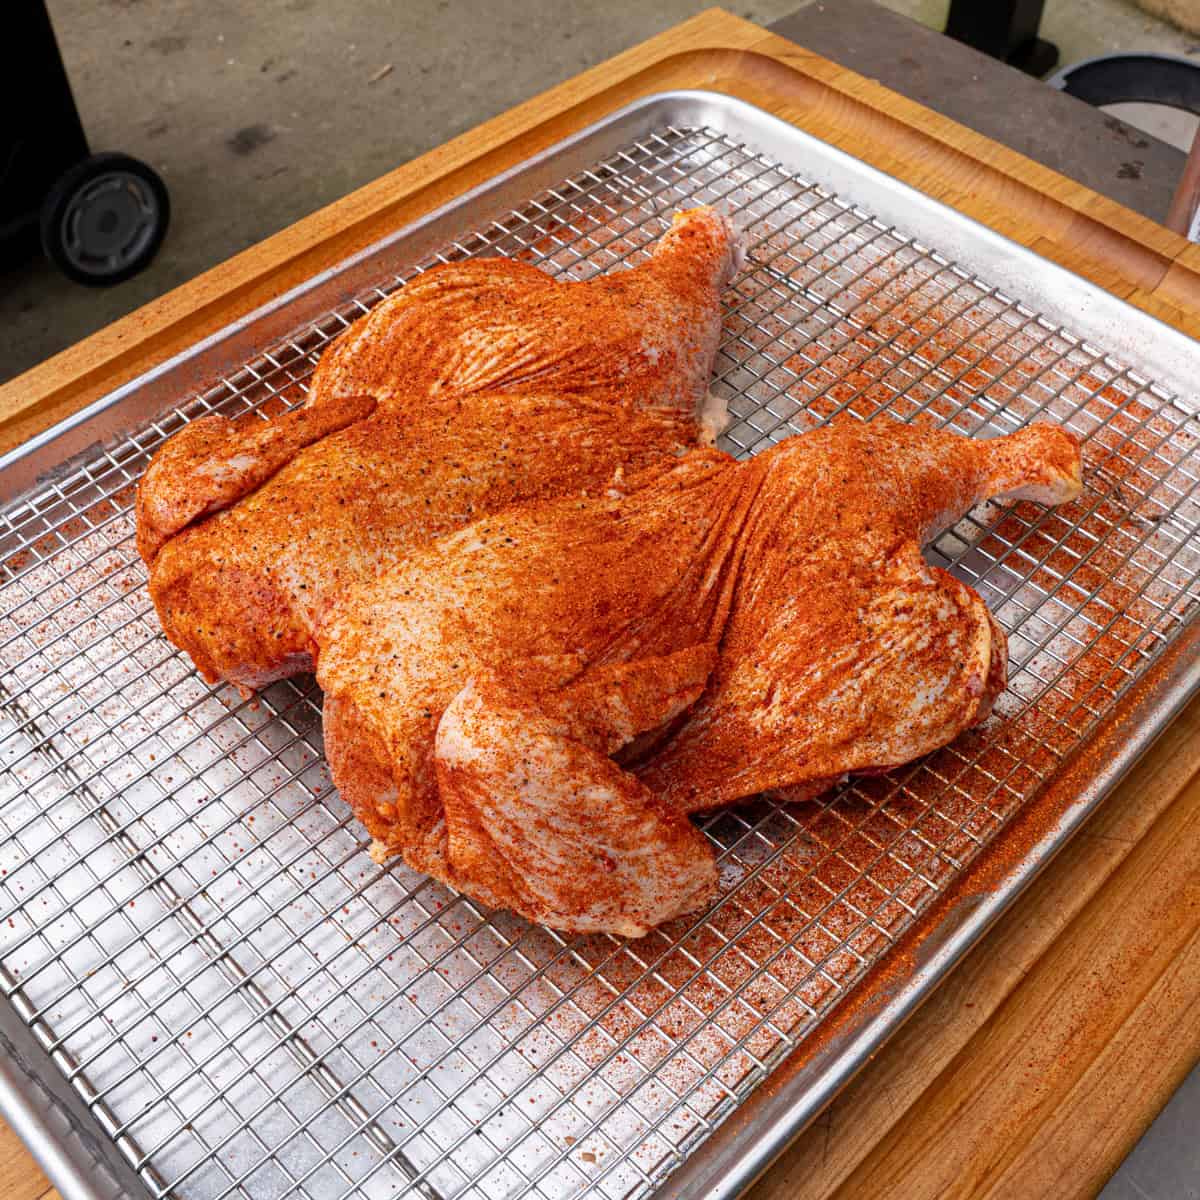
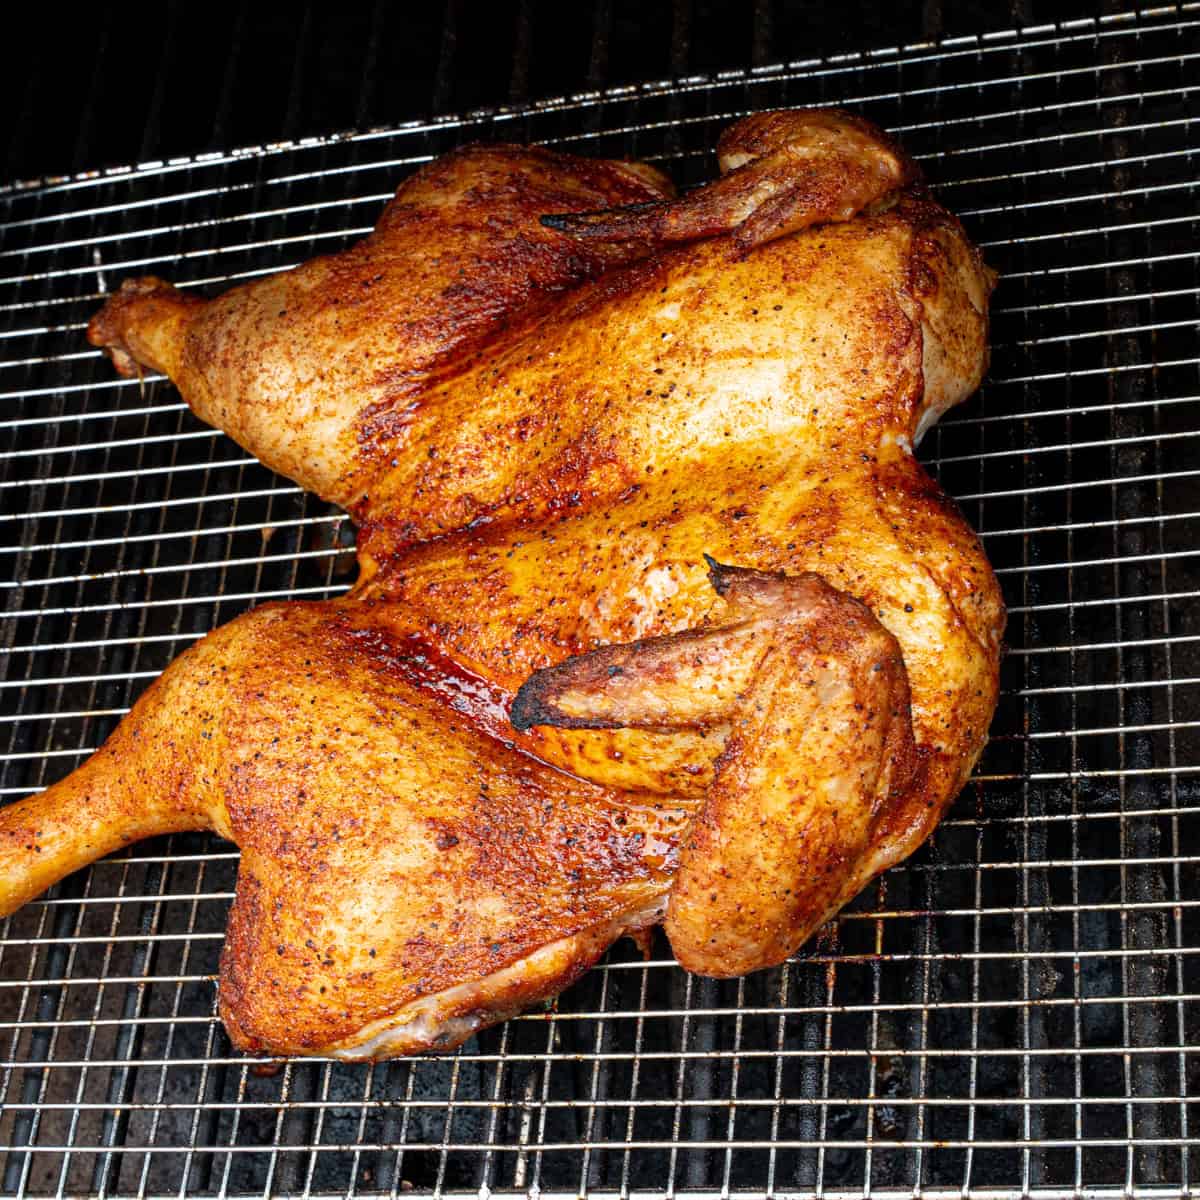
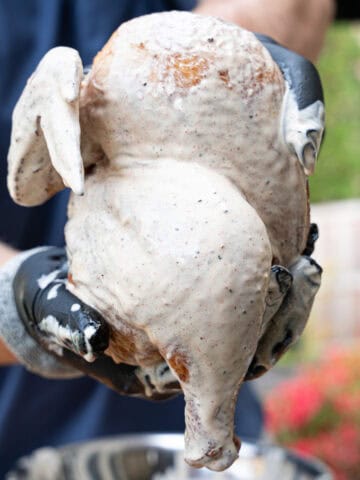
Once you’ve done that, just Pat the spatchcocked chicken dry with paper towels, spray it with oil or brush it with butter, and season liberally on all sides. I like to place the seasoned spatchcock chicken, skin-side up, on a wire rack on a baking sheet before adding it to the grill, just to make transport easier and to allow the skin to crisp during cooking.
Step 2: Brush/Spray with Fat for Crispy Skin
Once the seasoning has set for about 20 minutes, brush or spray the chicken lightly with olive oil, melted butter, or another cooking fat. This step helps the skin render properly and gives the chicken a golden-brown color as it cooks on the pellet grill.
Step 3: Continue Cooking the Chicken
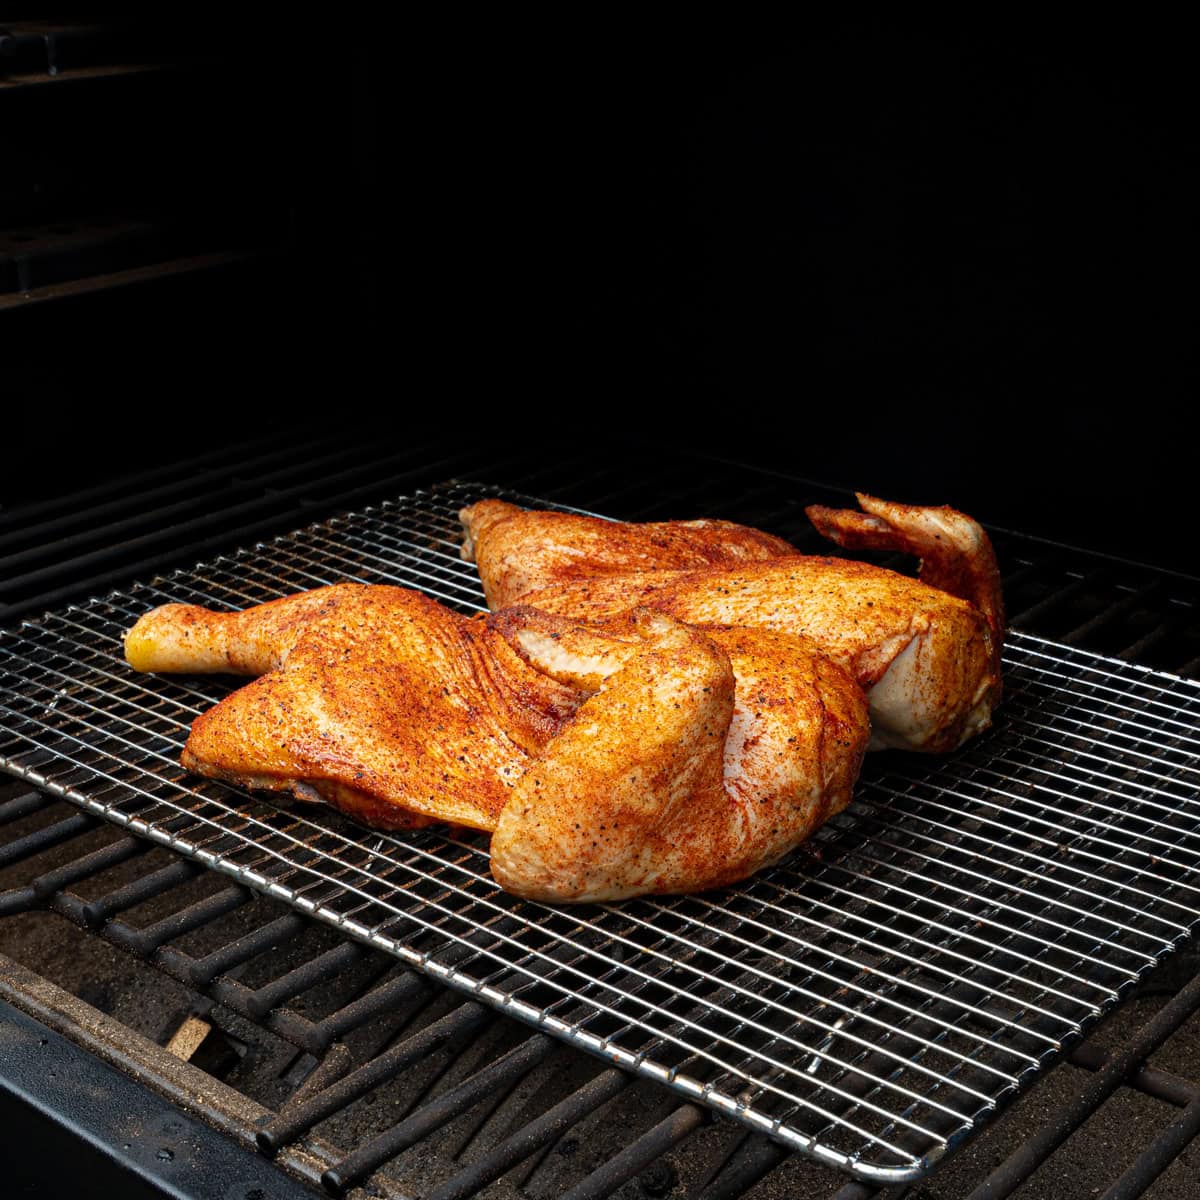
Let the spatchcock chicken cook until the thickest part of the chicken breast reaches about 160°F. No need to worry about the chicken legs and thighs; as long as the breasts are cooked through, the thighs tend to fall in line. will be too. Depending on the size of your whole chicken, this usually takes about 45–60 minutes, even when spatchcocked.
Step 4: Glaze the Chicken
If you’re adding BBQ sauce or another glaze, brush it onto the chicken during the last 5–10 minutes of cooking.
This allows the glaze to tack onto the skin without burning. The heat from the pellet grill will lightly caramelize the sauce, offering another layer of flavor to the smoked spatchcock chicken.
Step 5: Rest the Chicken, Carve & Serve
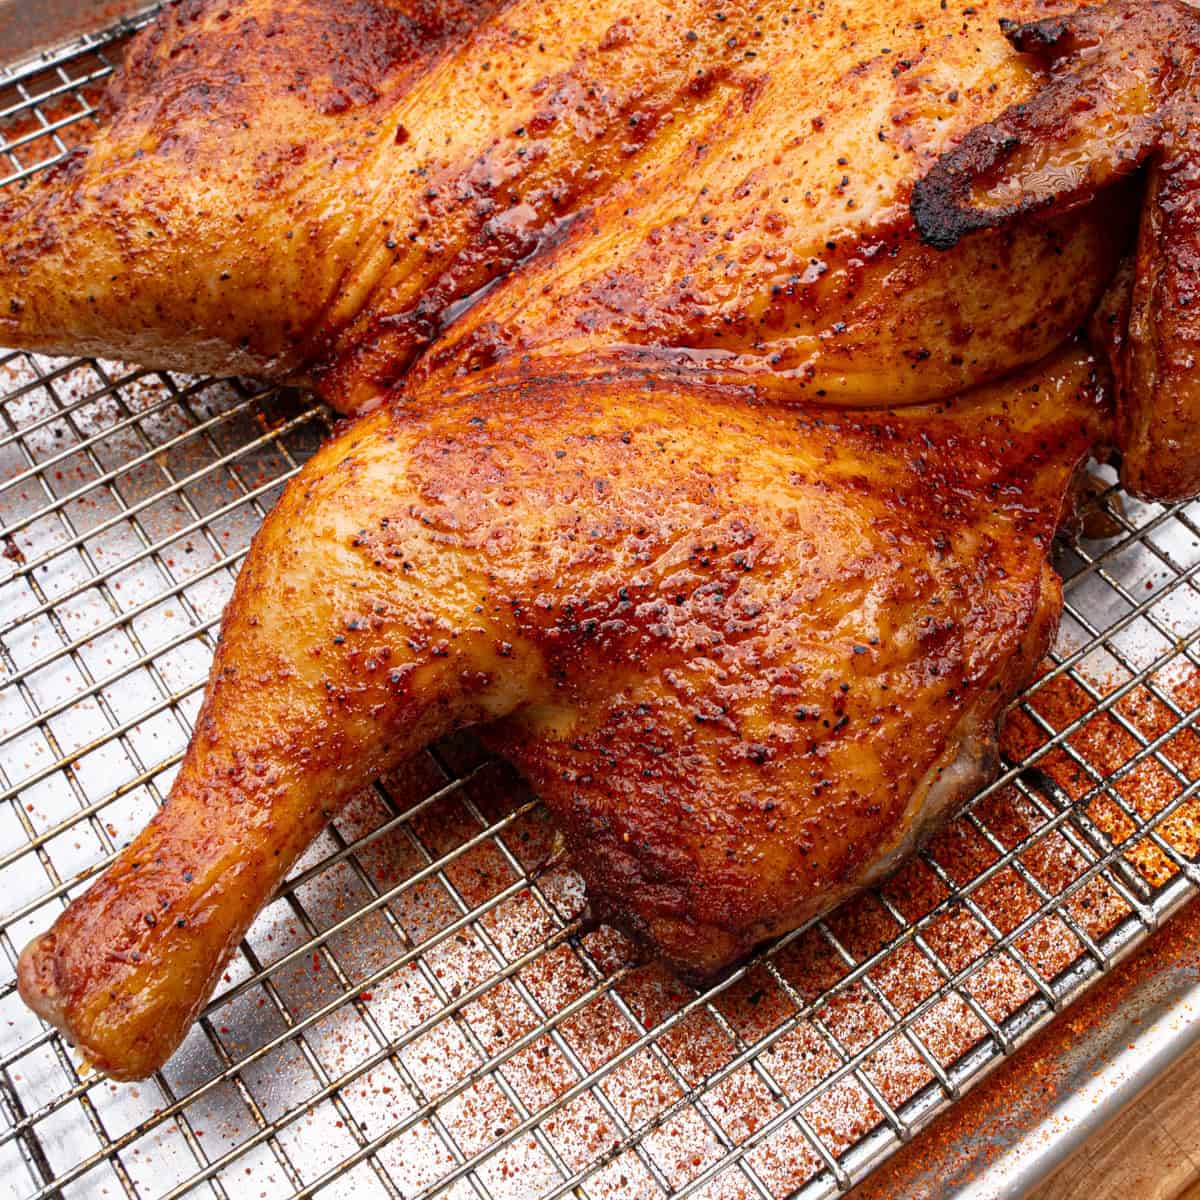
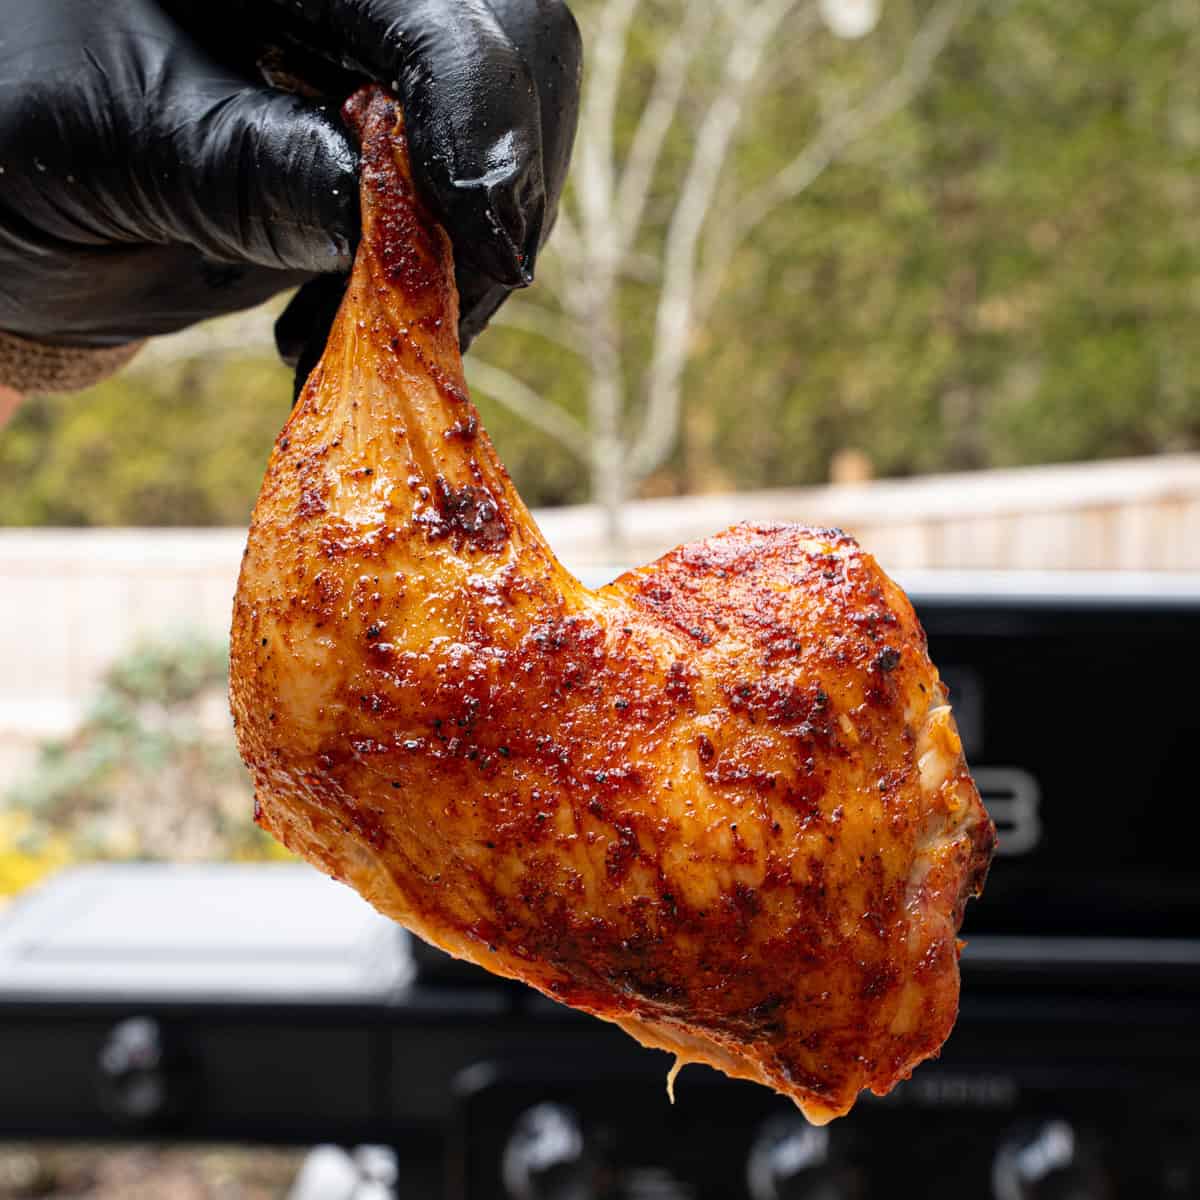
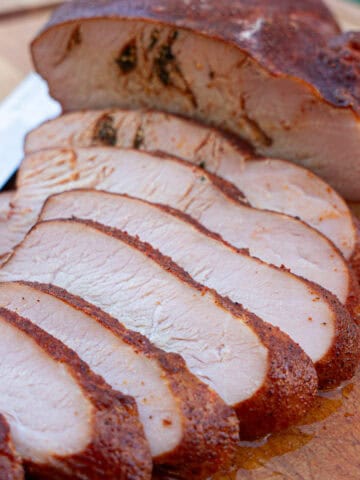
Let it rest for about 10 minutes before carving so the juices redistribute throughout the meat. If you pulled the chicken at the recommended temperature noted above, Carryover cooking finishes it off to 165°F, and it will be safe to consume. Once rested, carve the chicken into breasts, thighs, wings, and drumsticks. You’ll end up with perfectly juicy smoked chicken, crispy skin, and rich smoky flavor from the pellet grill.
BBQ Sauce Ideas for Smoked Spatchcock Chicken
If you want to take this recipe a step further and use a homemade BBQ sauce, here are a few of my favorites:
- Hot Garlic Sauce
- Cherry Molasses BBQ Sauce
- Alabama White Sauce
- Hot Honey BBQ Sauce
- Mustard-Based BBQ Sauce
Storage and Reheating
Smoked spatchcock chicken makes for great leftovers. Simply store any remaining chicken in an airtight container in the refrigerator for up to 4 days, or vacuum-seal (or use a freezer-safe bag) to freeze for 2-3 months.
Reheat on low heat in the oven or air fryer (I like to keep it around 350 degrees) until warmed through.
Recipe

Smoked Spatchcocked Chicken on a Pellet Grill
Equipment
- Pellet grill
- Instant-Read meat thermometer
- Kitchen Shears
- cutting board
- Wire Rack
- Sheet Pan
- Wood pellets
Ingredients
- 1 (3-5) lbs. chicken, whole
- Rub of choice
- Pam Spray as needed for the binder
- ¼ C duck fat or available butter/oil of choice
- ½ C BBQ sauce or glaze
Instructions
Spatchcocking the Chicken
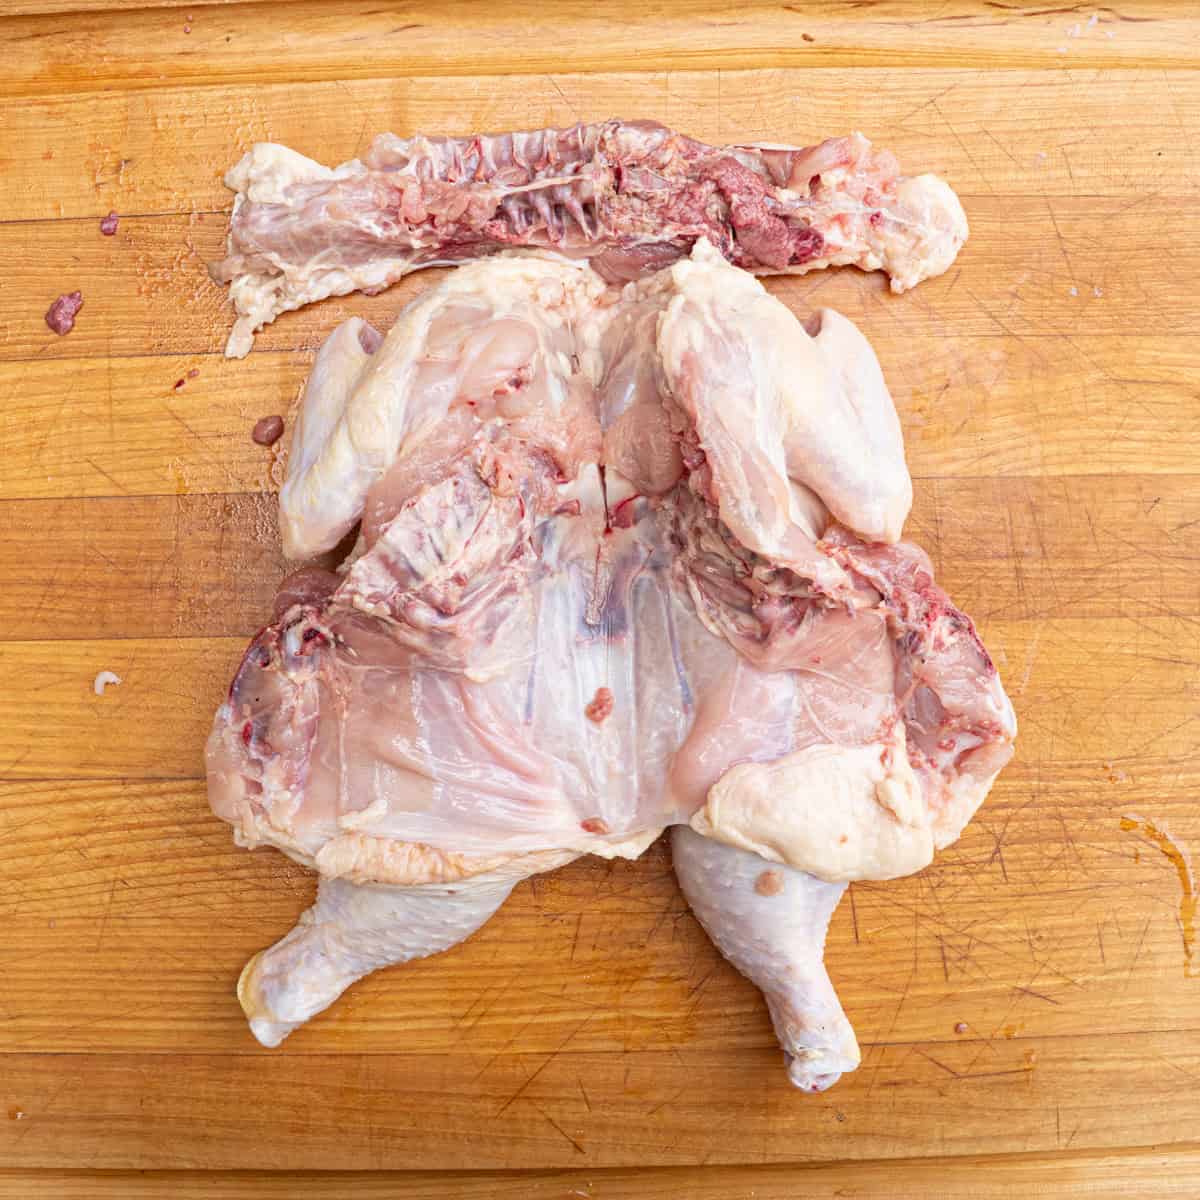
- Remove the chicken from its packaging and discard any innards. Using kitchen shears, cut out the backbone. Then, use a sharp knife to make an incision vertically along the breastbone (this will help it pop easier in the next step). Flip the chicken over and press firmly on the breastbone until you hear it snap flat. Finally trim any excess fat.
- Thoroughly season the chicken with your rub of choice. Place it on a wire rack and let it rest until you are ready to cook.
Smoking the Chicken
- When ready to cook, preheat your smoker to 300-350°F. Once preheated, transfer the chicken (still on the wire rack) to the smoker. Baste the turkey with the reserved butter after ~20 minutes (once the rub has set) to help the skin crisp up and develop a better color. Smoke until the internal temperature of the thickest part of the breast registers ~150-155°F, then glaze with your preferred BBQ sauce or glaze. Lastly, remove the chicken from the smoke once the internal temperature registers ~~160-162°F.
Rest, Carve, and Serve
- Allow the chicken to rest for ~15 minutes, letting carryover cooking bring the internal temperature up to the safe 165°F. Carve the chicken, serve, and enjoy!
Notes
- Watch internal temps: Pull the breasts around 160–165°F and let carryover bring them up. Thighs and legs can comfortably go to 175–180°F.
- Placement on the grill: Try to position the thicker parts (breasts) toward the hotter area of your grill if it has a known hot spot.
Leave a Reply