
Let’s be honest—chicken drumsticks are a cut that many home cooks tend to avoid at the grocery store. I’ll admit, I used to be one of them. Despite being an affordable option, I often gravitate toward chicken thighs, quarters, or halves instead. And honestly, there’s a good reason for that. Drumsticks can be surprisingly challenging to grill properly. Their shape and uneven thickness make it all too easy to overcook the outside while the interior remains underdone. It’s a frustrating experience, and I’ve been there myself.
That changed for me a couple of years ago after watching videos of people butterflying drumsticks before grilling. It was a lightbulb moment. With one cut, the drumstick flattens, cooking faster and more evenly, and gets a crispier finish. Flatten the leg, halve the time, double the crunch. Since then, butterflying is my go-to for drumsticks.
If you want to know why I advocate this method, keep reading. I’ll explain butterflying, its effectiveness, and how to use it in my straightforward, flavorful chicken drumstick recipe—grilled over direct heat and finished with a duck fat baste.
Jump to:
- What Is Butterflied Chicken?
- Why Butterfly Chicken Drumsticks?
- Ingredients for Flavorful Grilled Drumsticks
- How to Butterfly a Chicken Drumstick
- How to Grill Butterflied Drumsticks (And Finish with Flavor)
- Alternate Cooking Methods (No Grill Required)
- Equipment
- What to Serve With Butterflied Drumsticks
- Storing Leftovers
- Recipe
What Is Butterflied Chicken?
Butterflied chicken simply means the meat has been sliced open and flattened to create an even thickness. You’ve probably seen this with whole chickens (commonly referred to as spatchcocking), but the same concept works incredibly well with chicken drumsticks and is not difficult to do, either.
Why Butterfly Chicken Drumsticks?
Last year, I was shooting a video for a brand, and the goal was simple: showcase how easy it is to grill chicken drumsticks. The problem, though, was that it wasn’t easy at all. In fact, it was a total headache. The chicken just wouldn’t cook evenly. The skin was charring much faster than I would have liked (in under ten minutes, mind you), while the inside hovered around a worryingly raw 110°F.
Now, in my defense, I was cooking on an electric grill—something I use far less often than gas or charcoal, and truthfully, don’t enjoy nearly as much. It was one of those cooks that was certainly a learning experience, and I filed that memory away for the next time I made them so the same issues wouldn’t happen again.
Looking back, I should have butterflied those drumsticks. This technique would’ve solved the problem on the spot. By opening up the meat and flattening it, you allow heat to penetrate more evenly, seasoning to stick more effectively, and the entire cook to become far more controlled and predictable.
Here’s what butterflying does for you:
- Reduces thick, slow-cooking spots near the bone
- Speeds up drumsticks cooking time without sacrificing quality
- Promotes better surface contact for seasoning and char
- Delivers consistent, golden-brown, juicy results every time
It’s all about getting better results with less frustration. Once you’ve tried it, butterflying drumsticks just make so much more sense.
Ingredients for Flavorful Grilled Drumsticks
You don’t need a long ingredient list to make great grilled chicken. Simple works best when the technique is right.
You’ll need:
- 1 package (2–3 lbs.) chicken drumsticks
- Salt & pepper (1:1 ratio or favorite BBQ rub)
- 1 cup duck fat (or 1 stick unsalted butter)
Why This Strategy Works:
Salt and pepper keep things simple and let the chicken speak for itself—especially when you're grilling. That simple seasoning not only enhances the meat's natural flavor but also allows the chicken to absorb smoke more effectively than it would with heavy rubs or marinades.
The duck fat brings it all together. It adds richness, helps the seasoning stick, and promotes even browning, giving the drumsticks that deep, golden color and incredible flavor by the time they come off the grill. Butter works great, too—really, you just want a quality liquid fat to baste with. I’ve been using duck fat lately because I’ve had a tub from Maple Leaf Farms sitting in the fridge, but feel free to experiment with what you have on hand. Olive oil and avocado oil both offer a lighter flavor while still contributing to browning and moisture retention.
Pro tip
I always keep a small batch of 50/50 coarse kosher salt and coarse black pepper ready to go. A quick mix of ¼ cup each in a container lasts for multiple cooks and keeps your seasoning consistent and hassle-free.
How to Butterfly a Chicken Drumstick
This sounds intimidating, but it’s simple once you practice a few times. And the great thing about drumsticks is there’s a lot to practice on in a pack, so you’ll have it down in no time. Here are the steps you need to know to butterfly chicken drumsticks.
Make the Primary Cut Right Down the Knuckle
Hold the drumstick steady with the meaty side up. Using a sharp knife, make a vertical cut down the thickest part of the drumstick, usually right along the knuckle.
Safety Tip
Throughout this process, keep your fingers clear of the blade and use a stable cutting board. The last thing you want while you prepare your drumsticks is an accident.
Cut the Sides
Make shallow cuts along the left and right sides of that initial incision. I like to let the knife follow as close to the bone as possible. These cuts allow the meat to open up and flatten properly. I’ve also found it helpful to make the first cut on the dominant-hand side. So, for me, since I’m left-handed, I make a few slices on the left side of the bone to open it up, then rotate the drumstick 180 degrees so I can make the same cut on the remaining side. For me, at least, it's a pain trying to cut the latter side of the chicken without flipping it first.
Note
Be careful not to cut all the way through the drumstick—your knife should only go about halfway into the meat. The goal is to open it up, not separate it entirely. Keeping the bone intact helps retain the drumstick's structure and makes it easier to handle on the grill. A sharp knife makes this process much easier. Remember: you’re not removing the bone—just exposing more surface area so the chicken cooks evenly.
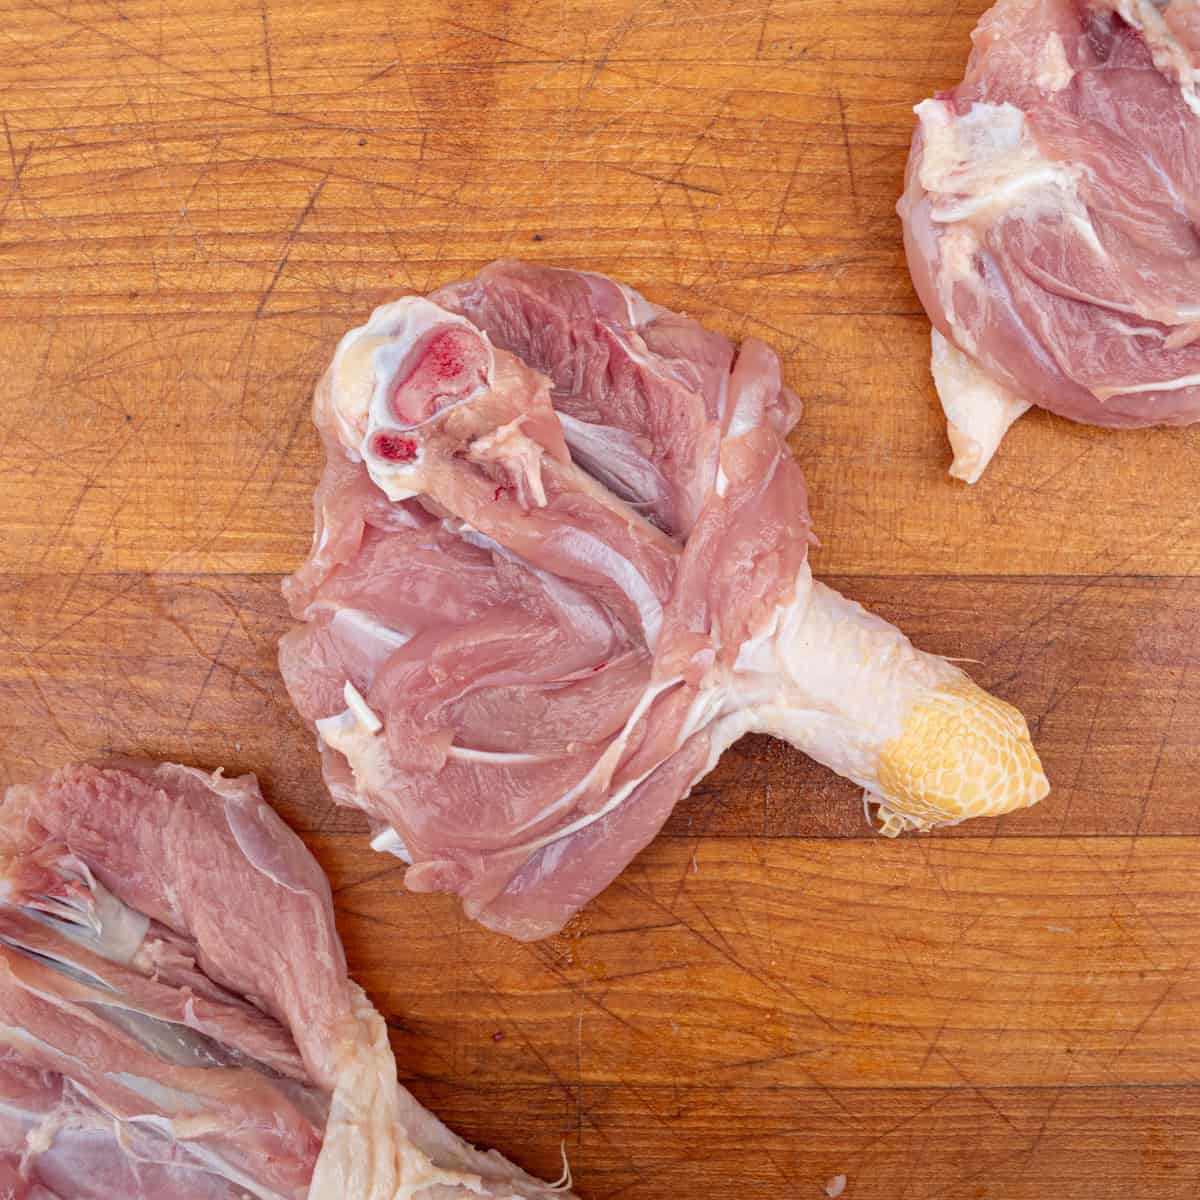
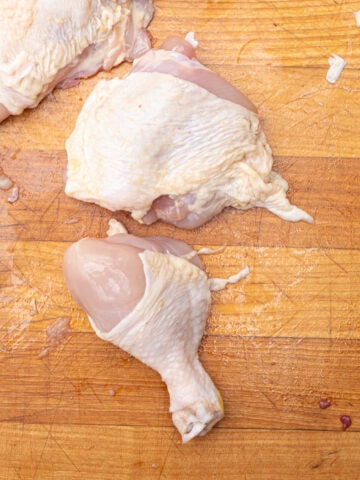
Open and Flatten
Now that the chicken is cut on both sides, simply spread the drumstick open like a book. That’s it! It’s truly that simple, so once you’ve knocked the first one out, keep going with the remaining chicken drumsticks so you can get these on the grill.
Want to Plan Ahead?
Yes, you can butterfly chicken drumsticks ahead of time. And honestly, I recommend it if you have the time. Butterflying and seasoning up to 24 hours in advance (commonly referred to as dry brining) will produce better results because it allows the salt to penetrate the meat and helps dry out the skin. It’s a win-win for what it’s worth.
How to Grill Butterflied Drumsticks (And Finish with Flavor)
Now that you’ve prepared the butterflied chicken drumsticks, it’s time to bring everything together.
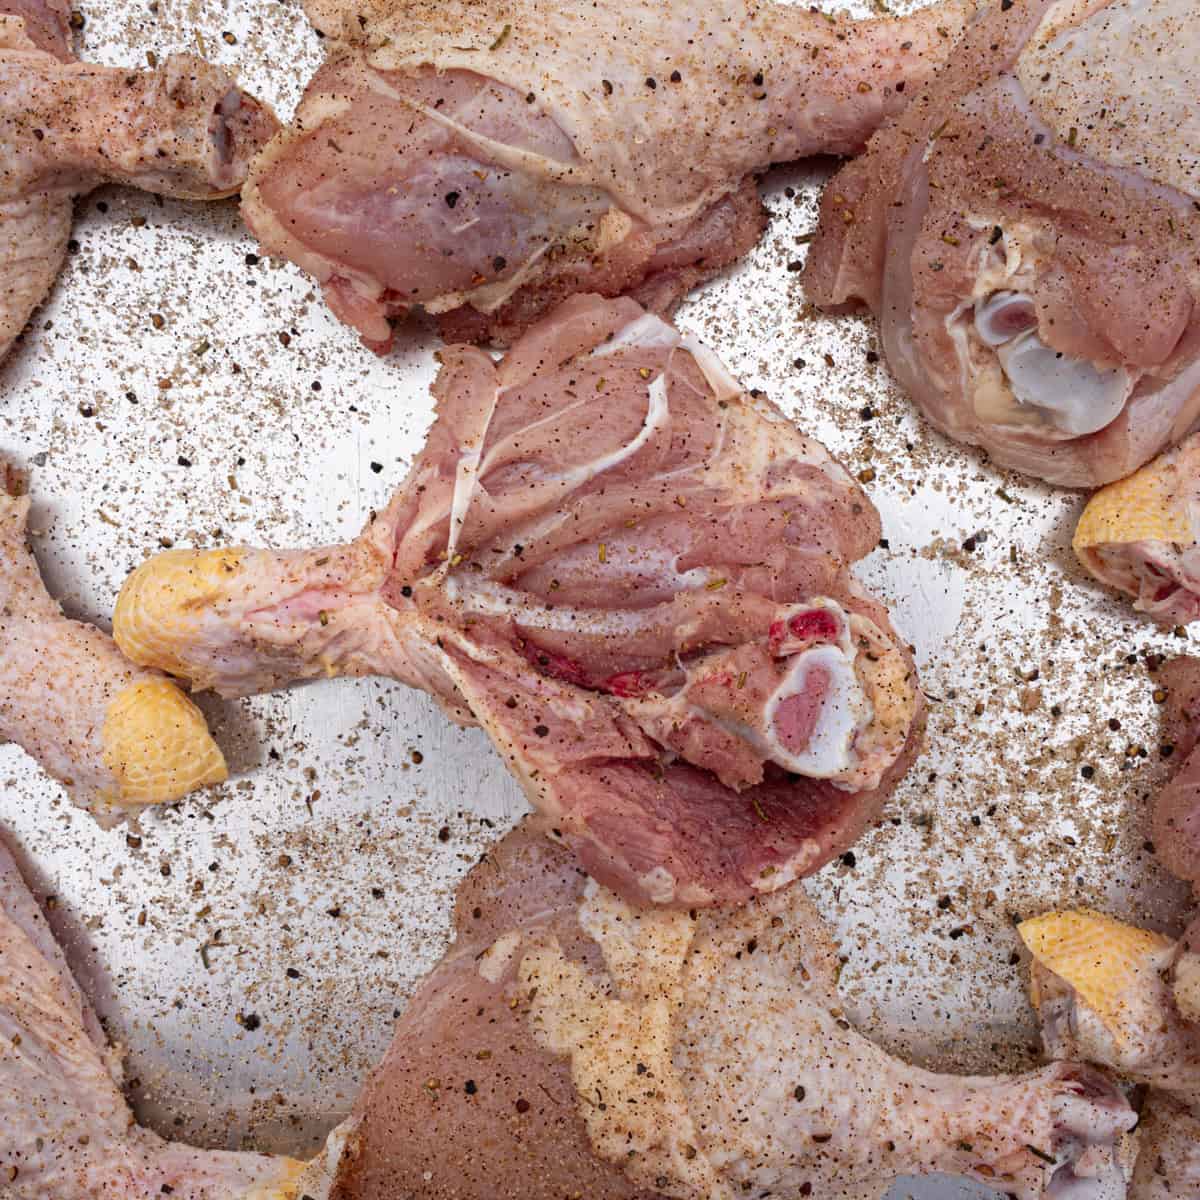
Step One: Preheat the Grill & Season the Chicken
Preheat your grill to 300–325°F. I find that this is a great temperature range for cooking chicken in general, especially when cooking over coals (i.e., direct heat) as I do for this recipe. This moderate temp lets fat render and skin crisp without burning. I’ll list some adjusted temperature recommendations below if you plan on cooking on a different heat source.
While the grill is coming up to temperature, season both sides of each drumstick generously with the salt-and-pepper mix or your favorite BBQ rub.
Step Two: Grill Over Direct Heat
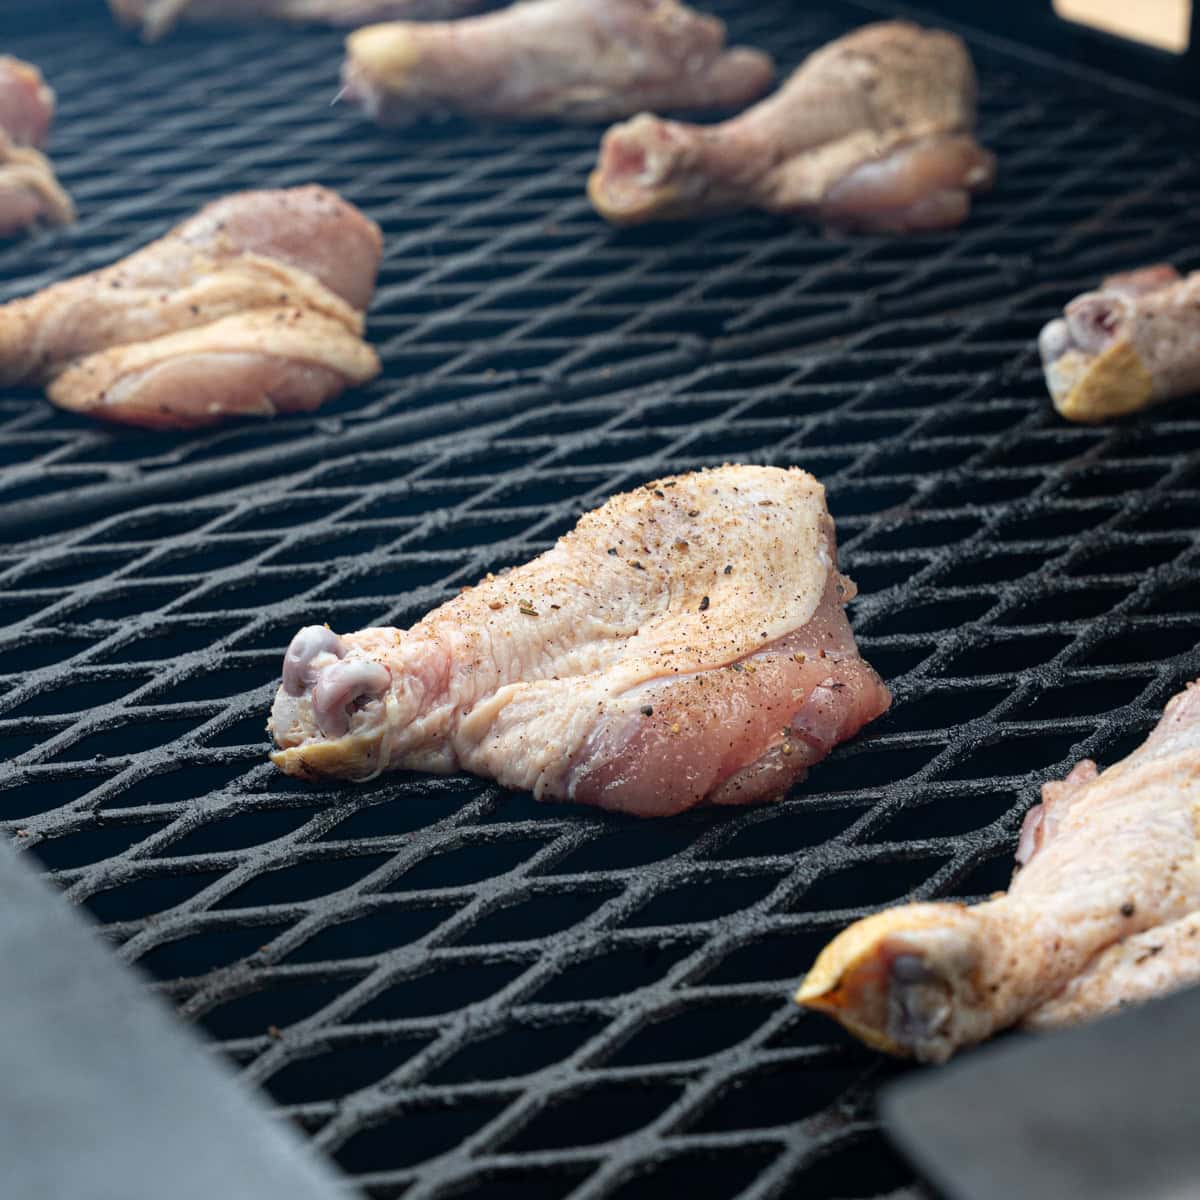
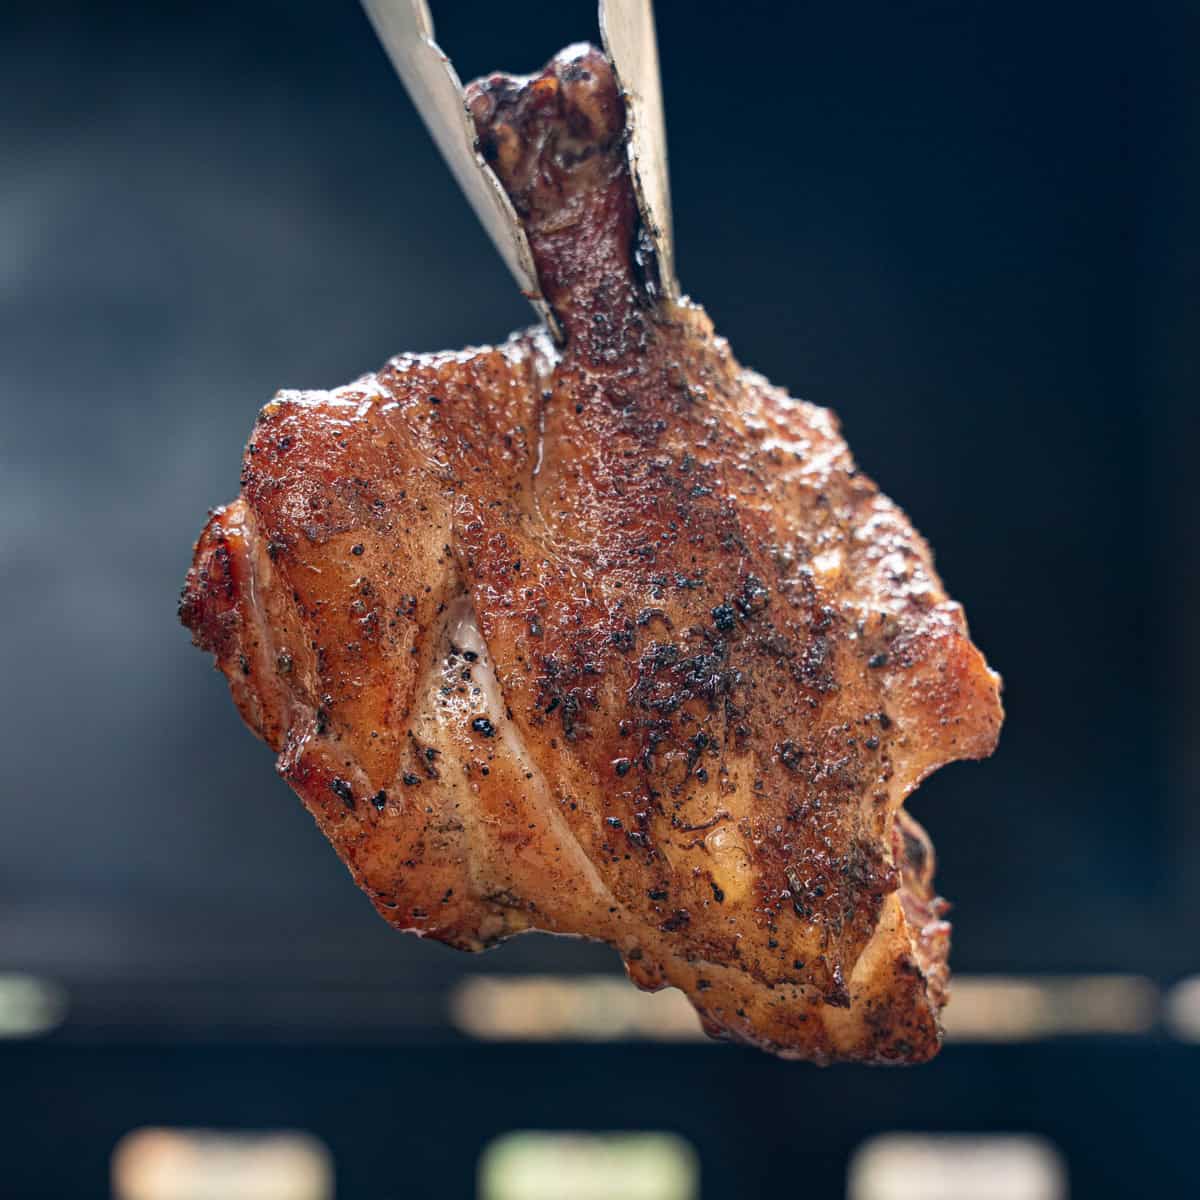
Place the butterflied chicken legs, meat-side down, over direct heat. Let them cook until the meat begins to brown (~15 minutes), then flip and repeat.
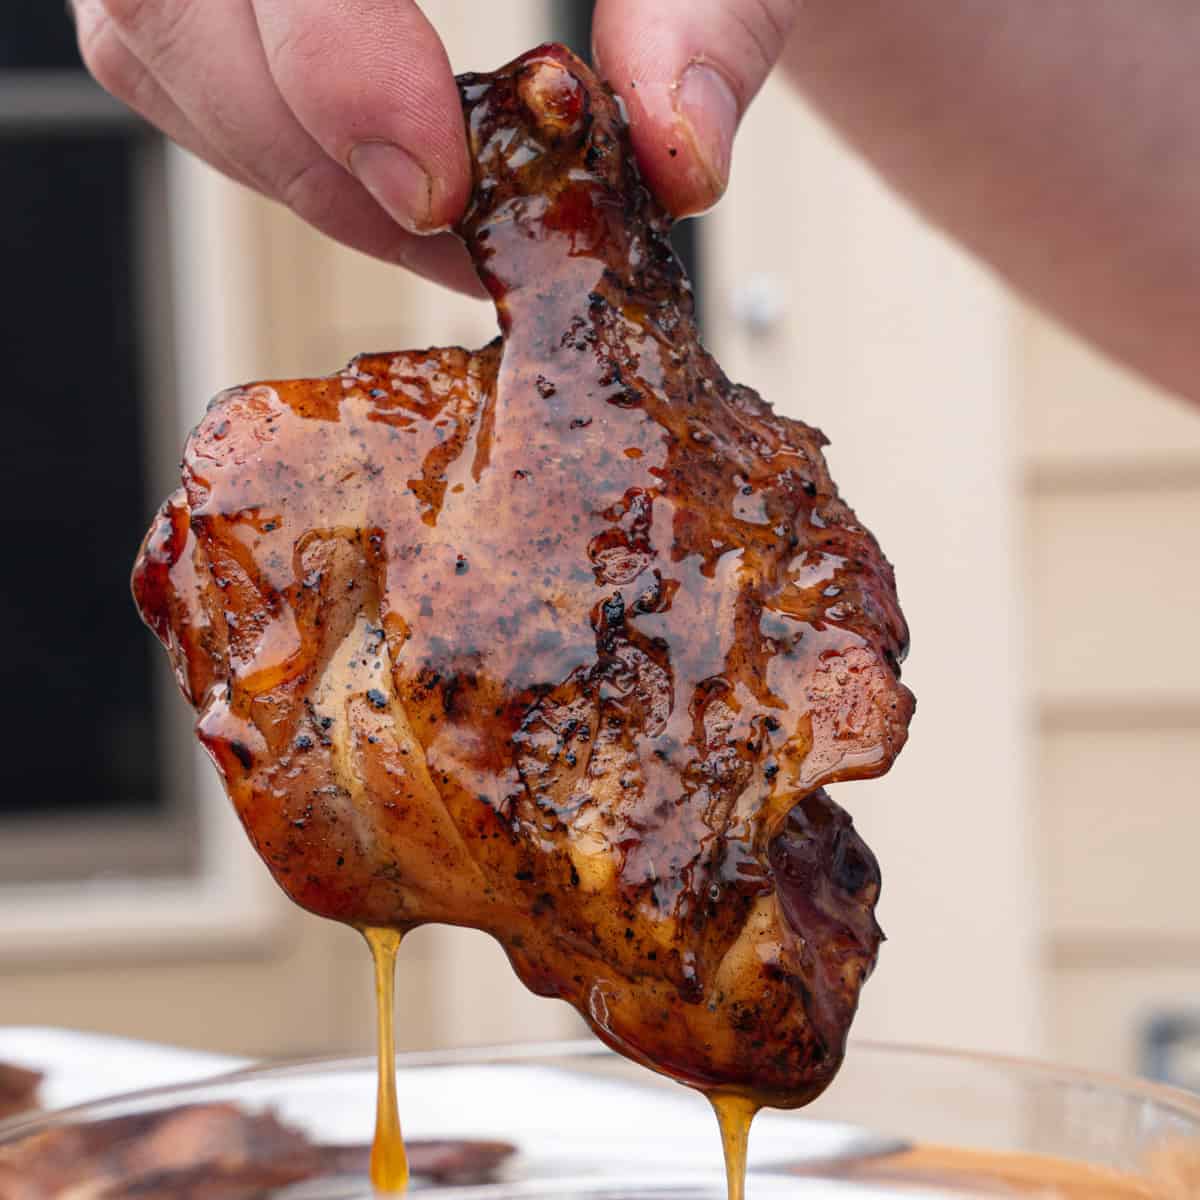
Step Three: Baste With Duck Fat or Butter
Start basting both sides of the drumsticks with duck fat (or butter) once the internal temperature hits around 150°F. I didn’t always do this—until I came across a video of Chris Lilly, arguably one of the best pitmasters in the world when it comes to BBQ chicken, using this exact method. I gave it a shot, and the results were phenomenal. Since then, it’s become a regular part of my process, no matter what cut of poultry I’m working with.
It’s the same principle as basting a Thanksgiving turkey: adding fat at the right time builds a deep, golden color, enhances richness, and helps lock in moisture.

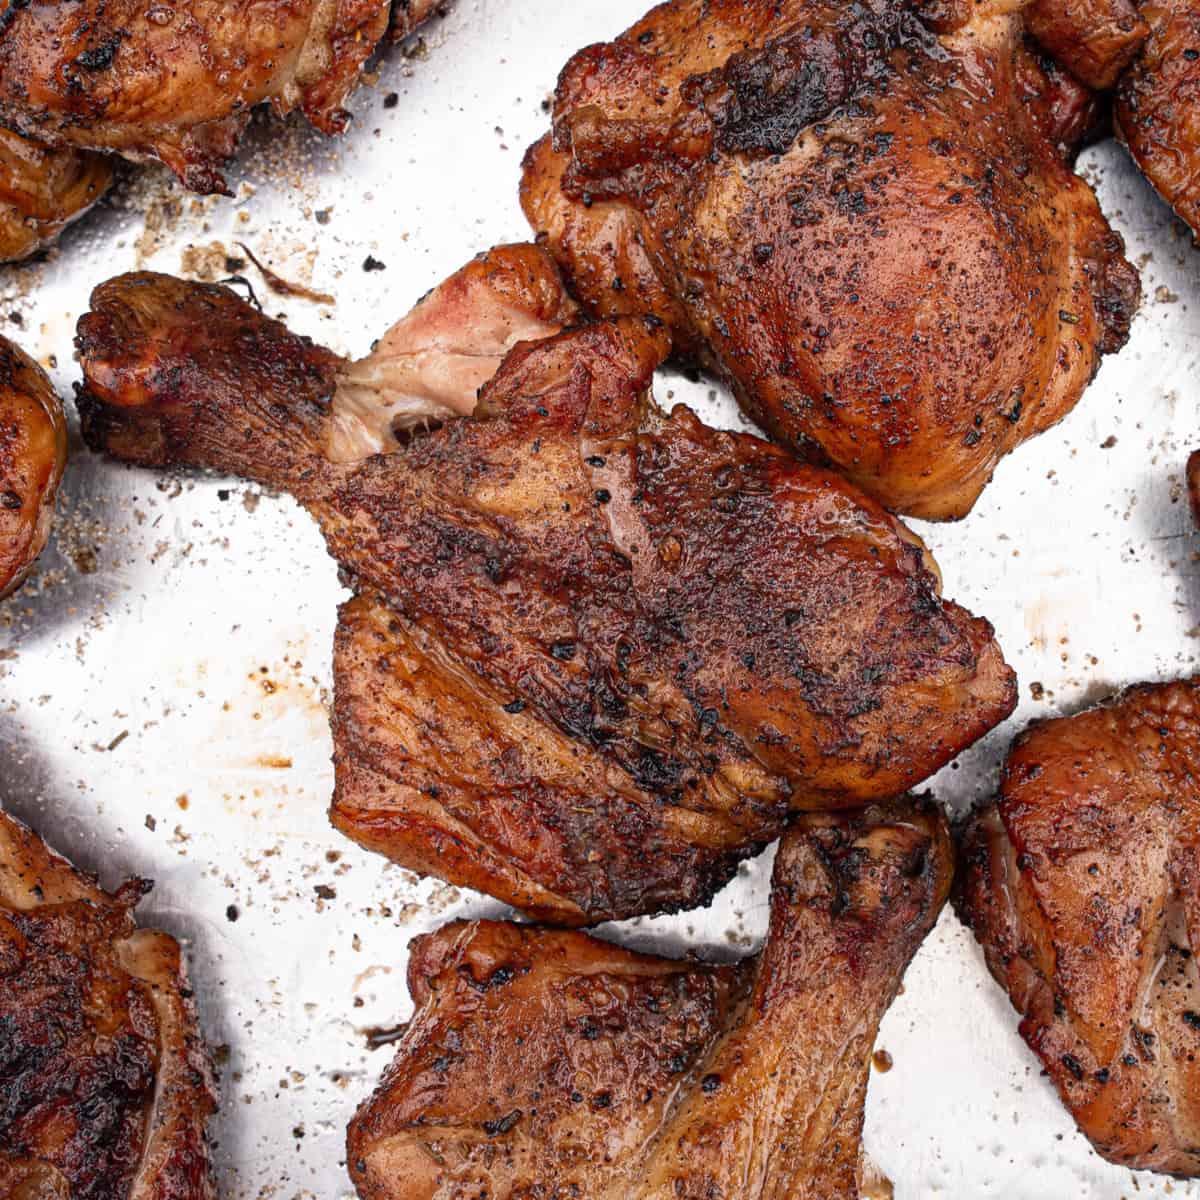
Step Four: Monitor Internal Temperature
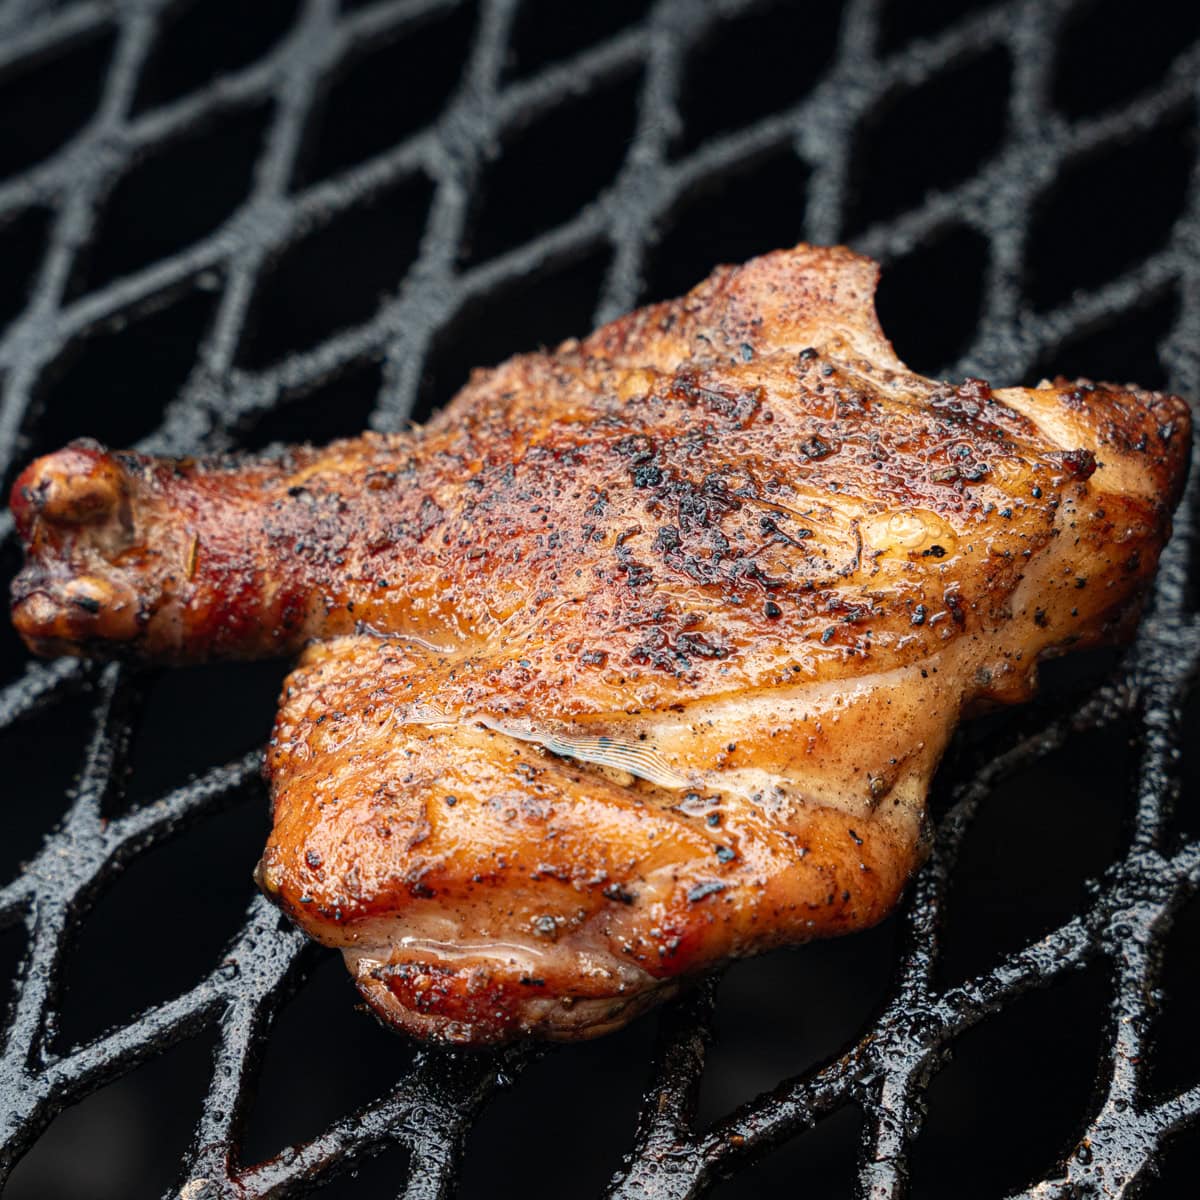
As the chicken cooks, keep an eye on the internal temperature. According to USDA guidelines, chicken should reach at least 165°F for safe consumption. However, I prefer taking dark meat poultry like thighs and drumsticks to 175°F-185°F. I’ve found over the years that dark meat is so forgiving that it’s significantly harder to dry out, but extending the cooking time gives you a few extra opportunities to baste the drumsticks with fat, enhancing flavor, color, and the crispiness of the skin.
Also, because the chicken is butterflied, the total cooking time is usually ~30 minutes, much faster than whole drumsticks and much more predictable. So, once those factors I mentioned have all been met (i.e., ideal temperature range, color, and skin texture), you can pull the chicken from the grill.
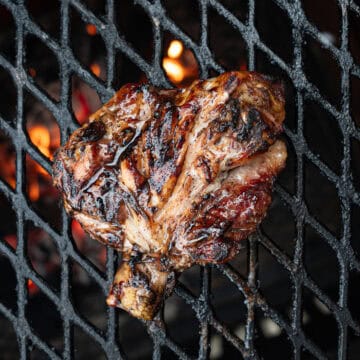
Managing the Heat
Transparently, I made these drumsticks on my 1904 Pits Trolley, which is my favorite smoker and perfect for direct-heat cooking because the firebox is two feet below the grates, giving a ton of flexibility for temperature control, and it tends to be much more forgiving on your meats than a traditional grill.
That said, if you’re working with a traditional charcoal or gas grill, it's helpful to set up two zones: one hot, direct zone and one cooler, indirect zone. Think of the cooler zone as culinary insurance against flare-ups. Start over direct heat for char, then move to the indirect zone if the skin is browning faster than the meat is cooking. I’d recommend moving the drumsticks to the indirect side before basting with duck fat or any other oil to prevent flare-ups.
Think of it as your crutch — it’s there to assist in case things ever get too dicey or the meat is cooking too fast.
(Optional) Step Five: Optional Glaze Finish
If you’re glazing, do it during the last 5 minutes of cooking over indirect heat. This allows the glaze to tack on without burning.
Here are a few options that I have up on the site that I love with chicken:
Each works beautifully not only with this butterflied chicken technique but also with thighs, quarters, and halves.
Alternate Cooking Methods (No Grill Required)
I know that not everyone loves grilling as much as I do, or evenhas access to a grill. Because of that, I wanted to share a few other ways to cook these butterflied drumsticks.
- Oven: Bake on a rack at 425°F for 25–30 minutes. You can broil briefly to crisp at the end if desired, although it isn’t required.
- Air Fryer: 390°F for 18–22 minutes, flipping halfway. When I’m cooking indoors, this is my favorite option and one I tend to lean on.
- Fried: I’m not one of these people who just love fried foods. Don’t get me wrong, it has its place, but typically, there’s something else I’d like to make or choose on a menu over a piece of fried chicken, pork, or anything, really. That being said, if you go this route, I would recommend dredging the drumsticks in flour, dipping them in a heavy cream/egg wash, then coating them fully in seasoned flour. Deep-fry that at 350°F until golden, and the internal temperature registers 165-175 degrees. You can pull these a little sooner than my grilled recommendation, since they’ll crisp up much faster in the fryer.
The grill delivers the best flavor, in my opinion, but these options work when needed.
Equipment
- Sharp knife — Ideally a curved boning knife
- Grill
- Tongs
- Instant‑read thermometer
- Basting brush
- Measuring cups & prep bowls
What to Serve With Butterflied Drumsticks
You can go in quite a variety of ways, but here are a few of my favorites to serve with these drumsticks:
Storing Leftovers
Let the drumsticks cool, then store them in an airtight container for 3-4 days. Refrigerate within two hours of grilling and reheat until hot. Use an oven or air fryer at 375°F to restore crispness as best as possible. If you’d like to cut up the meat for repurposing in other meals, it goes great in tacos, soups, sandwiches, and salads.
Recipe
Direct Heat Grilled Butterflied Chicken Drumsticks
Equipment
- Sharp knife
- grill
- tongs
- instant read thermometer
- Basting brush
- Measuring cups & prep bowls
Ingredients
- 2-3 lbs. chicken drumsticks
- 1:1 rati Coarse salt & pepper mix as needed
- 1 C duck fat or 1 stick unsalted butter
Instructions
- Preheat the grill to ~300-325 degrees. Meanwhile, take a sharp knife and make a cut vertically down the meatiest section of the drumstick (I tend to go right down the knuckle). Next, make cuts along the left and right sides of this vertical incision and fold open the chicken. Ideally, the drumstick will be able to lay flat at this point. Repeat this step as needed with the remaining chicken drumsticks.
- Once the drumsticks have been prepared, season each liberally with the salt & pepper mix or your favorite BBQ rub and transfer them to the grill.
- Cook until each side begins to get a nice, charred exterior, flipping as needed. Once the internal temperature registers ~150-165 degrees, begin to baste both sides of the chicken in duck fat (or butter if duck fat isn’t available). Allow the chicken to continue cooking until the skin has turned a deep golden-brown color, then remove from the grill.
- Plate the butterflied chicken with sides of choice and serve. Enjoy!
Notes
- If you’d like to glaze the chicken, do so ~5 minutes before pulling the chicken off the grill. Ideally, you want the glaze to tack on just long enough to stick, but not so long that it burns.

Leave a Reply