St. Louis-style ribs are almost always priced higher than whole spare ribs at the store. I was shopping recently and saw spare ribs for $1.99 per pound, while St. Louis cut racks were listed at $4.59 per pound. The primary difference? The St. Louis racks had already been trimmed.
If you’re willing to spend a few extra minutes at home, trimming spare ribs yourself is an easy way to save money. You’re paying for labor and presentation at the store, not a different cut of meat. When you trim them yourself, you control the shape of the rack, and you keep the rib tips, which are delicious and can be cooked separately.
I know some people avoid whole racks of spare ribs because they’re unsure how to trim them properly or intimidated by the thought of messing them up. And believe me, I fully understand the hesitation. But once you understand what you’re looking at and where to make your cuts, the process is simple and so easy to do.
No matter how you plan to cook your ribs — smoked, grilled, or direct heat — this step-by-step guide will show you how to trim spare ribs correctly. I’ll explain the difference between spare ribs and St. Louis style ribs, why trimming improves the final result, and the specific areas that tend to confuse you so you can feel confident trimming your own ribs the next time you grab a rack from the store.
Jump to:
Spare Ribs vs St. Louis Style: What’s the Difference?
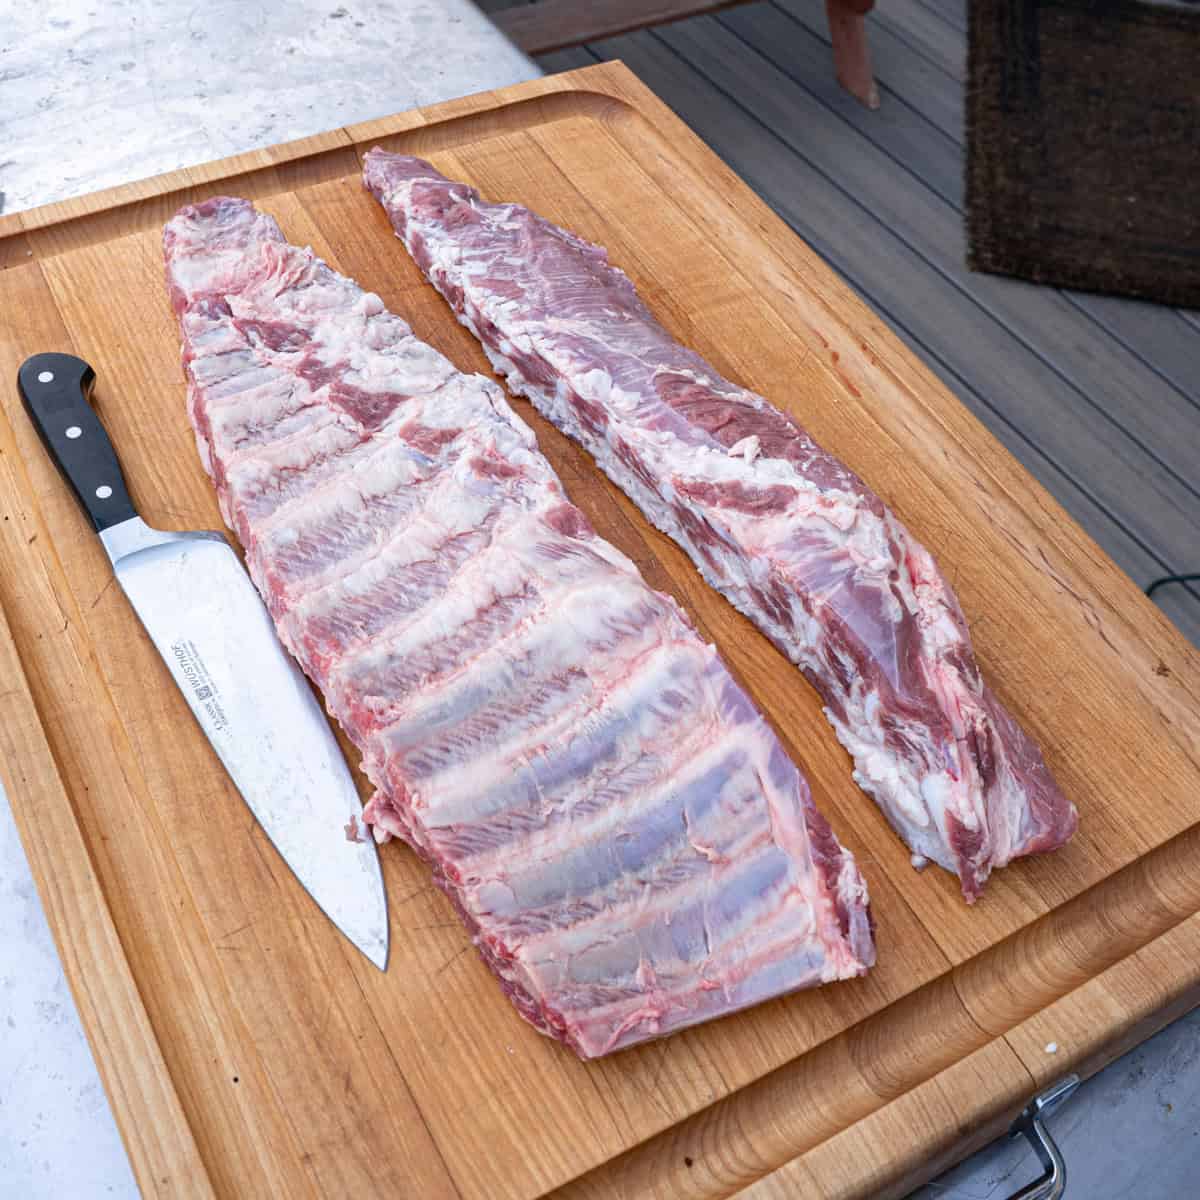
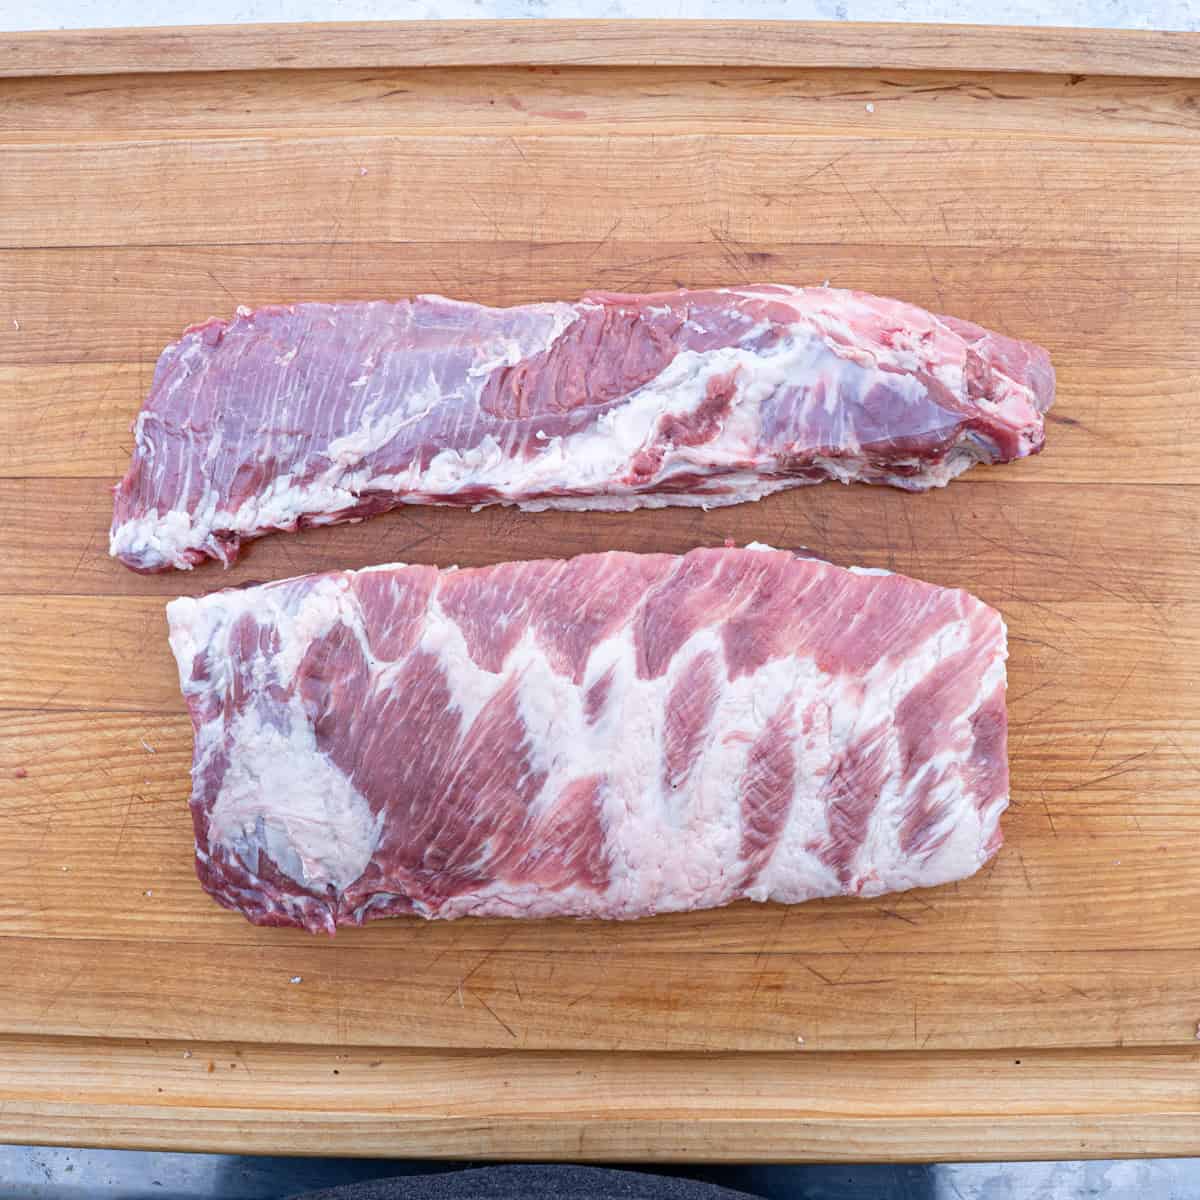
If you look closely at a full rack of pork spareribs, you’ll notice the rib bones stop before the rack does. Below the bones is a section composed mostly of meat, cartilage, and the breastbone — this section forms the rib tips. When you trim spare ribs into St. Louis-style, you remove the rib tips and the cartilage strip, squaring the rack into a clean rectangle. St. Louis cut ribs aren’t a different cut of pork — it’s simply spare ribs that have been trimmed into a uniform shape.

While it’s not an absolute necessity, many people prefer St. Louis cut ribs to full spare ribs because they are more uniform. Uniform racks cook more evenly. At 250°F, full spare ribs often take 4–5 hours, which can be longer than you might want to spend nursing a rack of ribs. Trimming them down to a St. Louis-style rack can shave 30 to 40 minutes off your total cook time (if not more), because the consistent thickness and less overall meat help heat circulate and cook every rib at the same pace.
Should You Trim Pork Spare Ribs?
You don’t technically have to trim pork spare ribs — they can be cooked straight from the package. In many places across the country — especially in Texas (think just about any BBQ joint on the Texas Monthly to 50 list) — this is the main way ribs are prepared and served. However, most places I’ve gotten ribs in Alabama and Georgia serve St. Louis-style ribs, which is what I’m used to. You can absolutely make fantastic ribs with traditional spares, but trimming can improve the final result — especially if you’re newer to BBQ and want an easier rack to manage.
Why is that? Untrimmed spareribs tend to have two major issues if not trimmed properly:
- Have thin edges that dry out faster.
- Cook unevenly due to the different sizes of the ribs in a full rack of spareribs.
If you’re cooking casually in the backyard and aren’t overly concerned about a couple of end pieces being a little overdone, you can get away with removing only the flap and the large fat deposits. But if you want even heat distribution, better bark formation, and a cleaner presentation, trimming is worth the extra few minutes. It’s one of those small prep steps that makes a noticeable difference once the ribs hit the smoker.
How to Trim Pork Spare Ribs (Step-by-Step Guide)
Here’s exactly how I trim spare ribs before cooking. Before you start, I recommend having a sharp, flexible boning knife for exact cuts and a chef’s knife for when you need a knife for cutting with a little more weight. A sturdy cutting board and a few paper towels will also come in handy for defining your workspace, gripping the slippery membrane, and keeping your work area clean. If you want to be extra safe, place a damp towel under your cutting board. That will help keep it from sliding around while you work on the ribs. Having these basic tools ready will make the trimming process much smoother.
Step 1: Remove the Spare Ribs from the Packaging

First things first: start with cold ribs—they are significantly easier to trim this way. Whether it's ribs or any other cut of meat, trimming them at room temperature is significantly harder.
The next step seems self-explanatory, but I like to start here because once you get the ribs out of the packaging, they're usually sopping wet. Take this time pat the rack of ribs dry with a paper towel (or several). This will also make the ribs easier to work with.
Step 2: Remove the Flap
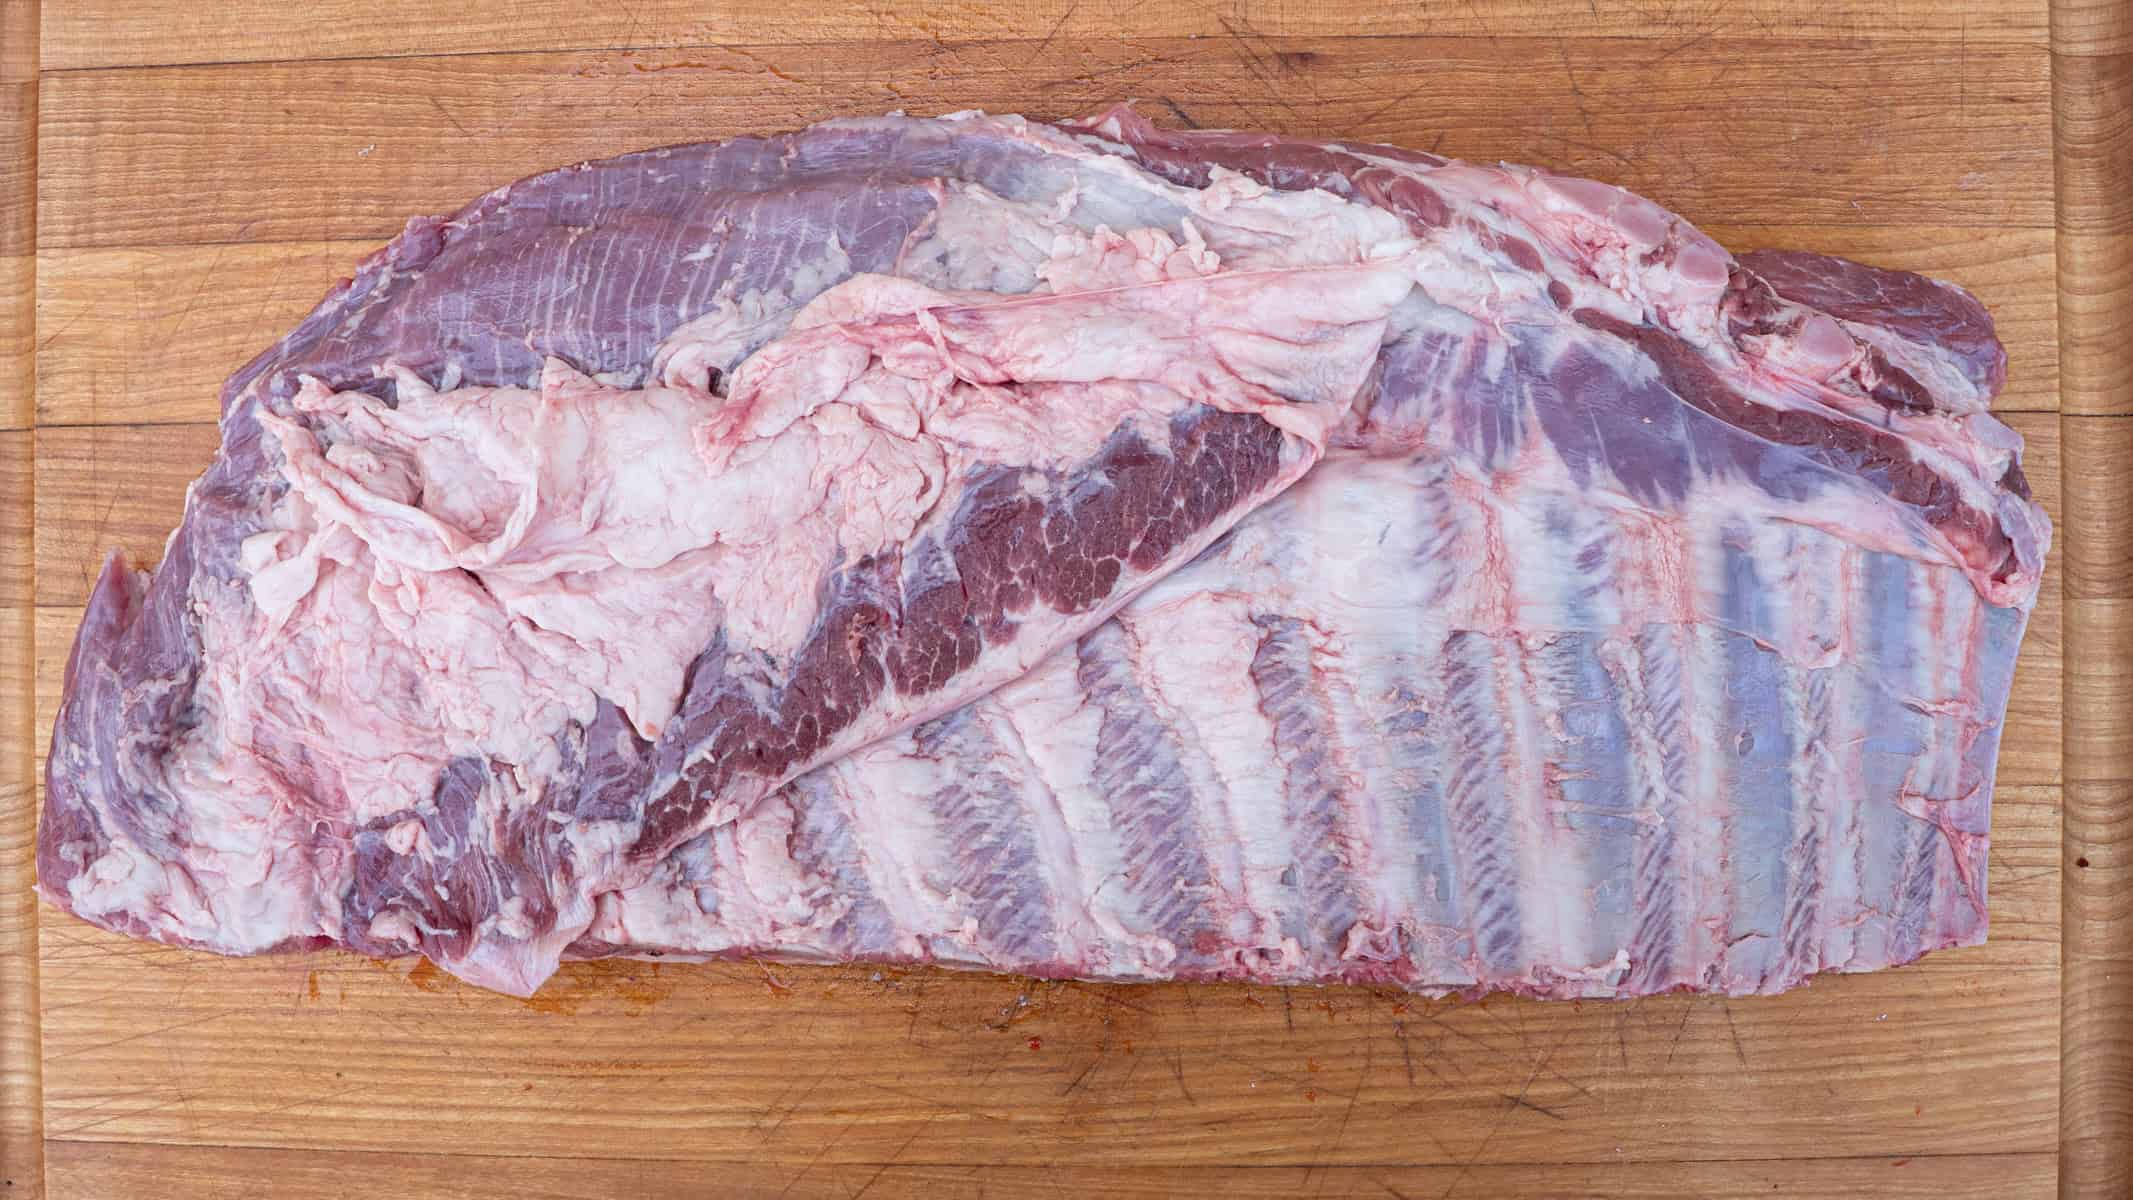
People have all sorts of ways to trim ribs, but when I cut spare ribs into St. Louis-style ribs, I like to start by prepping them bone-side up. You’ll usually see a thin flap of meat attached along the center of the primary rib bones. Use a sharp knife to remove it completely. The reason you want to remove that flap is that it cooks faster than the rest of the rack, and it will dry out or burn—there’s just no use keeping it on. Removing it also helps the rack cook evenly. You can save it to throw on the grill for a snack later if it's thick enough, but honestly, I toss that part more times than not.
Step 3: Create the St. Louis Style Cut
Now look at the bone side and identify where the rib bones end, and the cartilage begins. The lower strip is the rib tip section. I like to run my knife down this section where I plan to cut, “draw a line” on the ribs, so that when I make the actual cuts, I can be consistent. That helps me produce uniform cuts each time and prevents me from cutting too much — or too little — off of the ribs. A common mistake is cutting too high above the cartilage, which shaves off valuable meat from the rib ends and leads to thinner edges that tend to dry out during cooking. Conversely, cutting too low can leave excess cartilage attached, resulting in an uneven rack and inconsistent texture.
Next, follow the line you just made with the knife to cut parallel to the rib bones and remove that cartilage strip and the rib tips. When making this cut, make sure you don’t angle your knife towards the rib bones. Maintaining a straight, confident cut along the line where the bones end and the cartilage begins will help ensure the most uniform and effective result.
What to Do with the Rib Tips
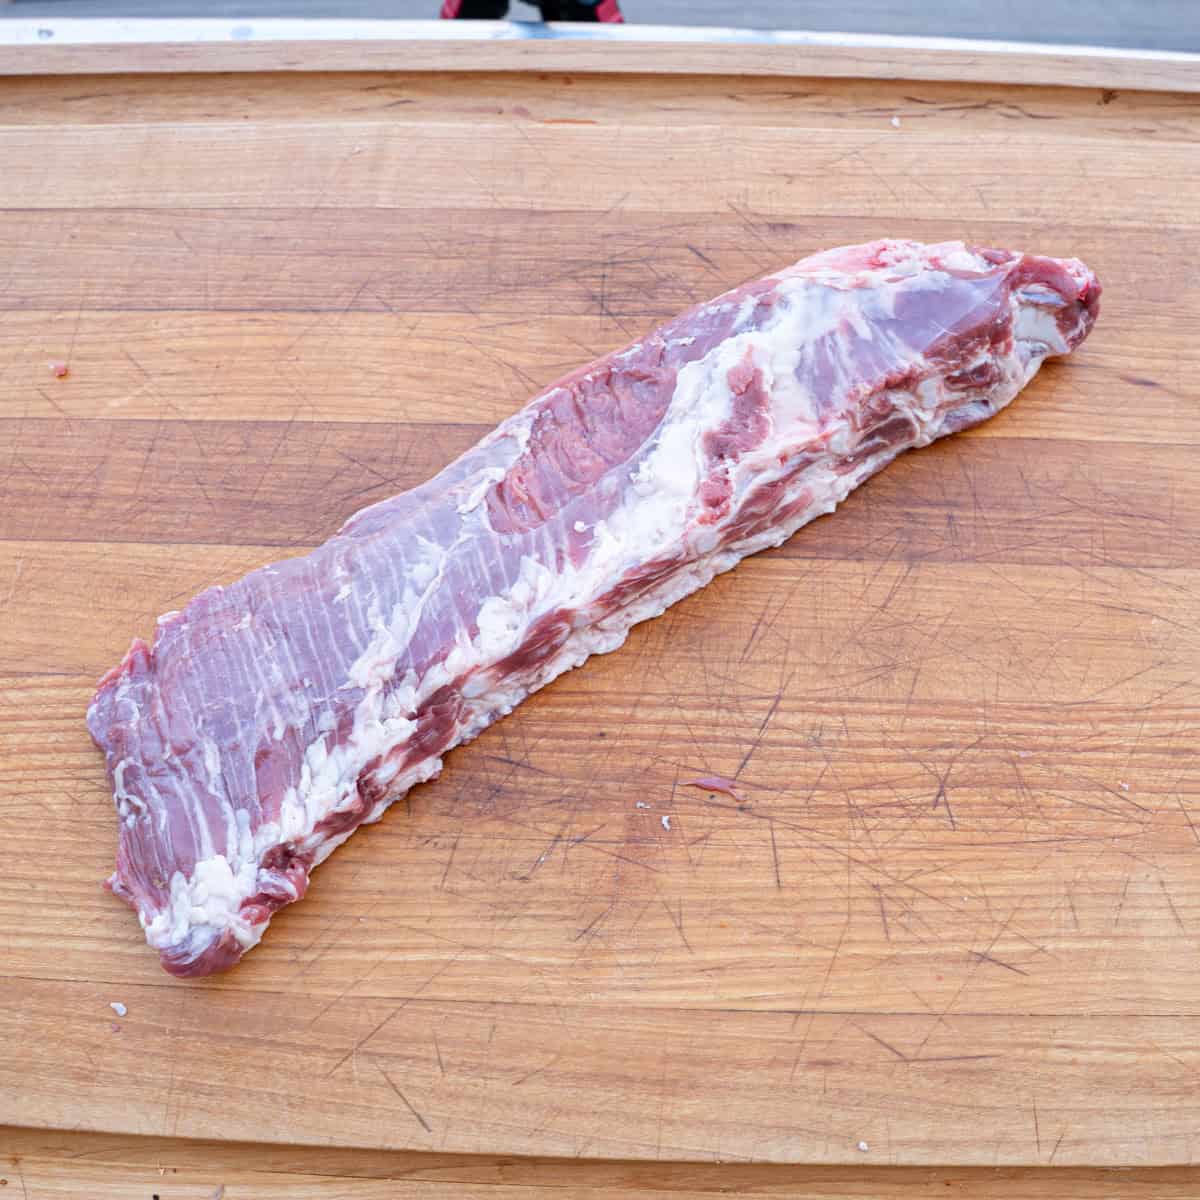
Rib tips are not scrap! I highly recommend keeping them on hand to cook with your ribs. They’re:
- Excellent smoked separately
- Great chopped into baked beans
- Perfect for experimenting with sauces
- Ideal for snacking during a longer rib cook (they cook way faster than the ribs themselves)
Depending on the size of the rack, trimming spare ribs into St. Louis style can remove anywhere from half a pound to a full pound of rib tips. That doesn’t mean it’s a waste; it just shifts the meat into a different use. Rib tips still cook beautifully—they’re not ideal for uniform rack presentation. If you aren’t planning to cook them right away, you can refrigerate them for up to two days or freeze them in a sealed bag for later use. This way, you avoid waste and always have extra pork on hand for another meal or batch of beans.
Want to see how I like to make them? Check out my Smoked Rib Tips recipe here.
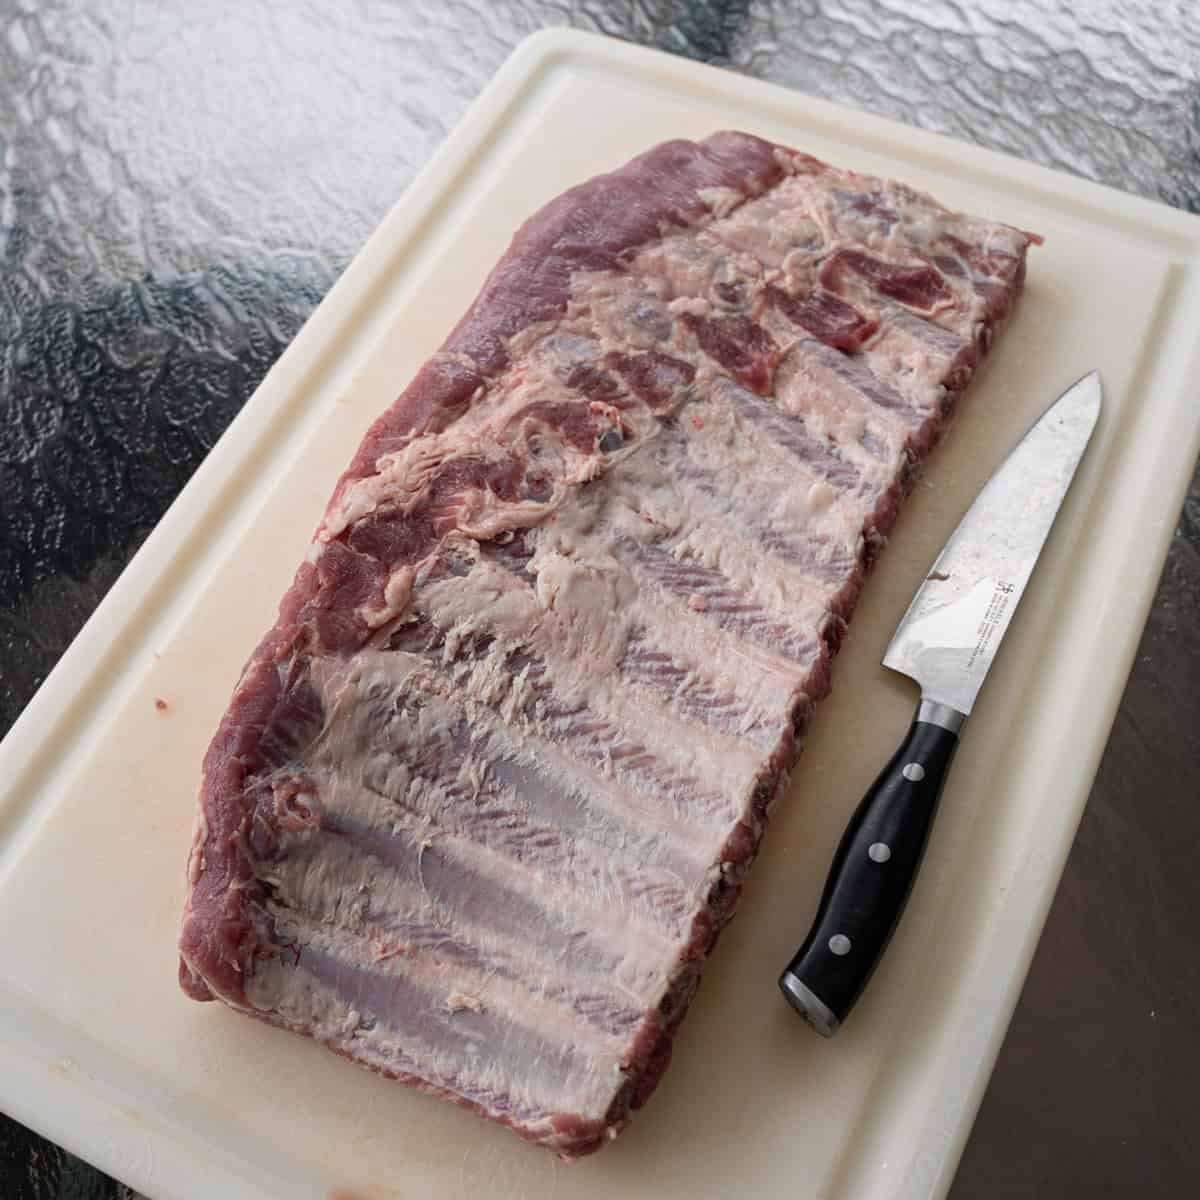
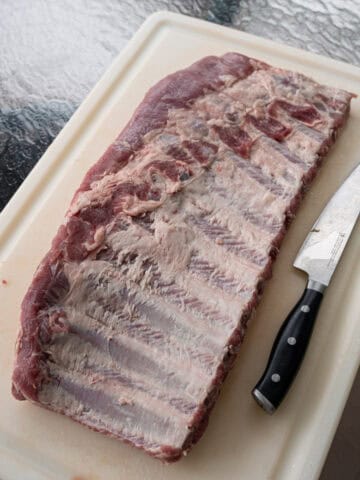
Step 4: Remove the Rib Bones on Either End
To square up the ribs, I like to remove the last rib on either side. On the thicker end, I find that simply removing one rib suffices. On the thinner end, I sometimes remove 2-3 ribs depending on how small they are. Like the flap meat, these ends will burn or cook faster, so there’s no need to keep them. What remains is a rectangular rack with evenly spaced rib bones and uniform thickness.
Note
Before you start trimming, it helps to remember: you do not need to get a perfect cut on your first try — I certainly did not. Most people make small mistakes the first few times they trim ribs, and even if your cuts aren’t exact, your ribs will still turn out delicious. Just keep practicing and even make notes if you need to. The more you practice, the better you will get at trimming your ribs.
Step 5: Remove the Membrane
The final step on the bone side is removing the thin silver membrane. There are several ways to do it, but I’ve found the most reliable method is starting in the center of the rack.
Using a paper towel, gently lift the membrane until you can slide a finger underneath it. Once you have a solid grip, pull it back slowly and steadily, keeping tension on it so it stays intact instead of tearing. Work it across the rack in one controlled motion until the membrane is completely removed.
Does Removing the Membrane Make a Difference?
This is one of those BBQ topics that's very polarizing, and if you asked 10 people, you’d probably get different answers more times than not. Advocates of removing the membrane say it is vital to improve smoke penetration, help seasoning adhere better, and prevent a rubbery texture on the bottom of the ribs. Others will tell you they can't tell the difference between left on and off.
For my two cents, I started taking the membrane off religiously because I wanted to do what the guys on the competition BBQ circuit were doing. I learned over the years, though, that it isn’t always necessary and depends on the temperature at which you cook your ribs. Now, I remove the membrane when I’m smoking ribs indirectly at 225-275 degrees, but I leave it on when I’m grilling or making direct-heat ribs, since those cooks run 275-325 degrees. I actually find that the membrane improves the texture in that scenario. At the end of the day, though, it really comes dependent on personal preference and how you like to cook your ribs. If you’d like to split the difference, I’ve heard of several people leaving the membrane on but scouring it.
Step 6: Trim Excess Fat
The last thing that I do is trim any remaining excess fat. The bone side of the ribs should be good to go at this point, so I primarily do this on the meat side. Look for thick surface fat deposits and trim those down. You don’t need to remove all the fat — just large pockets that won’t render during cooking.
Leave thin layers of fat intact, as they serve an important role during cooking. These thin layers help insulate the meat, preventing it from drying out during long cook times, and gradually render, improving both moisture retention and flavor development in the finished ribs.
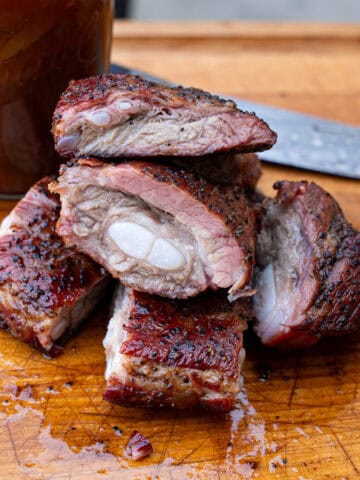
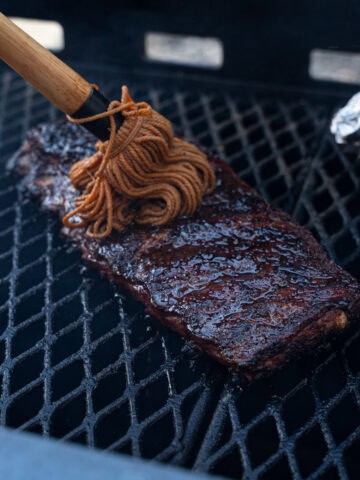
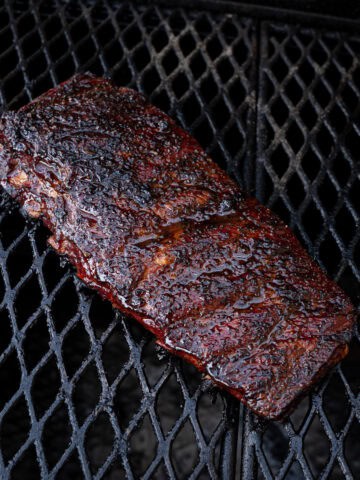
Once you’ve completed this step, you’ll have a rack of homemade St. Louis Style Ribs ready to throw on the smoker.
Ready to Cook Ribs?
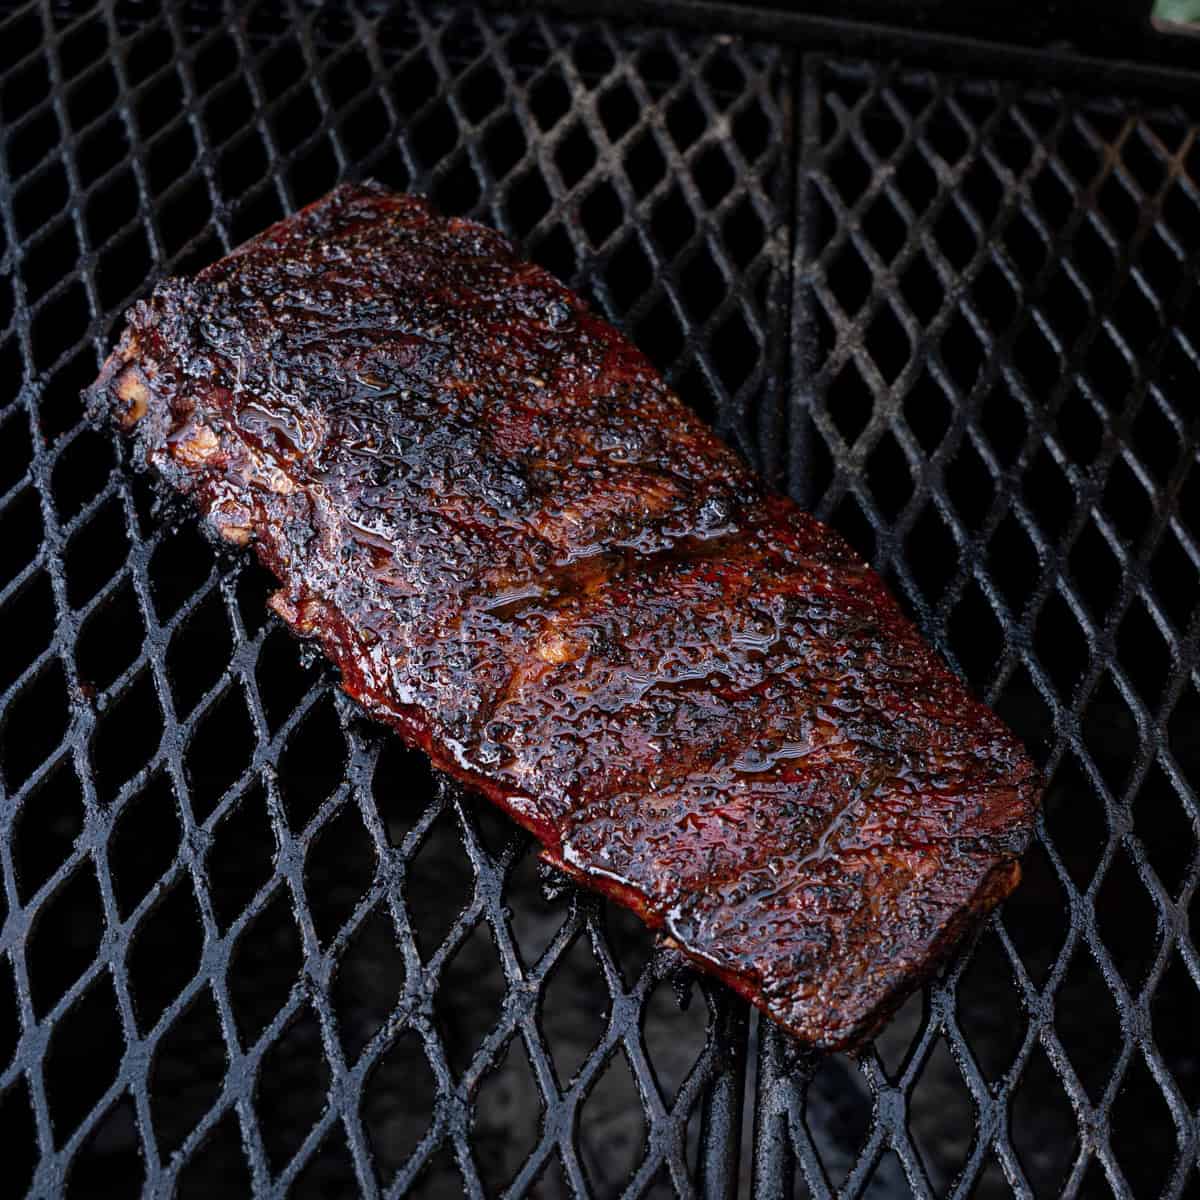
Now that you know how to trim pork spare ribs, it’s time to put that rack to work.
If you’re looking for some of my favorite rib recipes and cooking guides, here are a few to check out:
Leave a Reply