If you’ve ever roasted a whole chicken or turkey and ended up with dry breast meat and undercooked thighs, you’re not alone. Cooking a whole bird evenly can be tricky — but the simple technique known as spatchcocking a chicken solves most of those problems.
If you’ve never tried it before, this step-by-step guide will show you exactly how to spatchcock a chicken, why the technique works so well, and some tips and tricks, including product selection, to help your cooking go as smoothly as possible. Once you learn this method, it might become your favorite way to cook a whole chicken.
Jump to:
What Does Spatchcocking a Chicken Mean?
The first time I heard the term spatchcock, I didn’t know what to think. Honestly, it sounds like such an unusual term, but the technique itself is simple. Spatchcocking (basically butterflying a chicken) means removing the backbone and flattening the bird before cooking.
Why Spatchcock a Chicken?
What you’re really doing with this technique is creating more surface area when cooking, which can solve several common cooking problems and produce better results.
Faster Cooking
One of the biggest advantages is that spatchcock chicken cooks faster than a traditional whole roast chicken. If you think about it, it makes a lot of sense — you’re essentially increasing the surface area of the bird (i.e., amount of the bird touching the heat source) and creating a thinner cut of meat. A whole chicken or turkey is pretty thick, which is why you cook them for a prolonged period, but spatchcocking the chicken lets you take the same bird and significantly cut the cooking time (usually 30–40% less total cooking time). I’ve attached a guide below to help you plan for your cook, no matter if you’re cooking in the oven or on the grill:
Spatchcock Chicken Cooking Time Chart
Oven Roasting (at 425°F ):
- 3.5–4 lb chicken: 40–50 minutes
- 4.5–5 lb chicken: 50–60 minutes
Grill (medium-high heat, around 400–425°F):
- 3.5–4 lb chicken: 35–45 minutes
- 4.5–5 lb chicken: 45–55 minutes
Hot & Fast Smoking (~325°F):
- 3.5–4 lb chicken: 45–60 minutes
- 4.5–5 lb chicken: 60–75 minutes
Note: Always check that the thickest part of the breast and the thigh reach an internal temperature of 165°F (74°C) for safe, juicy results. I’ll typically pull a chicken off the grill around 160°F to let it carryover cook to that range.
Crispier Skin
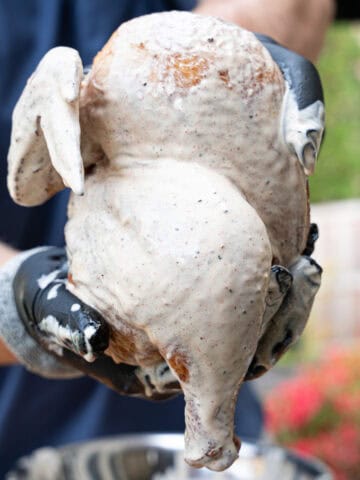
Because the chicken is spread out flat, much more of its skin is directly exposed to heat. This allows the fat under the skin to render properly, creating beautifully crispy skin across the entire bird when cooking at higher temperatures (especially ~400 degrees). It is very difficult, even with this technique, to get a crispy skin on a chicken at lower temperatures—especially at 325 degrees or below. I’ll also note that cooking on a charcoal grill has always helped give me crispier skin than cooking a similar chicken on a pellet grill, for what it’s worth.
More Even Cooking
Flattening the bird allows heat to reach every part evenly, so it cooks as a single layer rather than in uneven sections. Unlike a whole roasted chicken—where the breast often overcooks before the thighs are done—spatchcocking helps both white and dark meat finish at the same time, keeping the breast juicy and the entire bird evenly cooked. I originally took to this technique because my Thanksgiving turkey came out so much better when spatchcocked than my in-laws' traditionally oven-roasted turkey.
Perfect for Grilling or Smoking
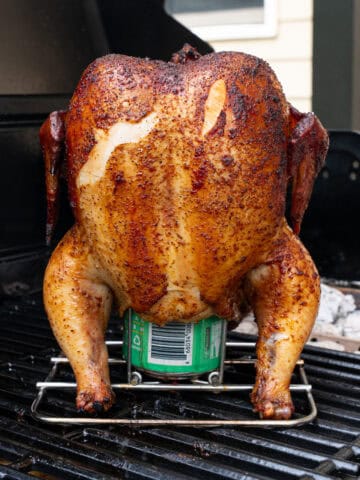
This seems small, but it’s true. A spatchcock chicken sits perfectly flat on a grill or smoker. That makes it so much easier than trying to balance a beer in the rear of a chicken or continually turning a chicken on the grill. Plus, this allows heat and smoke to circulate evenly around the entire bird. Because of their size, a spatchcocked chicken will fit in just about any size grill you’ve likely got in the backyard, too.
Best Chicken Size for Spatchcocking
When you go to the store to buy a whole chicken, there are generally a lot of options to choose from, and it’s easy to just pick the one that is closest to you. But it’s important to take the extra step to inspect the bird you’re looking to buy, because not all chickens cook the same once flattened. Ideally, you want to buy a smaller bird — 3.5 -5 lbs. in total, but I prefer staying closer to the 3.5 lbs. side when I can. Much like a turkey, you pick the smaller chickens because they aren’t quite as tough and tend to cook more evenly. Plus, you can always grab a second if you need to — two 3.5 lbs. birds will comfortably fit on most grills out there.
If possible, look for air-chilled chickens; they yield crispier skin when roasted or grilled.
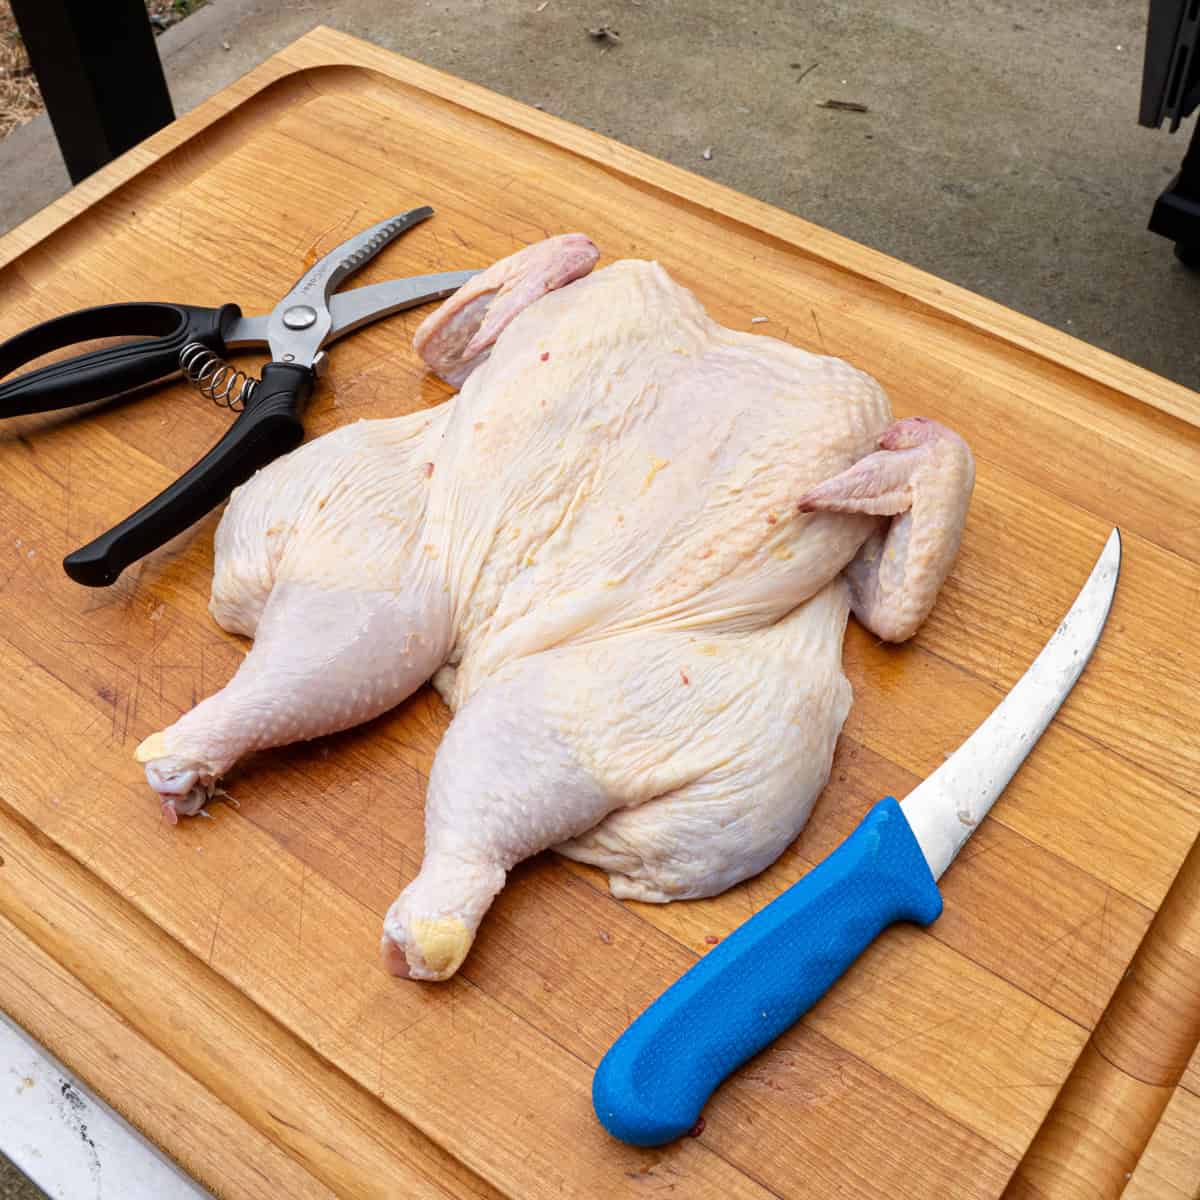
Equipment You’ll Need
You don’t need many tools to spatchcock a chicken, but having the right ones makes the process much easier.
Flexible boning knife
No matter what I’m cutting, I’ve always got my boning knife with me. I find it’s the most maneuverable knife I own, and I highly recommend buying one if you don’t have one—it’s great for cutting just about anything. Here’s the one that I use: it’s cheap but does a great job. I replace it about once a year due to heavy use. For chicken, it’s especially great for trimming fat and getting into any tight spots a chef’s knife can’t easily reach.
Large cutting board
Use a sturdy cutting board with enough space to maneuver the chicken safely. Plus, if you have a cutting board with grooves, it’s even better, so that it can help catch any rogue juices that come out of the chicken.
Kitchen shears
These are among my favorite tools for breaking down a chicken. I find it especially helpful when removing the backbone for spatchcocking poultry.
Paper towels
These are a must when cutting any large cuts of meat, poultry, or seafood, but especially with chicken. Patting the chicken dry helps keep things from slipping while you work, and you’ll need something to catch the liquids that inevitably drip from the chicken.
Sharp chef’s knife (optional)
You may not need a chef’s knife for this process, but I like to keep one on hand just in case. I find it helpful to cut out the backbone when I have a dull set of kitchen shears (or no shears at all).
Step-by-Step Guide: How to Spatchcock a Chicken
If you’re starting with a raw whole chicken straight from the store, the process is very simple. Follow these step-by-step instructions, and you will have a flattened chicken ready to cook in no time.
Step 1: Remove the Chicken from the Packaging
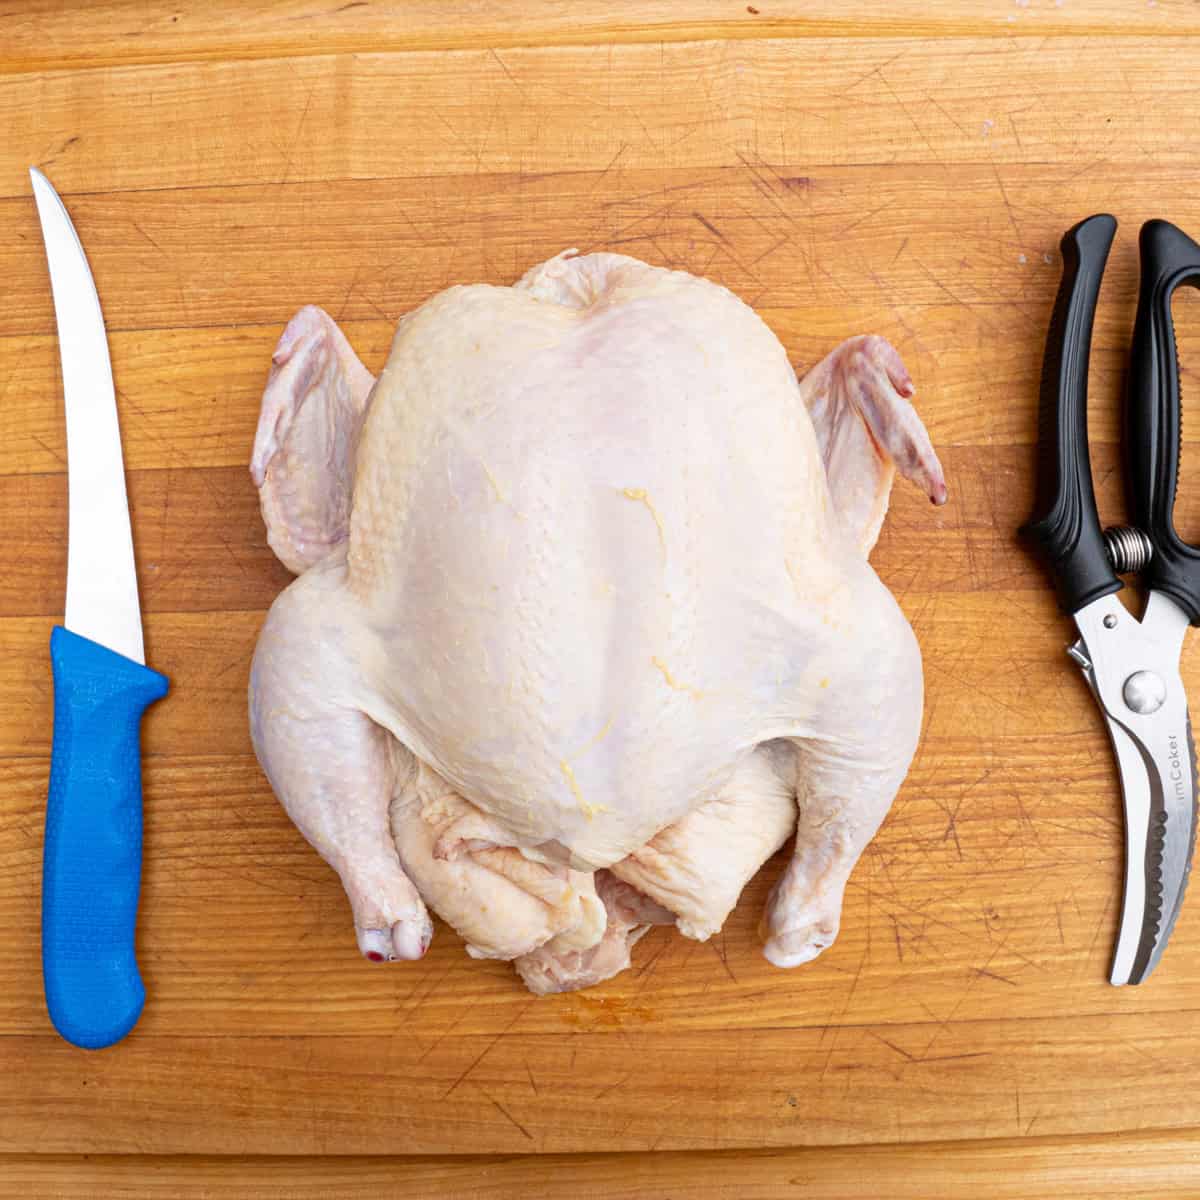
Remove the whole chicken from the packaging and any giblets (if any) from the cavity. Pat the bird dry with paper towels to make it easier to grip and maneuver, then place it breast-side down on a cutting board. Starting with the back facing up makes the first cuts easier.
Step 2: Locate the Backbone
Next, locate the backbone by running your fingers down the center of the chicken’s back. You’ll feel the backbone running from the neck down to the tail. To spatchcock the chicken, you’ll remove this bone so the bird can lie flat.
Step 3: Remove the Backbone
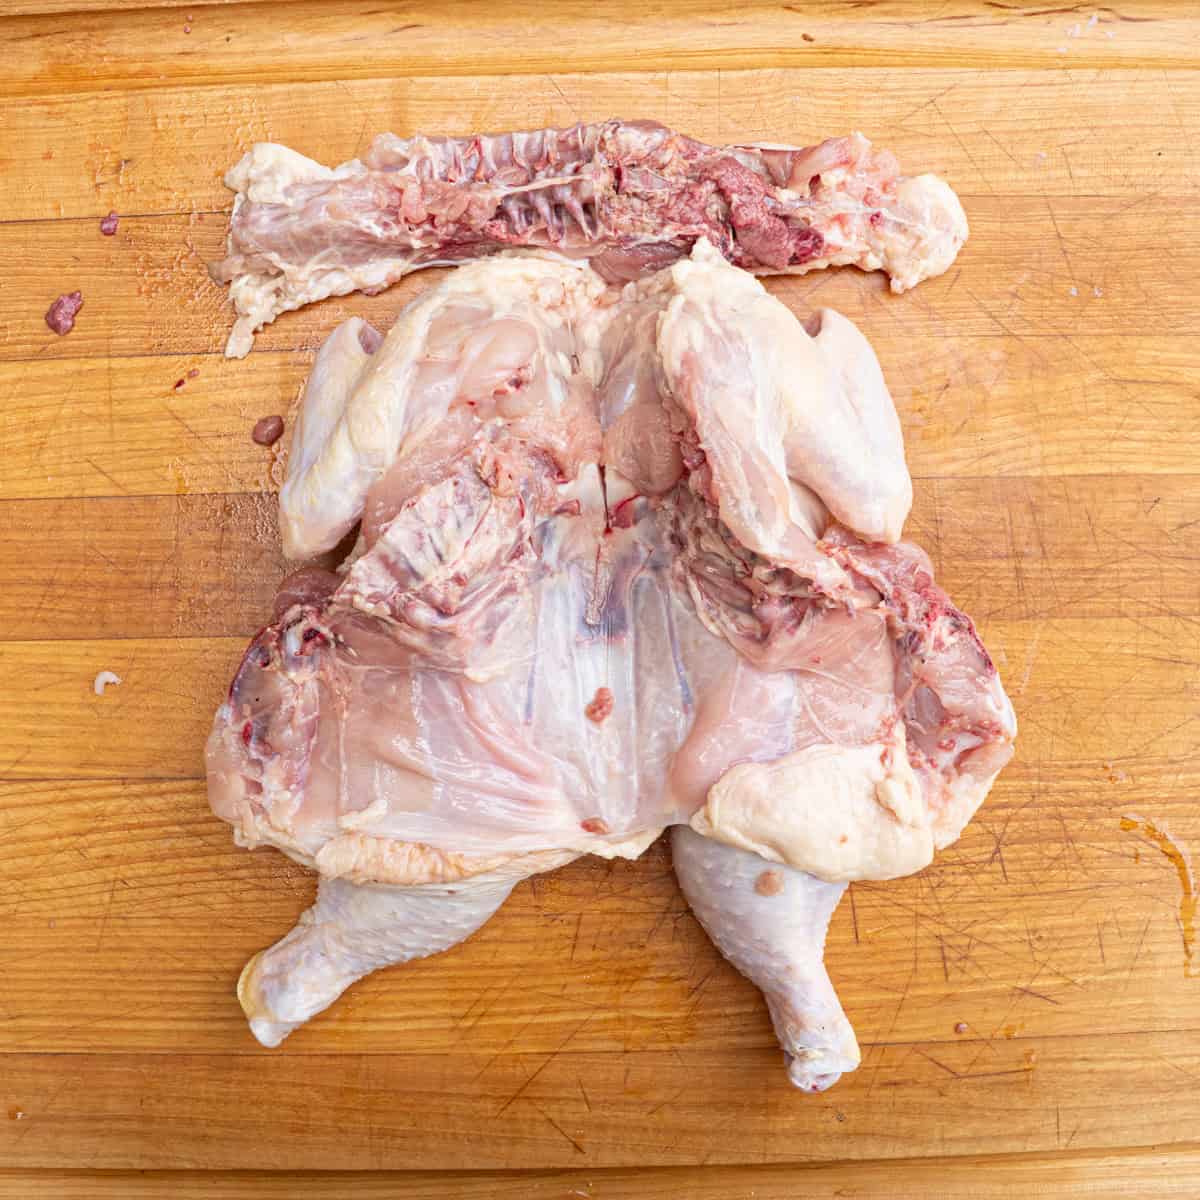
Using your kitchen shears or a sharp knife, cut down one side of the backbone from tail to neck. Work slowly and follow the bone as closely as possible — you’ll mostly be cutting through small rib bones. When you get to the end, flip the bird around 180 degrees and repeat on the other side until the backbone comes free.
Step 4: Scour the Breastbone
With the chicken cavity now open, use your knife to make a vertical incision down the center of the exposed breastbone (inside of the cavity). This makes it easier to “pop” in the next step.
Step 5: Flatten the Chicken
Flip the chicken breast-side up and press firmly on the thickest part of the breasts until you hear a crack. This breaks the breastbone, which was loosened in the previous step, and allows the bird to lie completely flat. Congrats! You’ve spatchcocked your chicken and are now ready to cook.
If you want to see how I cooked this bird, check out my spatchcock chicken recipe that I made on a pellet grill here. Want to take this a step further and break down the whole chicken? Check out my step-by-step guide here.
Watch the Full Spatchcock Chicken Tutorial
If you prefer learning by watching, check out my YouTube video where I walk through the whole process of spatchcocking a chicken—it makes it much easier to follow.

Leave a Reply