If you’ve ever compared prices at the grocery store, you’ve probably noticed something pretty quickly: A whole chicken is almost always cheaper than buying individually packed, pre-cut chicken pieces. Unfortunately, most people don’t know just how easy it is to cut a whole chicken and realize those savings, so they grab the pre-cut packages of breasts, thighs, wings, and drumsticks instead.
I’m going to attempt to fix that with this article, because learning this one simple kitchen skill can save you money and give you way more control over how your chicken cooks. Keep reading, and I’ll walk you through how to cut a whole chicken into eight clean pieces, starting with a raw yard bird that anyone can pick up from the store and try for themselves.
Jump to:
Why Learning to Cut a Whole Chicken Saves Money
Buying pre-cut chicken is convenient, but you’re paying extra for someone else to do the work. A whole chicken is usually the cheapest way to buy poultry (unless you get lucky and find some chicken quarters on sale, which I see every once in a while). Grocery stores charge more for individual chicken pieces because the butchering has already been done.
When you learn how to cut a whole chicken yourself, you get several advantages:
- As we discussed, you save money compared to packaged cuts. For example, it’s common to see prices like this:
- Whole chicken → $1.80 per pound (or less — I’ve found some incredible deals on these at wholesale retailers like Costco).
- Chicken breasts → $4–6 per pound
- Chicken wings → $4-6 per pound
- You control the exact size of your chicken pieces.
- You get multiple cuts (i.e., multiple meals) from one bird. That means one whole chicken can easily turn into:
- 2 chicken breasts
- 2 thighs
- 2 drumsticks
- 2 wings
- You can use the leftover bones for homemade chicken stock if you’re feeling really adventurous.
Plus, once you’ve done it a couple of times, breaking down a whole chicken doesn’t take more than about five minutes.
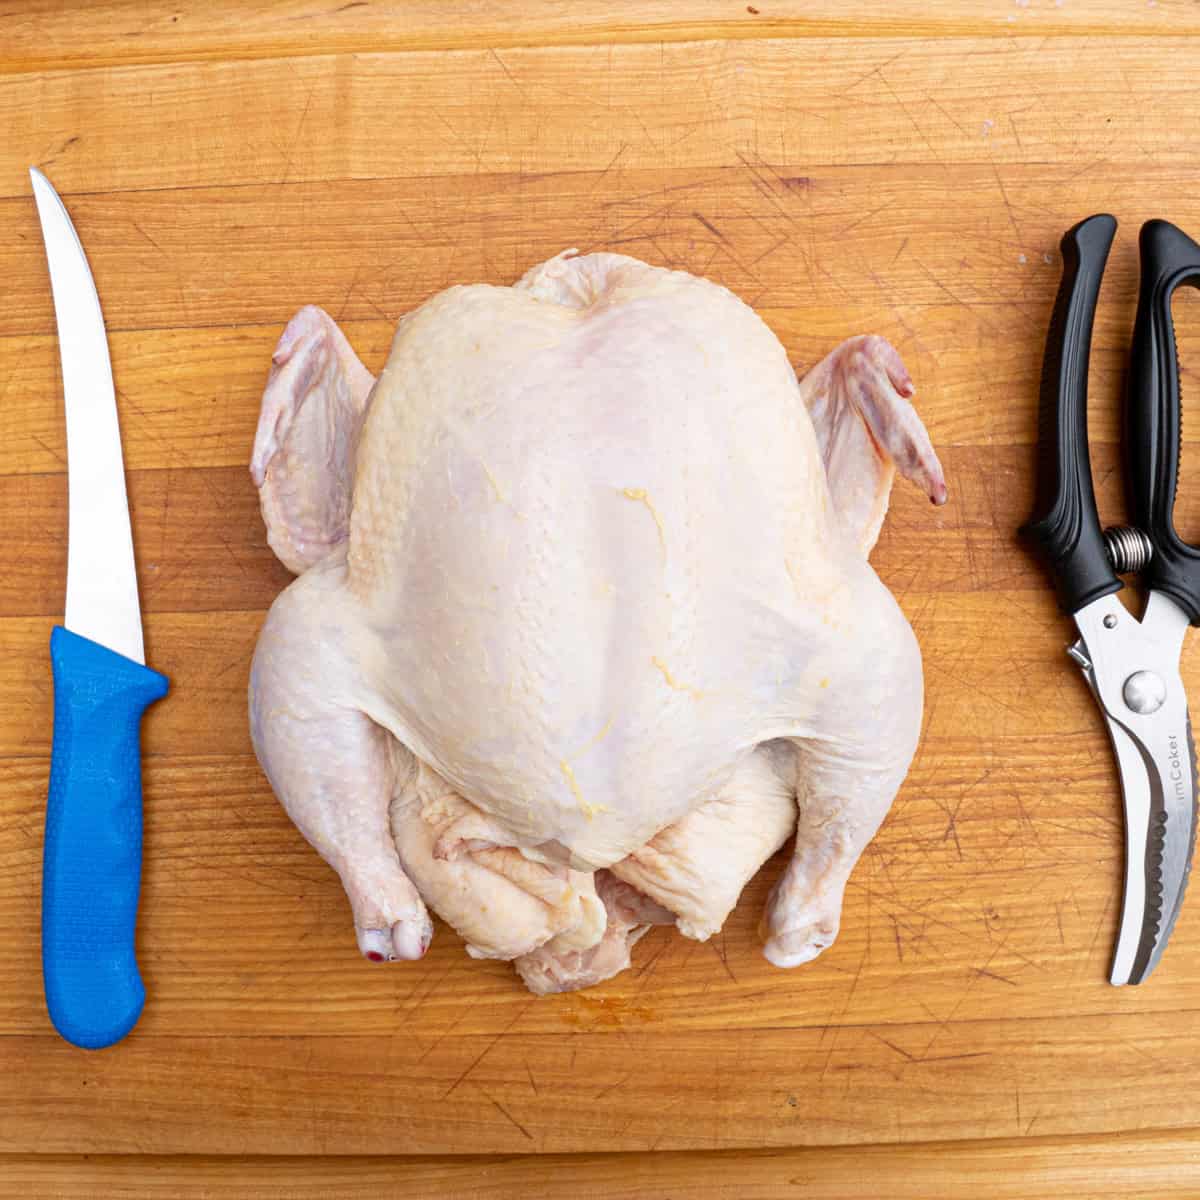
Equipment You’ll Need
You don’t need a lot of tools to break down a whole chicken, but having the right tools makes the process much easier.
Sharp Chef’s Knife
A good chef’s knife will handle almost the entire process. Most of the cuts are through joints, not bone, so a sharp blade is key. You can substitute a chef’s knife with a sturdy cleaver if you have one, particularly when cutting the quarters, thighs, and drumsticks.
Flexible Boning Knife
No matter what I’m cutting, I’ve always got my boning knife with me. I find it’s the most maneuverable knife I own, and I highly recommend buying one if you don’t have one—it’s great for cutting just about anything. Here’s the one that I use: it’s cheap but does a great job. I replace it about once a year due to heavy use. For chicken, it’s especially great for trimming fat and getting into any tight spots the chef’s knife can’t easily reach.
Large Cutting Board
Use a sturdy cutting board with enough space to maneuver the chicken safely. Plus, if you have a cutting board with grooves, it’s even better, so that it can help catch any rogue juices that come out of the chicken.
Kitchen Shears
These are one of my favorite tools to use when breaking down a chicken, cutting up whole salmon, heck, my wife even uses it for our kids' pizza! I find it especially helpful when removing the backbone during the spatchcock step.
Paper Towels
These are a must when cutting any large cuts of meat, poultry, or seafood, but especially with chicken. Patting the chicken dry aids in keeping things from slipping while you work, and you’ll need something to catch the liquids that inevitably drip from the chicken.
Step-by-Step Tutorial: How to Cut a Whole Chicken
If you're starting with a raw whole chicken straight from the store, the easiest way to break it down is to remove the backbone first, split the bird in half, and then separate the individual pieces.
Step 1: Remove the Chicken from the Packaging
Remove the whole chicken from the packaging and any giblets (if any) from the cavity. Pat the bird dry with paper towels to make it easier to grip and maneuver, then place it breast-side down on a cutting board. Starting with the back facing up makes the first cuts easier.
Step 2: Spatchcock the Chicken (Remove the Backbone)
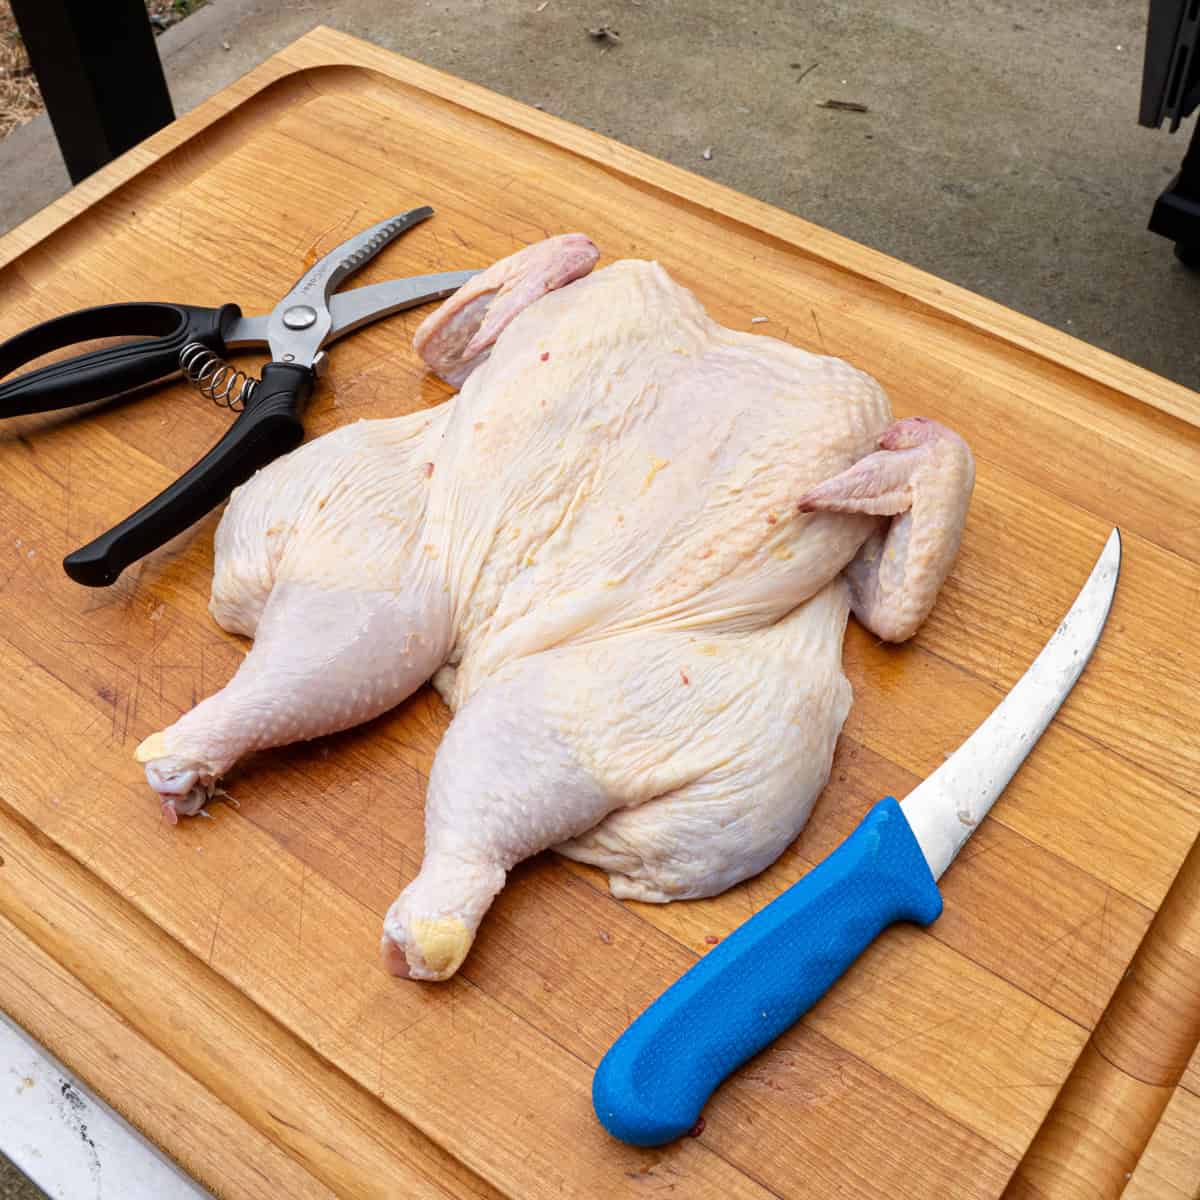
Next, locate the backbone running down the center of the bird. Using your kitchen shears or a sharp knife, cut down one side of the backbone from tail to neck. When you get to the end, flip the bird around 180 degrees and repeat on the other side until the backbone comes free. With the chicken cavity now open, use your knife to make a vertical incision down the center of the exposed breastbone to loosen it, then flip the chicken over (breast-side up) and press firmly until you hear a crack. You may need to tuck the legs in, but the chicken should now lie flat. This technique is called spatchcocking (you can catch my blog post here for an in-depth breakdown of this process and why it can be so useful for grilling).
Step 3: Cut the Whole Chicken in Half
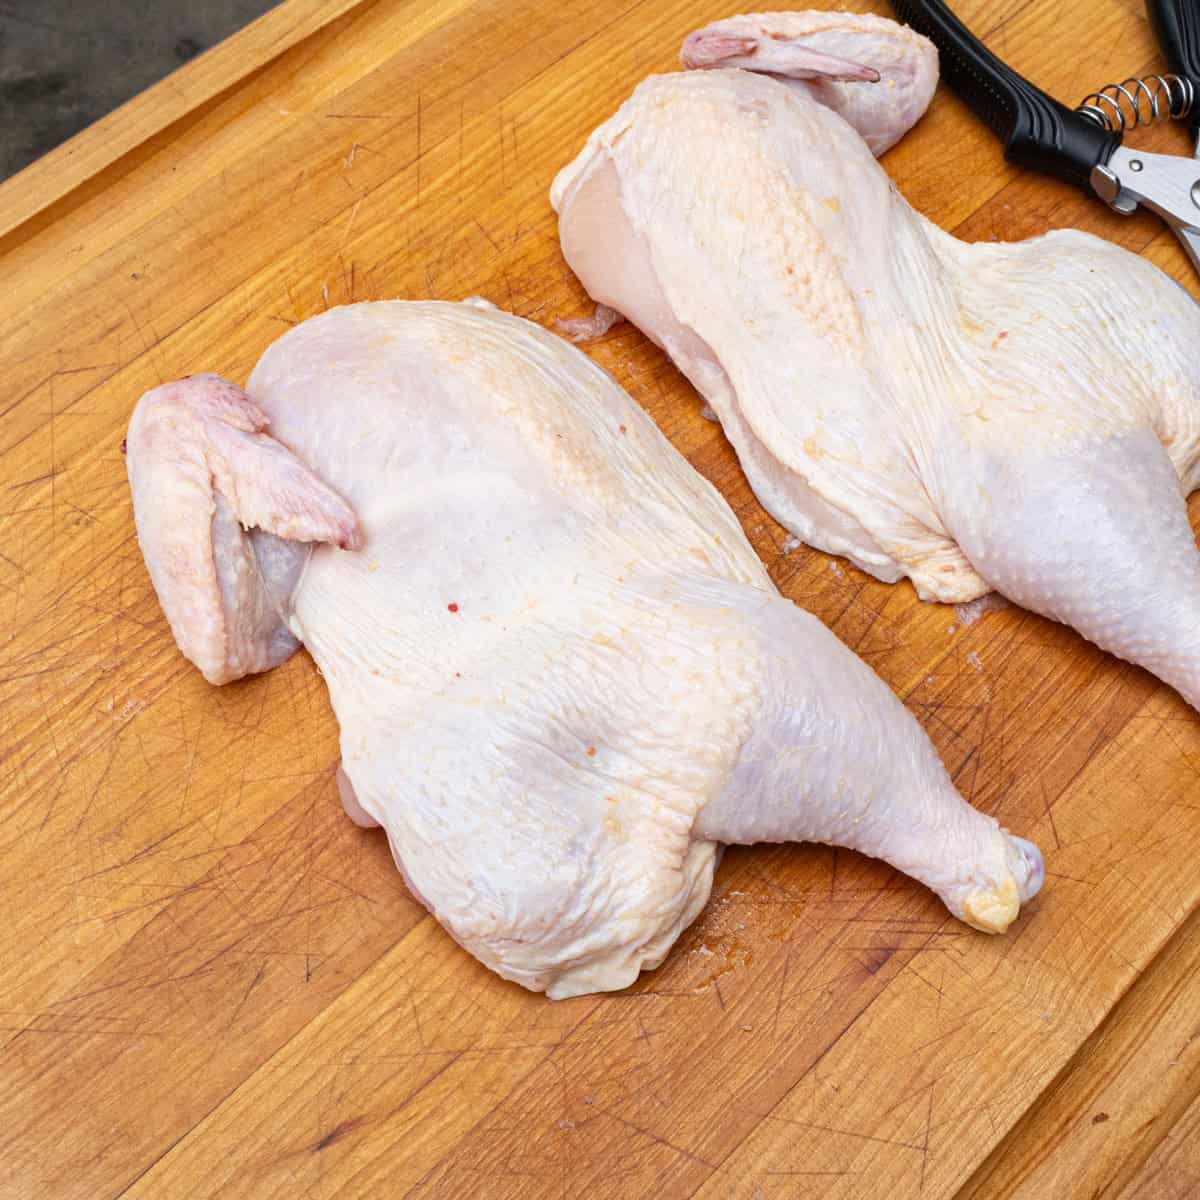
With the chicken flattened, place your knife along the center of the breastbone and press firmly to cut straight down, splitting the chicken into two halves. This process will give you two chicken halves, making it easier to separate the remaining pieces. You can also use the kitchen shears for this step if you prefer.
Step 4: Separate the Leg Quarters
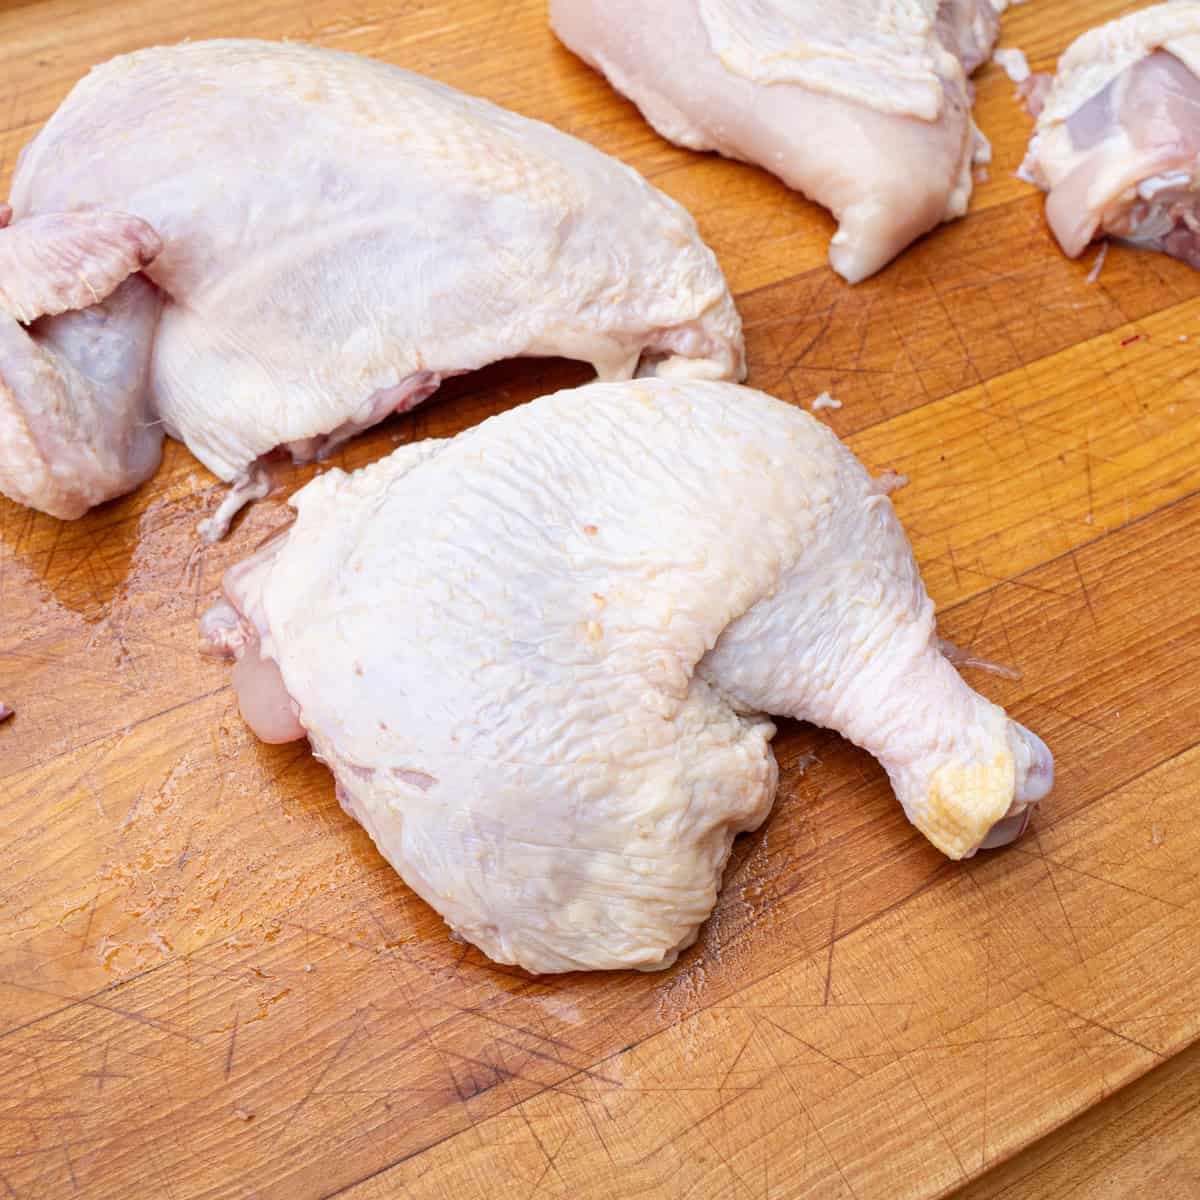
Next, take one half of the chicken and pull the leg away from the body. With a little pressure, you’ll be able to easily tell where the cavity (right between the bottom of the breast and the top of the thigh) is that you need to slice through to separate the leg. Make the cut here and repeat on the other side. This will yield you two leg quarters.
Note: You can also bend the leg back until you hear the joint pop, then cut through the joint with your knife.n Either way is effective and gets the job done.
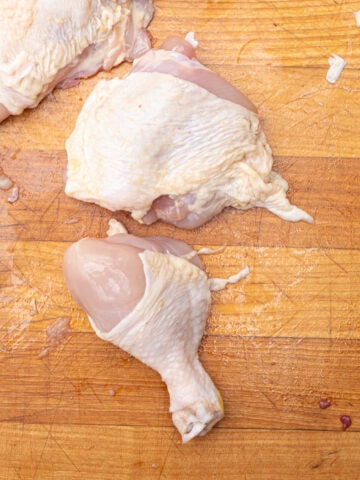
Step 5: Separate the Drumsticks and Thighs
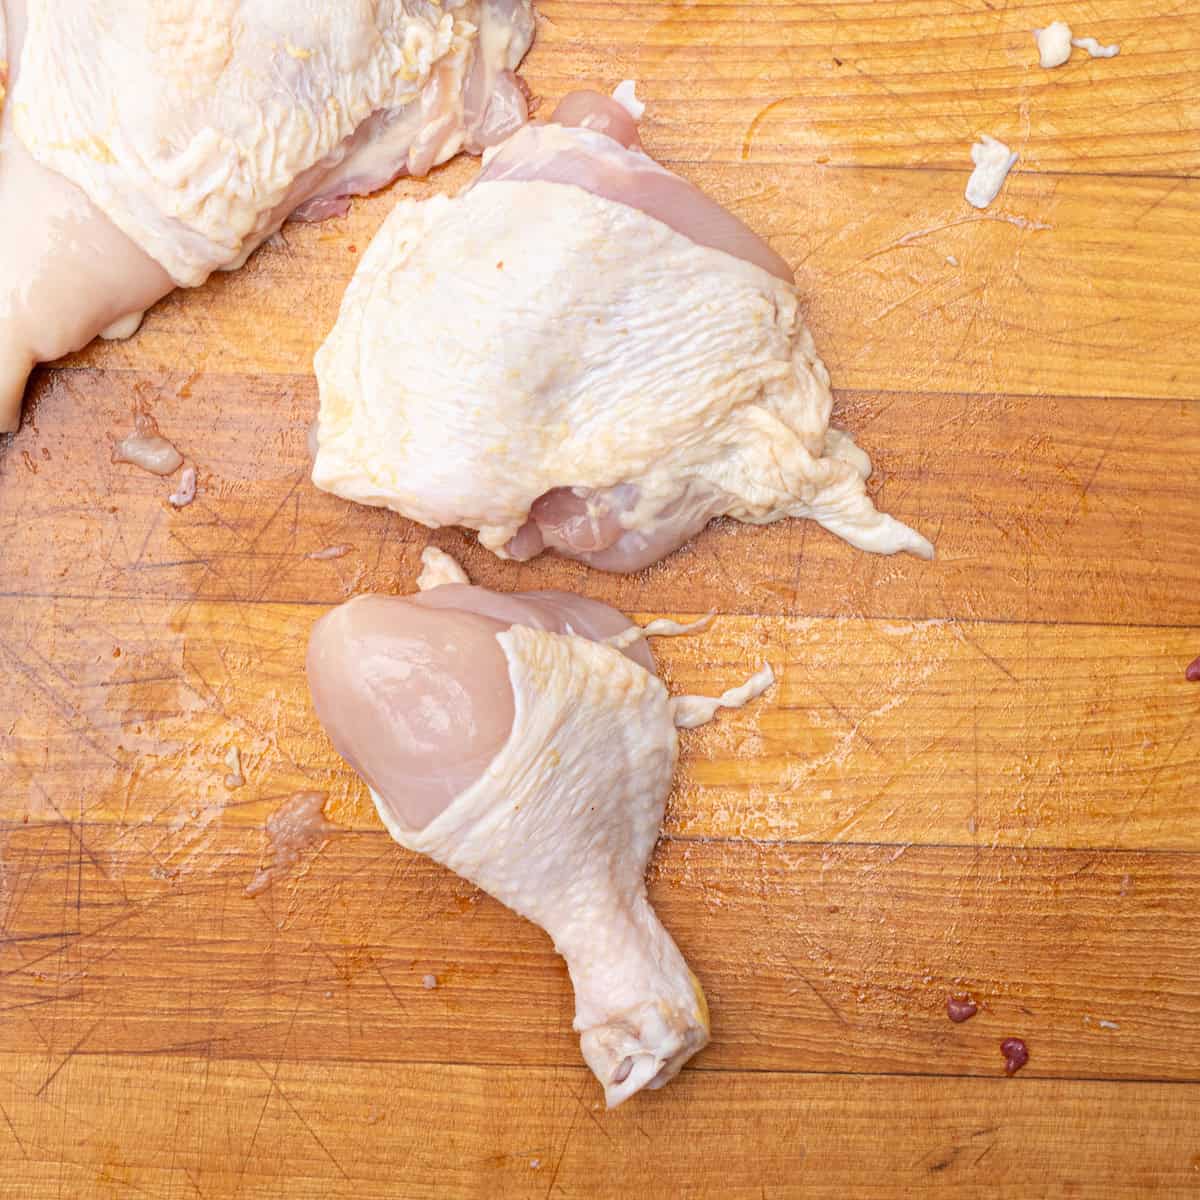
Lay the leg quarter flat on the cutting board. Find the natural joint between the thigh and drumstick and cut directly through it. Repeat on the other side.
Now you have:
- 2 thighs
- 2 drumsticks
Step 6: Remove the Wings
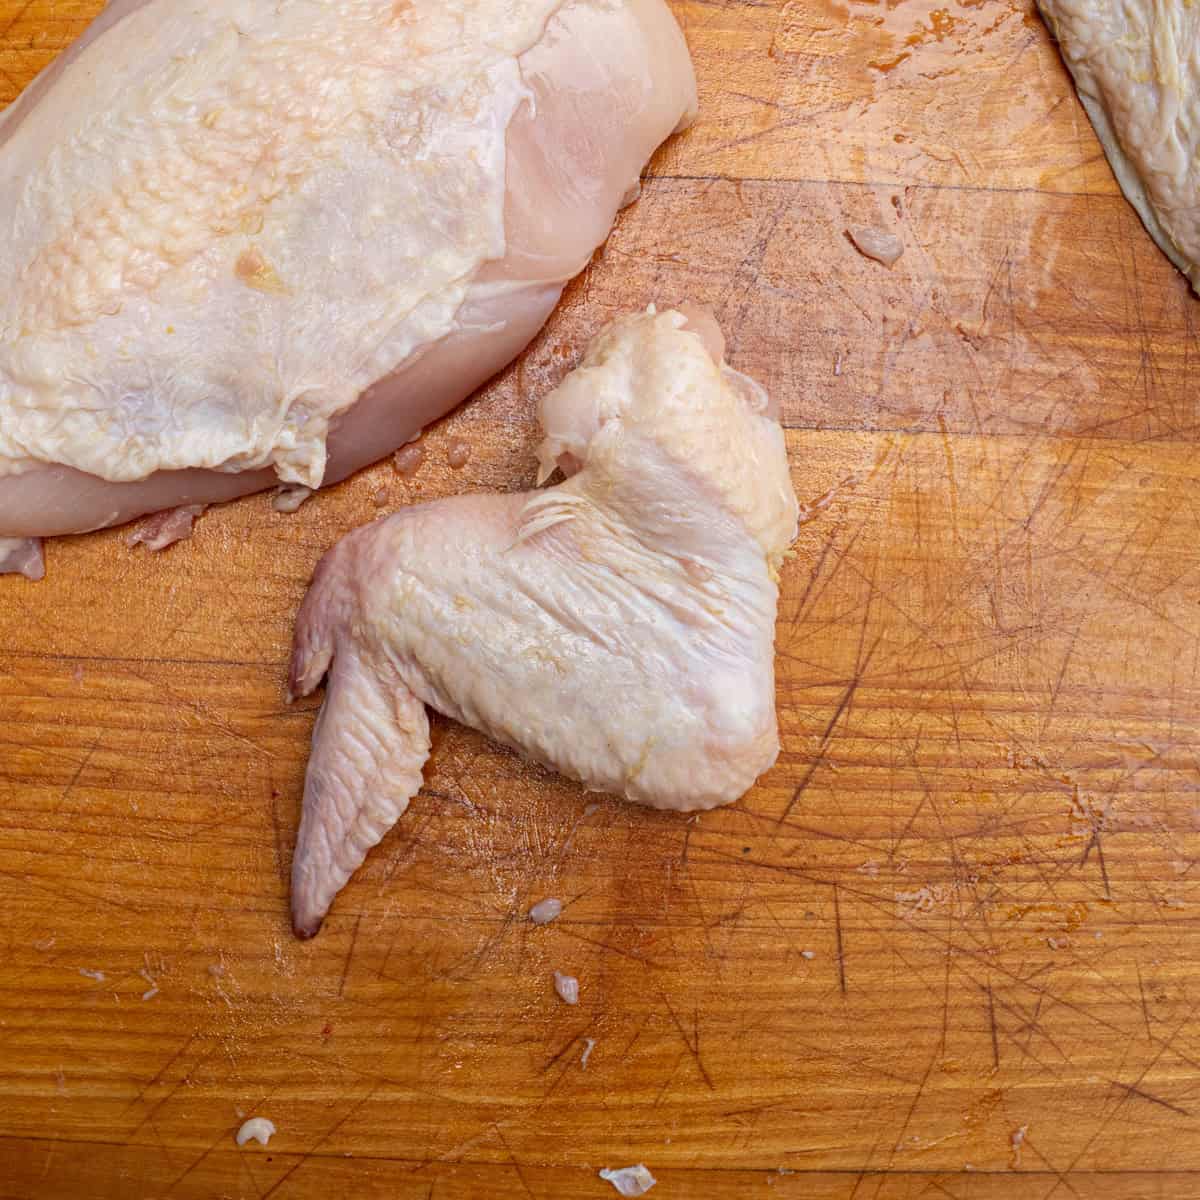
Pull each wing away from the body and locate the joint where it connects to the breast (it tends to be further into the breast than you think it would be — this is the cut that I actually find the trickiest). Cut through the joint with your knife. Repeat for the other half. Now you have two wings separated from the bird.
Step 7: Remove the Chicken Breasts
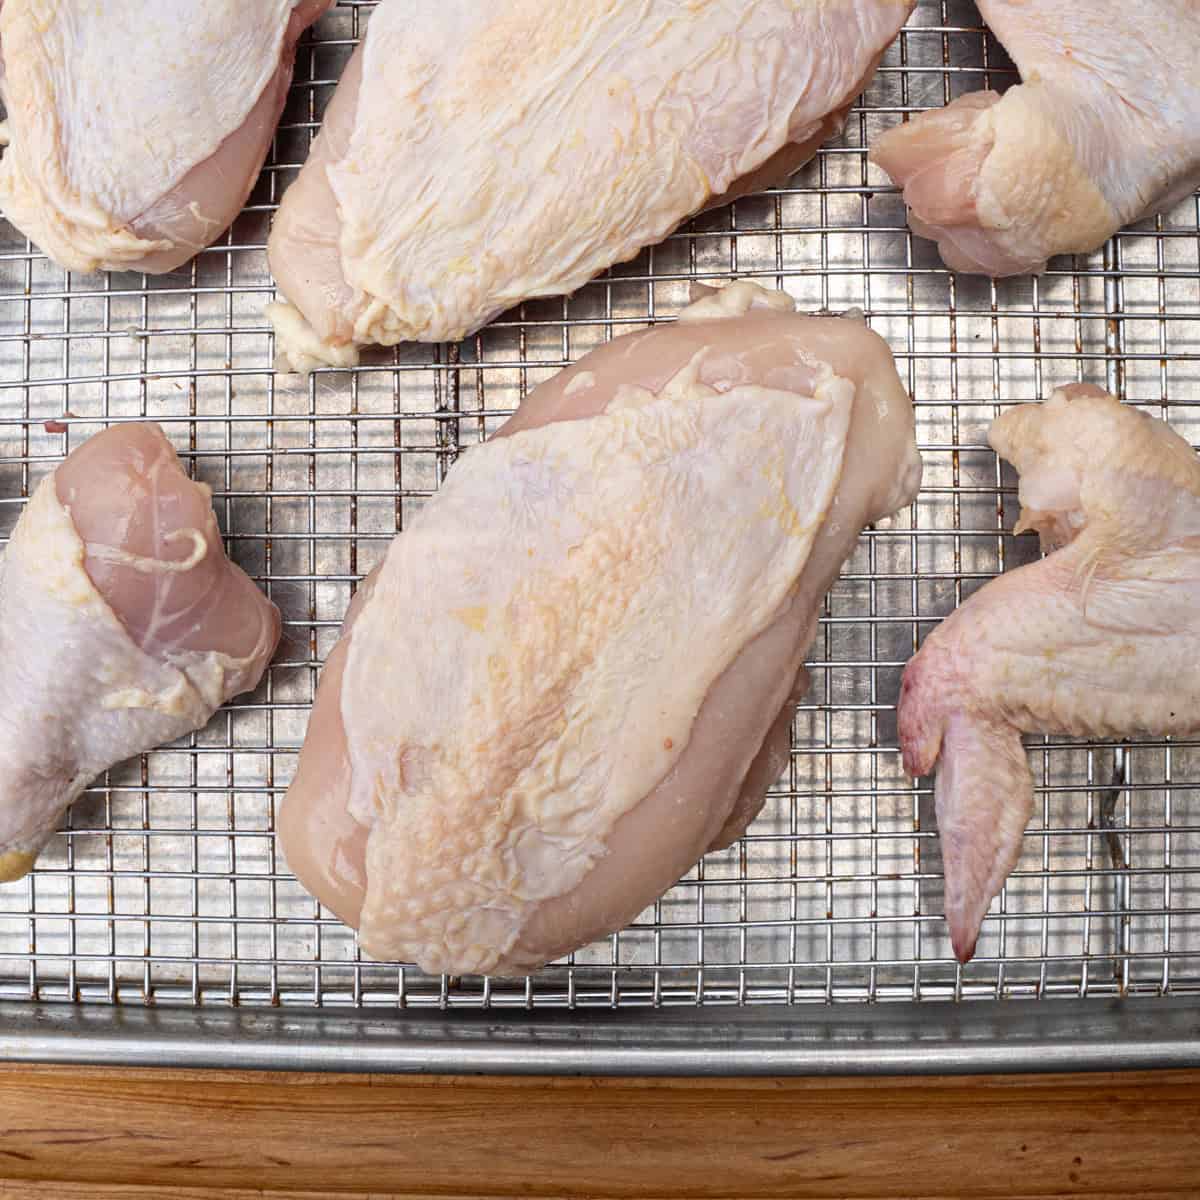
With the wings removed, the breasts are easy to take off. Place the chicken, half skin-side down, and run your knife along the rib cage to separate the breast meat from the bones. Take your time here and keep the blade close to the ribs to remove as much meat as possible. Repeat for the second half.
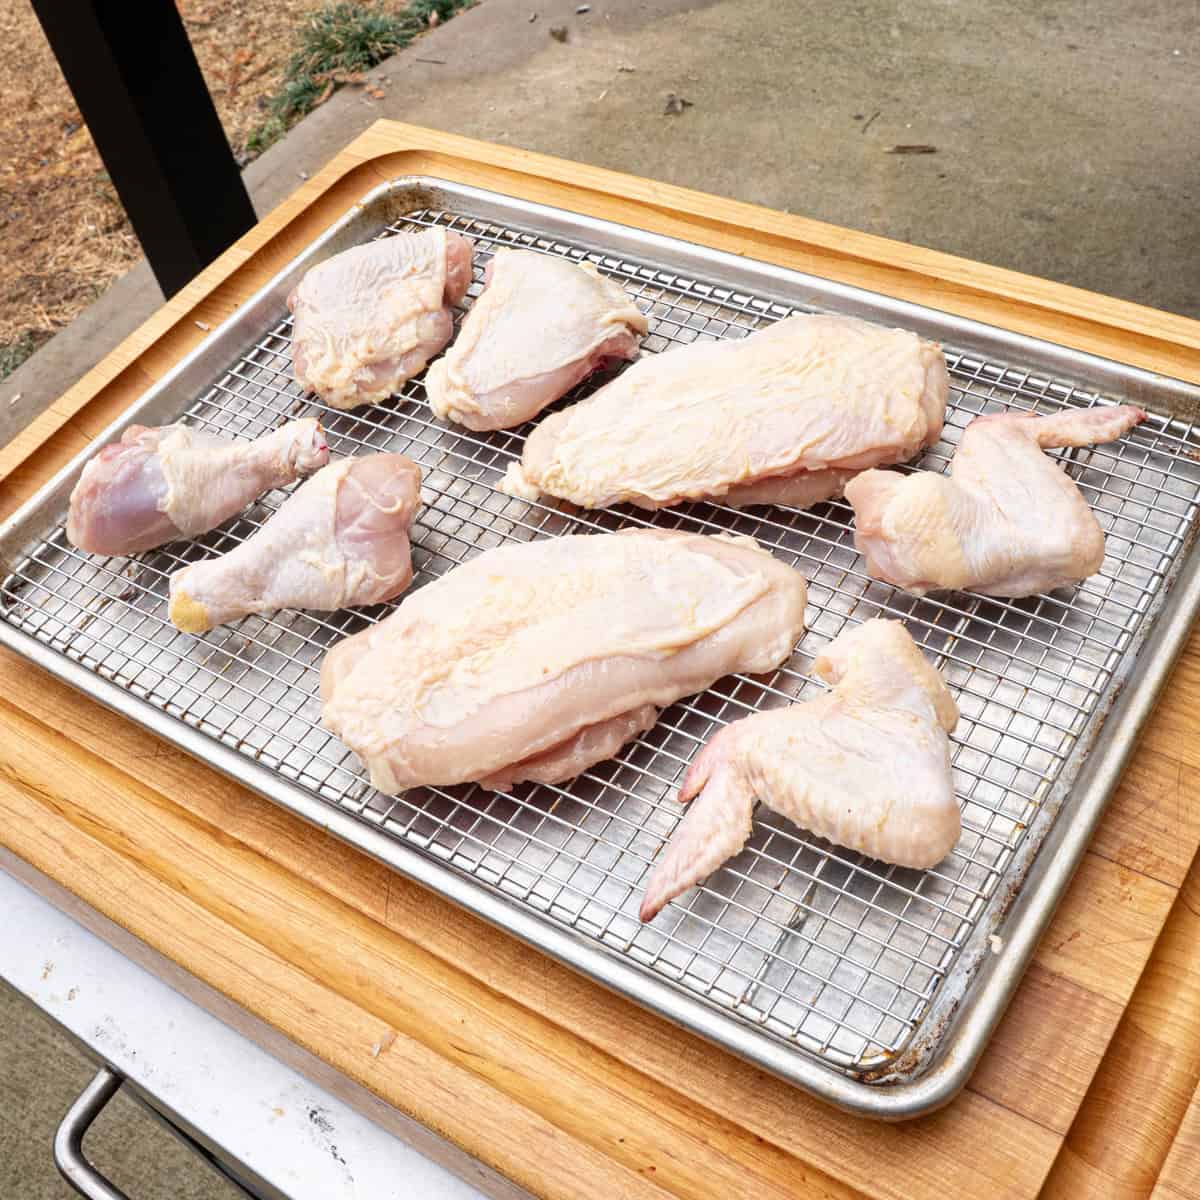
At this point, your whole chicken will be separated into 8 pieces, ready to cook!
Common Mistakes When Cutting a Whole Chicken
If it’s your first time breaking down a bird, you’re bound to second-guess yourself and even make a few mistakes, which is totally fine. Here are a few of those that trip me up the most:
- Trying to cut through bone instead of joints: If you hit resistance, adjust your knife slightly until you find the joint. It’s ok to have a few nicks in the meat; you want to get the cut right so you don’t risk dulling your knife or, even worse, accidentally cutting yourself.
- Using a dull knife: Speaking of dull knives, try to avoid using one if you can! A sharp blade makes separating joints much easier. I used to be terrible about getting mine resharpened, but I’ve recently started using this tool, which has made it easy.
- Not drying the chicken first: Moisture makes the chicken slippery and harder to control. Again, you’re putting yourself at risk for an accident if you don’t take care of this step.
Best Ways to Cook Each Chicken Piece
One advantage of learning how to cut a whole chicken into pieces is that each cut works well with different cooking methods.
Chicken Breasts
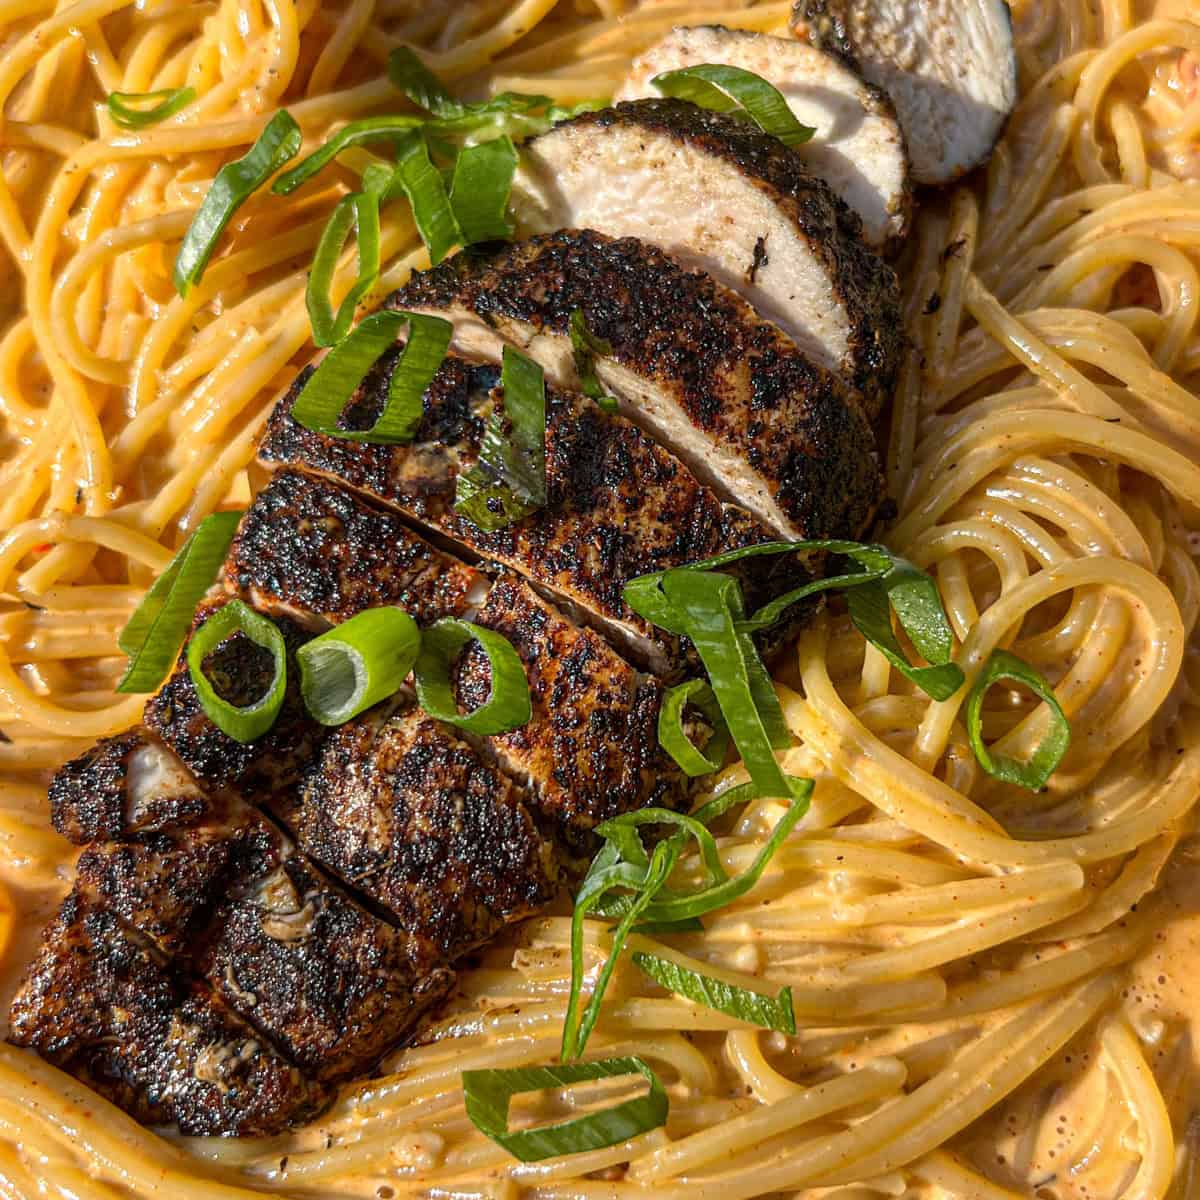
Chicken breasts are one of the most versatile cuts and can be cooked just about any way you can think of, but I primarily use them for grilling, braising, baking, or pan-searing. Because they’re lean, they cook quickly and take on marinades and seasoning really well. This blackened chicken alfredo pasta is one of my favorite ways to cook them up!
Chicken Thighs
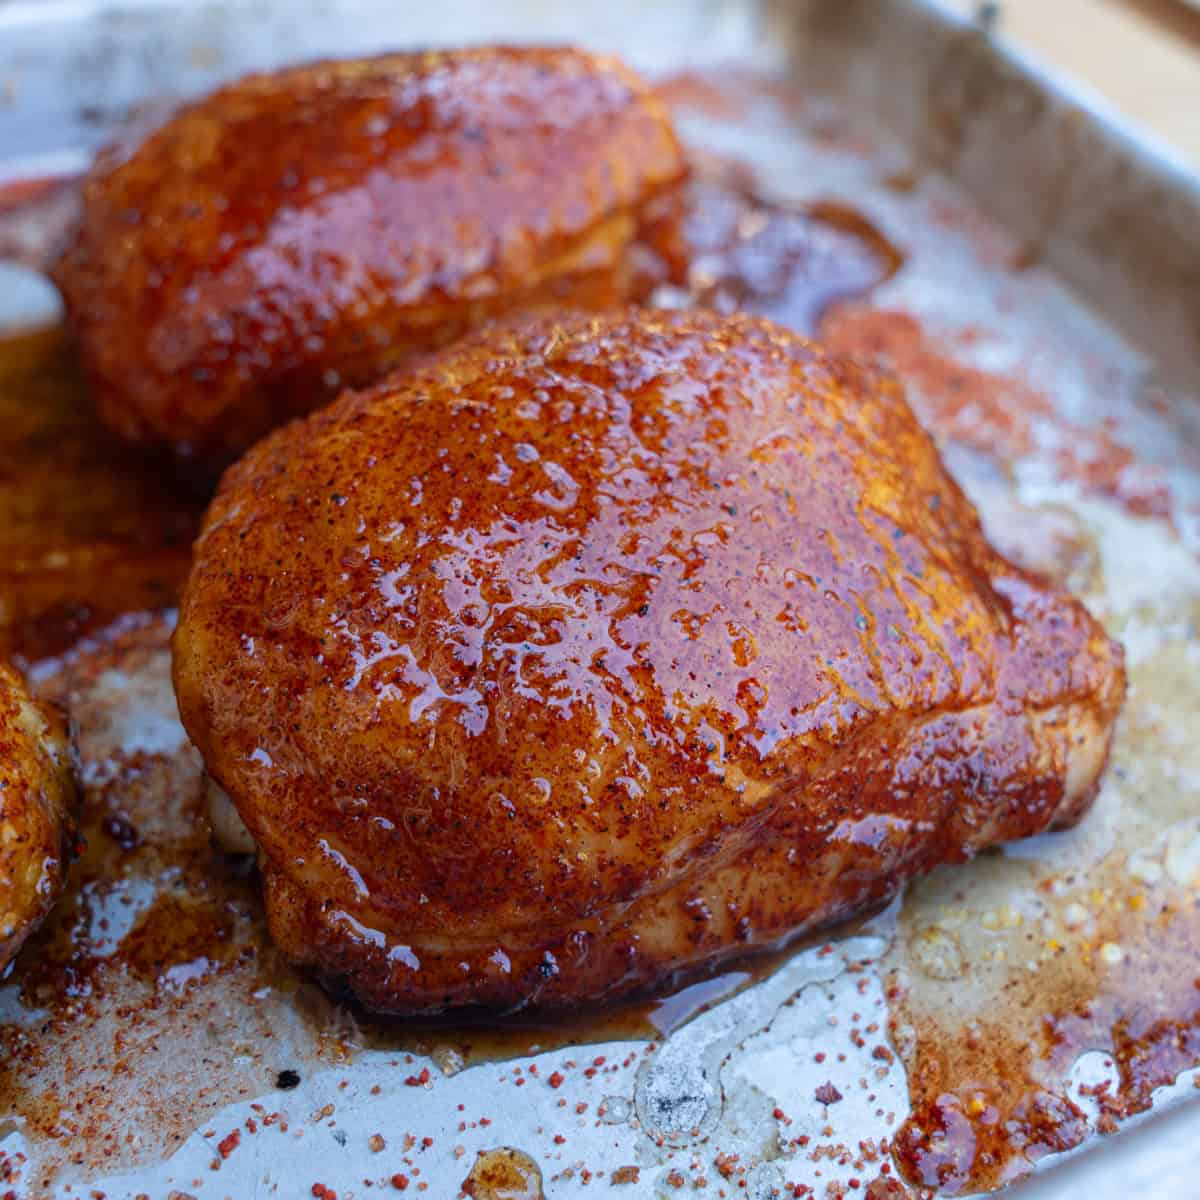
Chicken thighs are packed with flavor and stay juicy even during longer cooks. They’re a great choice for smoking, braising, or grilling for BBQ chicken because they can withstand higher cooking temperatures without drying out as quickly as chicken breasts do. These apple-cinnamon chicken thighs, cooked over direct heat on a charcoal grill, are a great place to start if you’re looking for a recipe.
Drumsticks
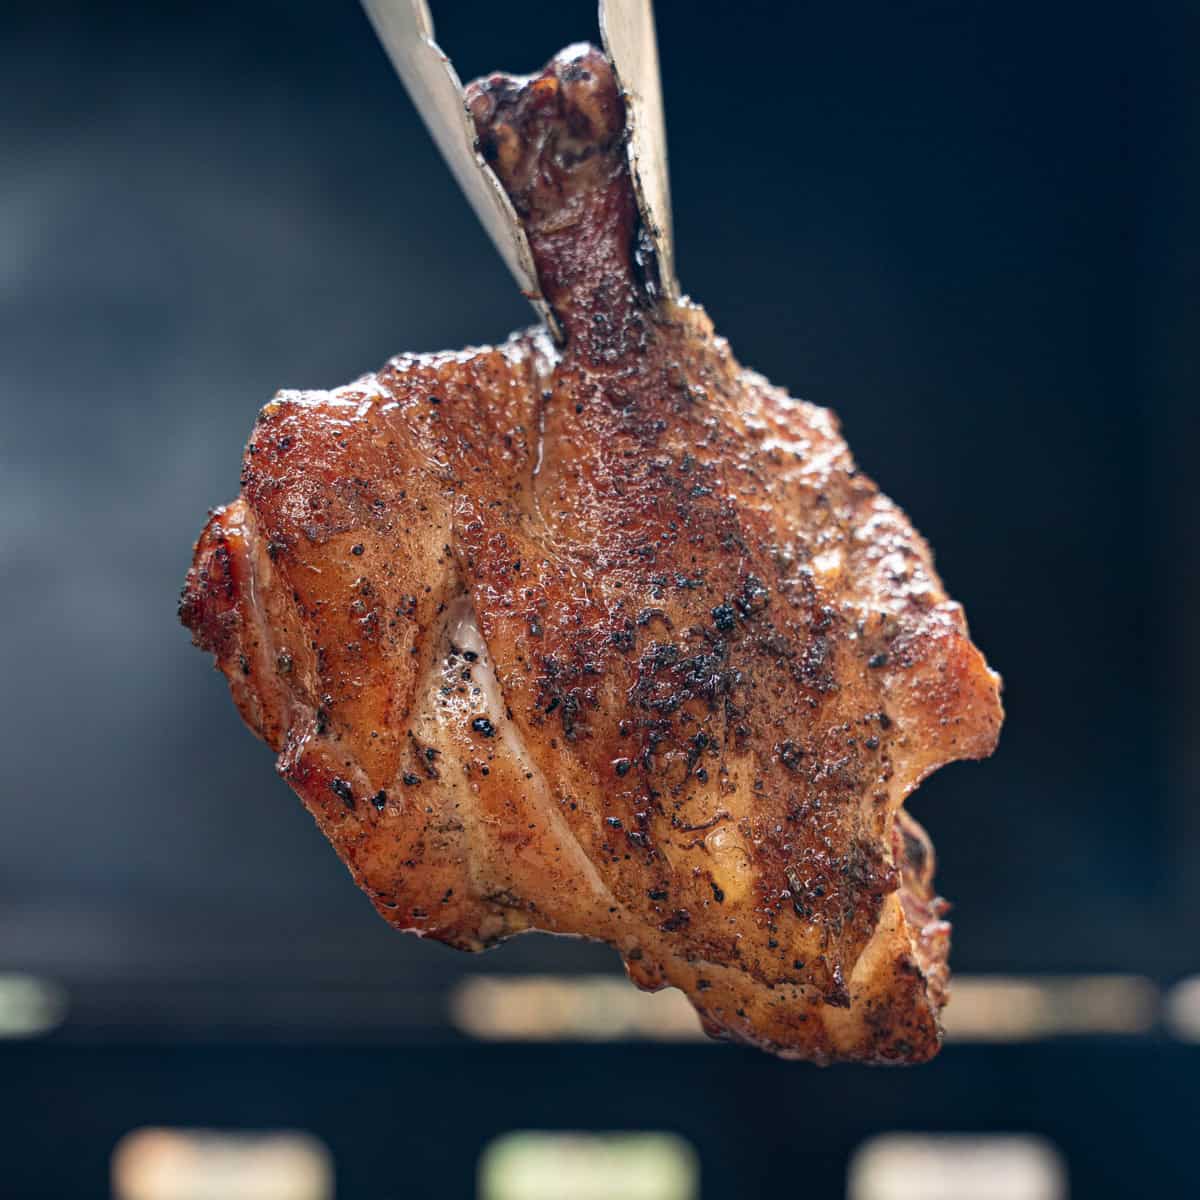
Drumsticks are simple, affordable, and hard to mess up. Personally, I prefer to butterfly them, which gives them the perfect combination of crispy bark and juicy chicken. They’re great for grilling, frying, or baking, and they hold up well to bold seasoning and sauces.
Chicken Wings
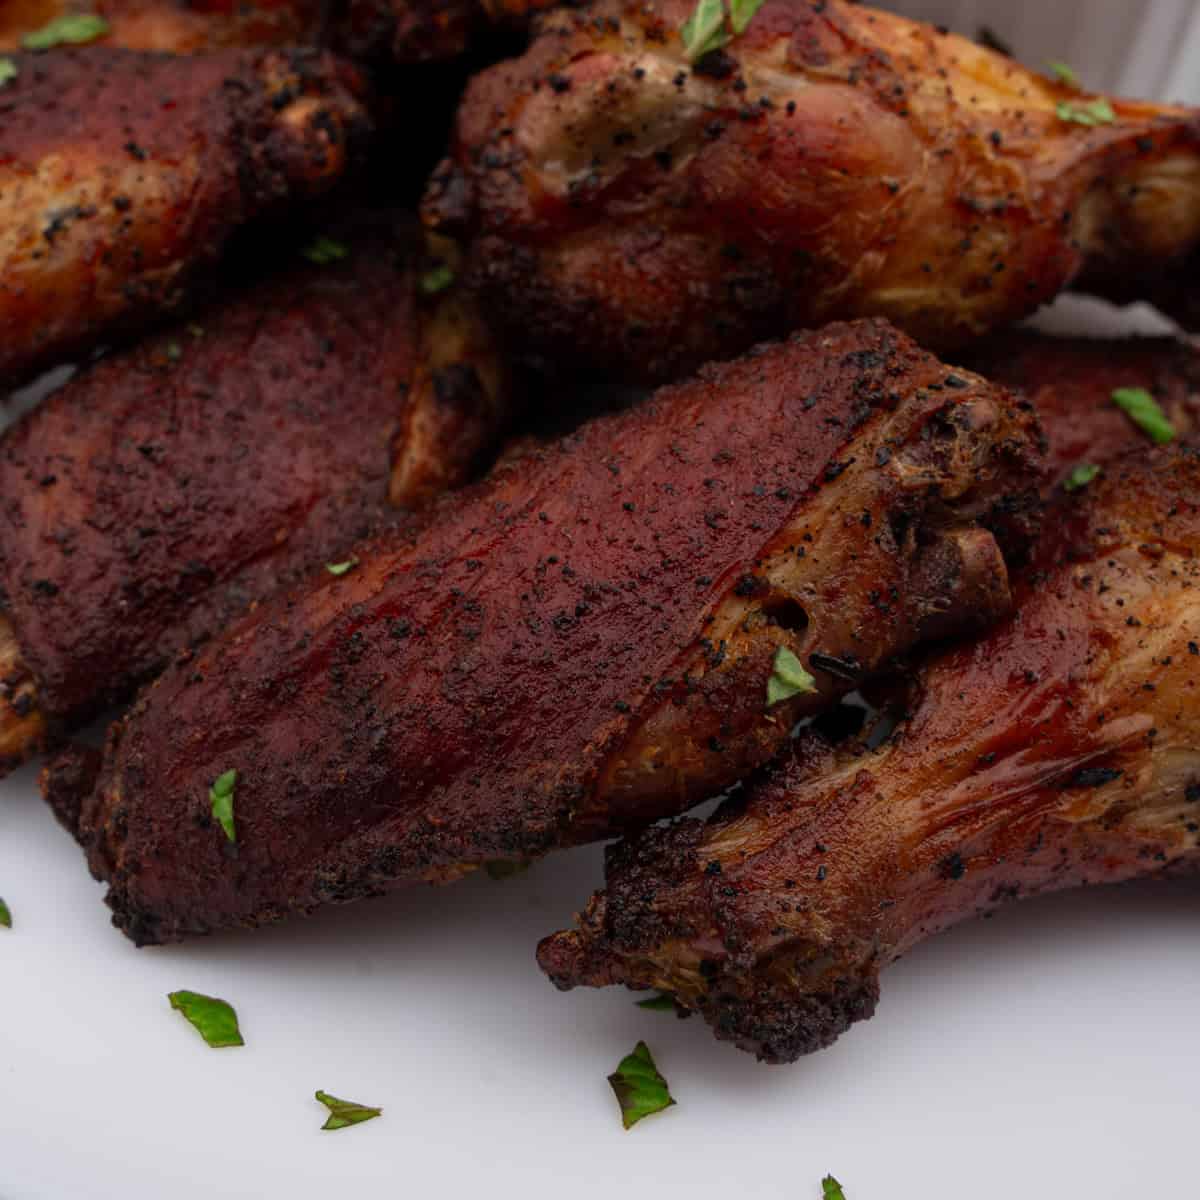
Chicken wings are all about crispy skin and flavor. And let’s face it, this is what most people who grill or smoke gravitate to when they make any of these cuts because not only do they taste delicious, but they’re easily shareable, making them great for a party. They’re perfect for smoking, grilling, or air frying, and they really shine when tossed in your favorite sauce, like my Alabama white BBQ sauce.
Watch the Full Chicken Cutting Video Tutorial
If you prefer learning by watching, check out my quick chicken-cutting video on YouTube—it can make the whole process much easier to follow.

Leave a Reply