If you've ever made grits and ended up with more than you could eat in one sitting, you’re not alone. I do this almost every time I make them, so I can enjoy the leftovers for days to come. Many people end up wondering the same thing the next day, though: Can you reheat grits without ruining their texture? The short answer is yes, but there's a right way to do it, and it all comes down to heat, moisture, and patience.
Whether you're working with leftover grits from breakfast or prepping ahead for the week, I'll show you the best way to reheat them, keeping the texture creamy and smooth so you don't end up with lumpy grits.
Jump to:
Why You Shouldn’t Waste Grits
Grits are more than just a Southern side dish. When done right, they’re creamy, rich, and comforting. If I had to pick one side that I could eat every day, this one would be hard to beat. They're made from ground corn, usually in the form of stone-ground grits (The kind of grits I used here, too), which cook more slowly but deliver the best texture and flavor. And while they’re typically served warm, they reheat surprisingly well if you know what you're doing.
Whether you’ve made plain grits or dressed them up with a three-cheese blend like I do in my recipe, the reheating process is key. The starches in grits tighten up in the fridge, so they require a little help to return to their original state. To combat this, add liquid and warm them slowly over low heat. Stir frequently to restore the creamy texture of grits without clumping. Think of these delicious grits like you would a roux -- you have to keep stirring and can't leave it alone too long. With the right approach, those leftover grits won’t go to waste. You’ll get the best texture and the same great flavor, even after a night in the fridge.
Also, try swapping out the quick cooking grits in my Shrimp & Grits Empanadas recipe with this one— these grits in an empanada are out of this world good!
Ingredient Highlights
Stone-Ground Grits: These take longer to cook than quick grits or instant grits, but they deliver better texture and flavor. Ideal for rich, cheesy recipes like mine and great for reheating, too.
Chicken Stock: Used instead of water for more depth. It adds a savory base and helps balance out the richness of the cheeses and cream. I can't recommend swapping this for water enough.
Heavy Cream: Makes the grits silky, smooth, and luxurious. Helps with reheating, too, since the fat content keeps everything from drying out.
Cheddar Cheese (Grated): A sharp-flavored cheese that melts well and gels well with others.
Gouda Cheese (Grated): Mild and slightly sweet. Gouda brings a creamy melt and balances out the saltiness of the cheddar and parmesan.
Parmesan Cheese (Grated): Adds that salty, nutty punch at the end. A small amount goes a long way in rounding out the dish.
Refer to the recipe card at the end for the complete list of ingredients and quantities.
Instructions: How to Make Three Cheese Grits
Step 1: Bring liquids to a boil
Add chicken stock and heavy cream to a pot. Turn the heat to high and bring to a boil. This mix is the base that gives the grits their flavor and richness.
Step 2: Add the grits
Once boiling, slowly whisk in 2 cups of stone-ground grits. Stir constantly while pouring to prevent clumping and ensure even cooking.
Step 3: Cook low and slow
Once the mixture starts to thicken, reduce the heat to medium-low. Let it simmer for around 25 minutes, stirring regularly. If it thickens too much, add more liquid—either stock or cream—to maintain a smooth consistency.
Step 4: Finish with cheese
Once the grits are soft, smooth, and no longer grainy, remove the pot from the heat. Stir in the grated cheddar, gouda, parmesan cheese, and butter. Mix until everything is melted and combined.
Step 5: Season and serve
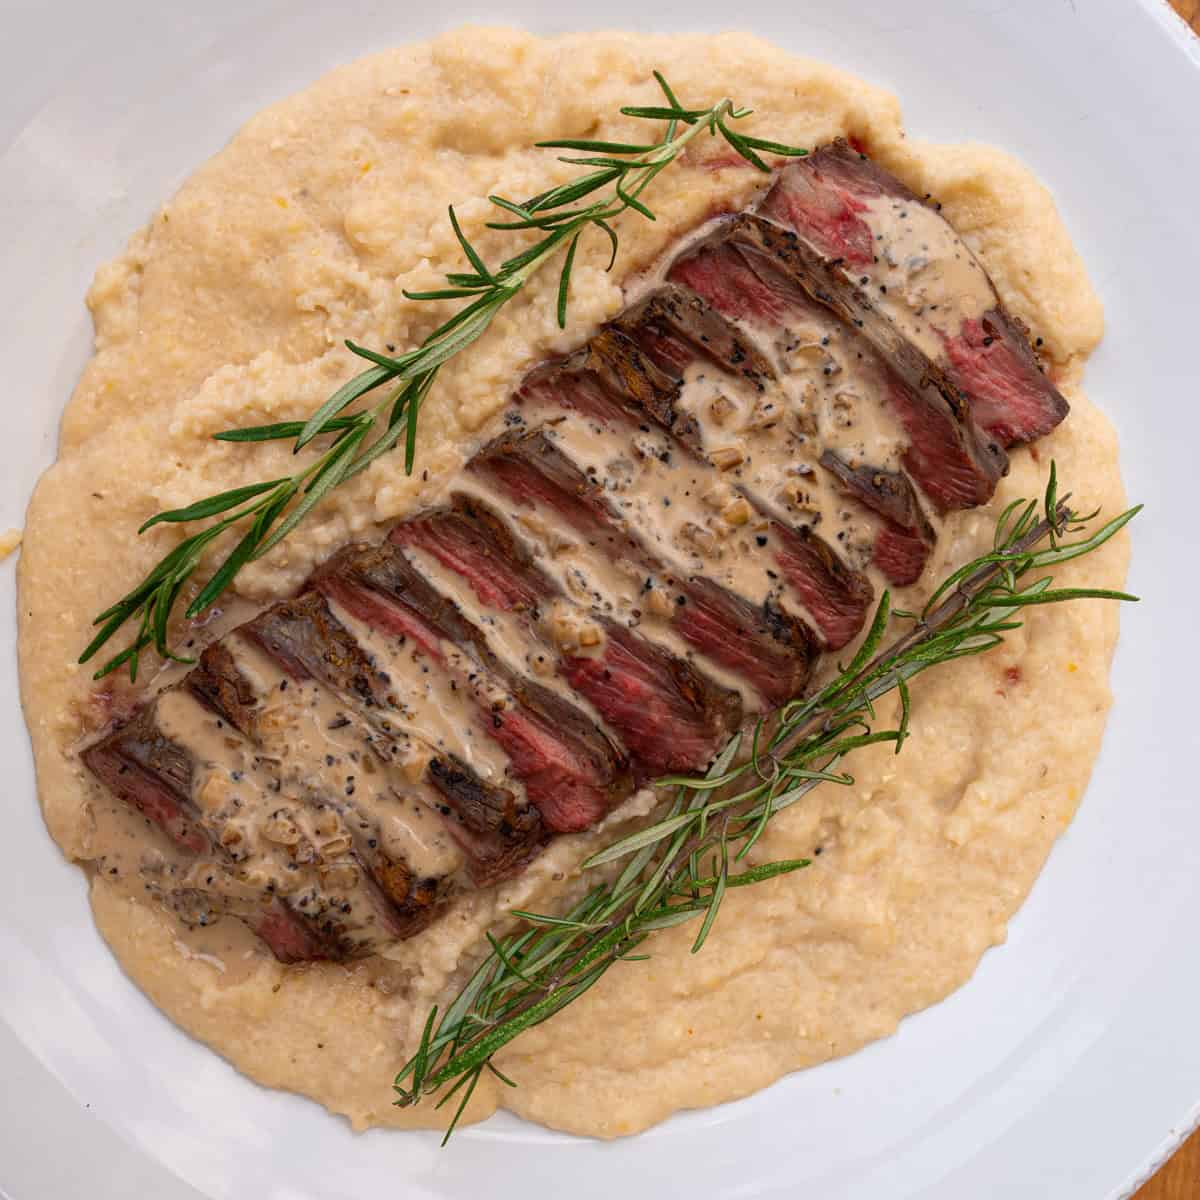
Add salt to taste. Garnish with green onions or rosemary if you're feeling fancy and serve hot as a side or base for other dishes like my grilled flank steak or Porterhouse Steak -- it goes exceptionally well together!
How to Store Leftover Grits the Right Way
If you’re not eating all your grits in one sitting (raising my hand here), store them properly. Let them cool to room temperature, then transfer to an airtight container. This helps prevent the grits from drying out or picking up fridge odors. They’ll keep for 3–4 days.
You can also portion them into single servings if you plan to reheat small amounts throughout the week. This makes it easier to reheat exactly what you need, when you need it. Last but not least, you can vacuum seal them and freeze them if you have enough leftovers and want to save them for a rainy day -- they keep well.
Reheating Grits Without Ruining Them
Here’s what I've found to be the best way to reheat leftover grits:
Stovetop Method (Recommended)
If you’ve got leftover grits and want to bring them back to life without losing that creamy texture, the stovetop is your best bet. Start by pulling the grits out of the fridge and letting them sit at room temperature for 10 to 15 minutes—this helps them loosen up slightly before being heated. Transfer them to a saucepan and warm gently over low heat, adding liquid, such as chicken stock, milk, or water, a little at a time. Stir constantly to break up any clumps and encourage a smooth, creamy consistency. Just be patient—low heat and frequent stirring are the keys to achieving soft, non-scorched results.
This method takes a little more time than what I'm about to cover, but it yields the best results.
Microwave Method (For Single Servings)
If you’re in a hurry and only reheating a small amount, the microwave can do the job. You still want to add a splash of liquid to the grits in a microwave-safe bowl to help loosen them up. Then, cover the bowl loosely with a lid or a paper towel. Heat in short, 30-second intervals, stirring between each round to maintain a smooth texture. While it’s not quite as foolproof as the stovetop method, it works well enough if you keep an eye on the moisture and don’t skip the stirring.
Keep in mind that this works well if you're short on time, but it's easier to get lumpy grits if you don't stir often or skip the added liquid.
What Not to Do
The worst way to reheat grits is to cook them over high heat or skip the extra liquid altogether. That’s a surefire way to scorch the bottom, dry out the texture, or end up with a clumpy, gluey mess. Whether you're using the stovetop or the microwave, always cook at a low temperature and stir regularly. It makes all the difference between creamy grits and a bowl of regret.
Substitutions
If you need to adjust for personal taste or what you have on hand, here are a few solid swaps:
- Milk instead of cream: If you want to cut back on richness or calories, milk works, though the grits won’t be quite as velvety. I've done this on several occasions, though, and it certainly still does a good job.
- Veggie broth instead of chicken stock: A great option for vegetarians or when you're out of chicken stock. The flavor will be a bit lighter.
- Fontina instead of Gouda: This cheese melts similarly and provides a mild, creamy texture.
- Unsalted butter as a substitute for cream (in a pinch): If you’re out of cream, a few tablespoons of butter can help add richness when reheating. If I'm making grits without the three cheese blend, this is a must.
Variations
This grits recipe is a versatile dish that can be customized in a variety of ways. Try one of these to mix things up:
- Add bacon or sausage: Place Conecuh sausage (my favorite variety) or crispy bacon on top of the grits for a delicious breakfast bowl.
- Roasted garlic: Adds depth and a mellow sweetness that pairs well with the cheese. Cut the top off a garlic clove, slather it with oil, and wrap it in foil. Then, roast it in a preheated oven at 350°F until tender. It'll add some crazy good flavor to the grits.
- Hot sauce or cayenne: I could put hot sauce on almost anything, but it pairs exceptionally well with grits, especially when paired with a protein like the ones mentioned above. The heat cuts through the creaminess, adding balance.
- Shrimp or pulled pork: Turn these grits into a Southern staple like shrimp and grits or load them up with leftover pulled pork for a delicious meal.
Recipe

My Favorite Three Cheese Grits Recipe
Equipment
- Large pot
- Wooden Spoon
- Measuring Cups & Utensils
- Stovetop or Grill
- Whisk
Ingredients
- Salt to taste
- 2 C stone-ground grits dry
- 4+ C chicken broth
- 1 C heavy cream
- ¼ C cheddar cheese grated
- ¼ C gouda cheese grated
- ¼ C parmesan cheese grated
- 4 T butter
Instructions
- Add the broth and cream into a pot over high heat and bring to a boil. Once boiling, slowly add the grits, stirring constantly until all have been added to the pot. Once the grits begin to thicken, reduce the heat to medium-low and continue cooking for ~25 minutes, until the grits develop a smooth consistency and are no longer grainy. Note: Keep more liquid on hand, as you may need to add more if the grits begin to thicken too much.
- Once the grits reach the desired consistency, turn off the heat and add the remaining butter, along with all the cheese. Stir until well combined and season with salt to taste.
Notes
- Use stone-ground grits if possible—they bring better texture and flavor, but you’ll need to adjust the cooking time slightly.
- Always keep extra broth or cream on hand during the cook. Grits absorb liquid as they simmer and tighten up fast.
- Stir often and keep the heat low once the grits start to thicken. This prevents clumping and scorching at the bottom.
- For a smoother finish, use a whisk in the early stages before switching to a wooden spoon.
- These reheat best on the stovetop with a splash of liquid. Avoid high heat and never skip stirring—creamy grits need love, even the second time around.


Leave a Reply